Hand-processing Fiber: The Making of "Not Your Average Marshmallow" Yarn
While you might think making yarn would be easy—isn’t it just, like, twisting some threads together?—there are so many steps that go into processing fiber from start to finish, not to mention the care for the animals that many natural fibers come from.
I want to talk about my process of spinning some skirtings (defined later) from a local sheep farmer, Laurel at Apple Creek Merinos, with step-by-step pictures of what goes into processing fiber and ultimately making yarn.
Because I intend for this blog post to be read by people who don’t know much of anything about yarn, I will use layman terms as much as possible and define everything! It’ll be great. Please also note that I am something of a novice, having been at this for less than a year. That means that my processing times are likely much longer than others who aren’t processing raw wool for the first time.
To that end, here are some terms I use in the blog that you can return to later for reference, listed in order of appearance:
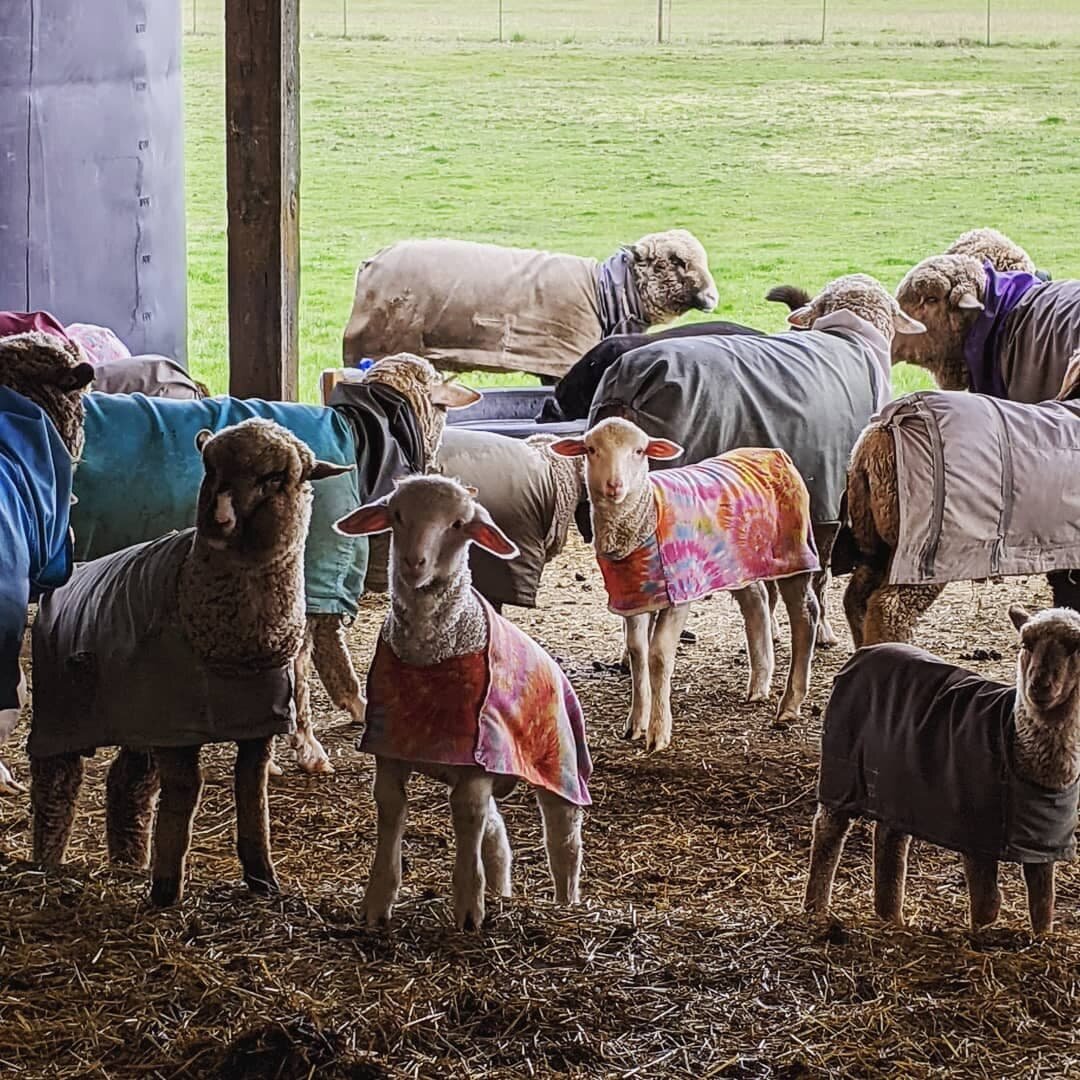
· Skirtings – This is the wool sheared off the sheep that is not grade-A quality. It typically has significantly more second cuts, vegetable matter, and other “undesirables.” The merino sheep at Laurel’s farm wear adorable handmade coats all year, and the wool the coat doesn’t cover typically gets “skirted” out of the main section of the fleece. This is the dirtiest, roughest part of the wool, but it is still perfectly usable once properly cleaned and processed. Waste not, want not.
· Second cuts – When the shearer shears a sheep (once a year typically right before the ewes give birth), the goal is to go over each area of the sheep only once. However, if the shearer goes over an area a second time, the result is shorter fiber. This is a problem because, while spinning, the short fibers come out of the finished yarn easier and frequently create lumps (also called “neps”) in the yarn.
· Vegetable matter (VM) – This is typically hay and grass but also includes whatever else the sheep get into: blackberry brambles, burrs, fencing, etc.
· Skein – This is a bundle of yarn prepared for crocheting, knitting, etc. A skein’s weight, length, and size varies, but a typical medium weight skein of yarn will measure about 140 yards and will allow the fiber artist to pull yarn from the center of the skein such that the main section of the yarn remains stationary (rather than rolling around like a ball of yarn would).
· Lanolin – The grease in sheep’s wool is called lanolin. It helps to keep the wool healthy while the sheep wears it. You can extract this from the wool and use it as a salve for sunburns and sore nipples after breastfeeding. I’ve also heard that it makes a great machine lubricant. Lanolin makes up anywhere from 5-25% of the weight of the wool, and the wool I washed seemed to be about 20% lanolin. It has a melting point of about 120 degrees Fahrenheit, but to be certain that the lanolin leaves the wool, it’s best to use water at the temperature of 180 degrees Fahrenheit.
· Drafting – This is the process of gently pulling the fibers apart to make them less dense and make spinning easier.
· Hank – Yarn wrapped in an oval, typically 2-3 feet long when held tight. Hand-dyed and hand-spun yarn typically come in a twisted hank.
Why Make Yarn?
Well, I crochet. A lot. And crocheting uses more yarn than knitting or Tunisian crochet. This means that I go through a lot of yarn. And then you need a lot of extra yarn in your stash that you might never use. You know, collector’s items and such.
Anyway, much of the yarn on the market today is foreign made, and while the craftsmanship is amazing, the transportation costs to the environment are not good. Additionally, much of the yarn on the market is acrylic, which, while it is vegan, is essentially made from plastic and fossil fuels. And, the yarn made or dyed locally is both really expensive (upwards of $30 per skein, which is, like, one hat) and rarely transparent about every stage of the process (what farm the fiber is from, what the dye is made of, who spun the yarn, etc.). I can’t tell you how many sellers on Etsy have absolutely no idea where their wool comes from. “U.S-made” is a common answer, but almost no one can tell you more specifics than that.
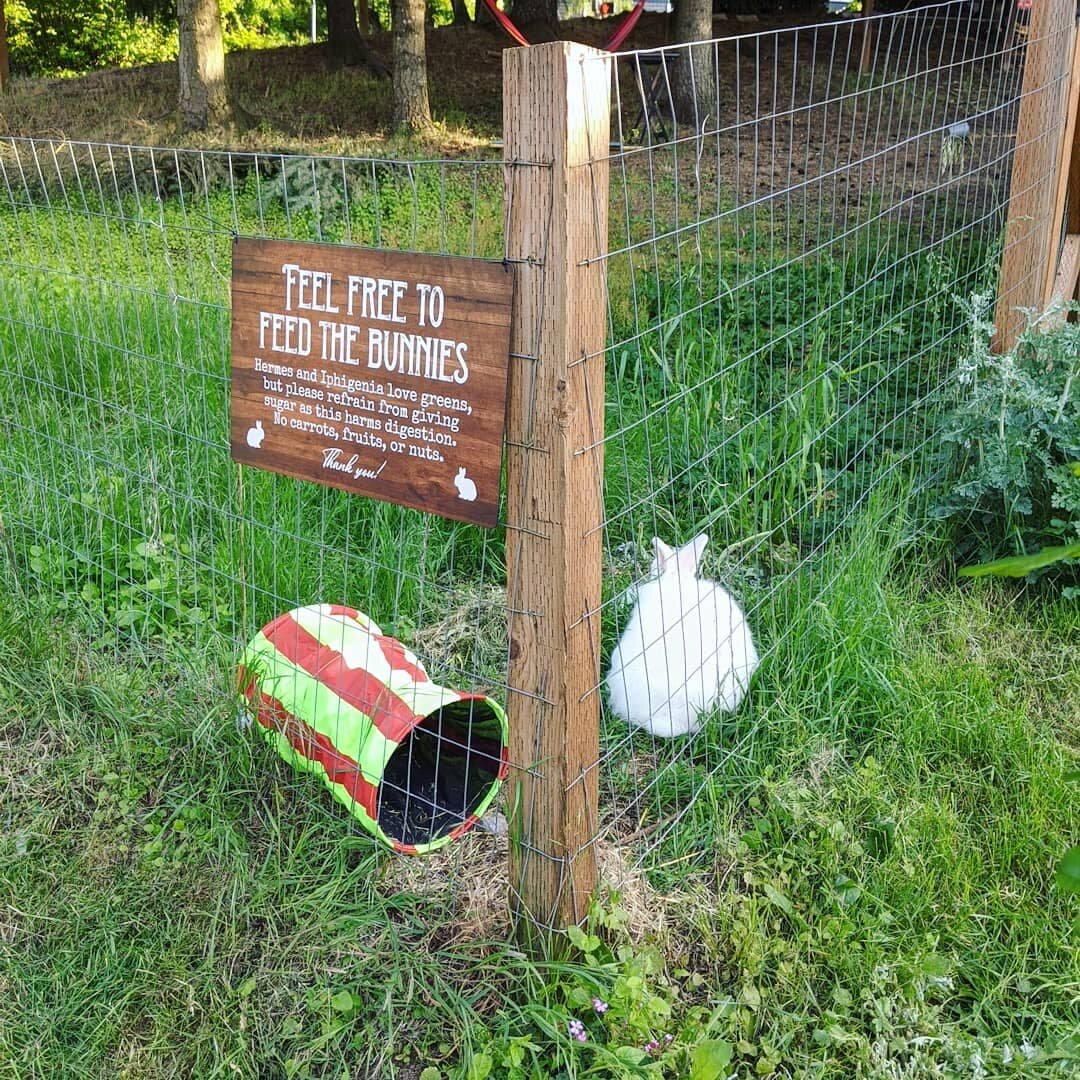
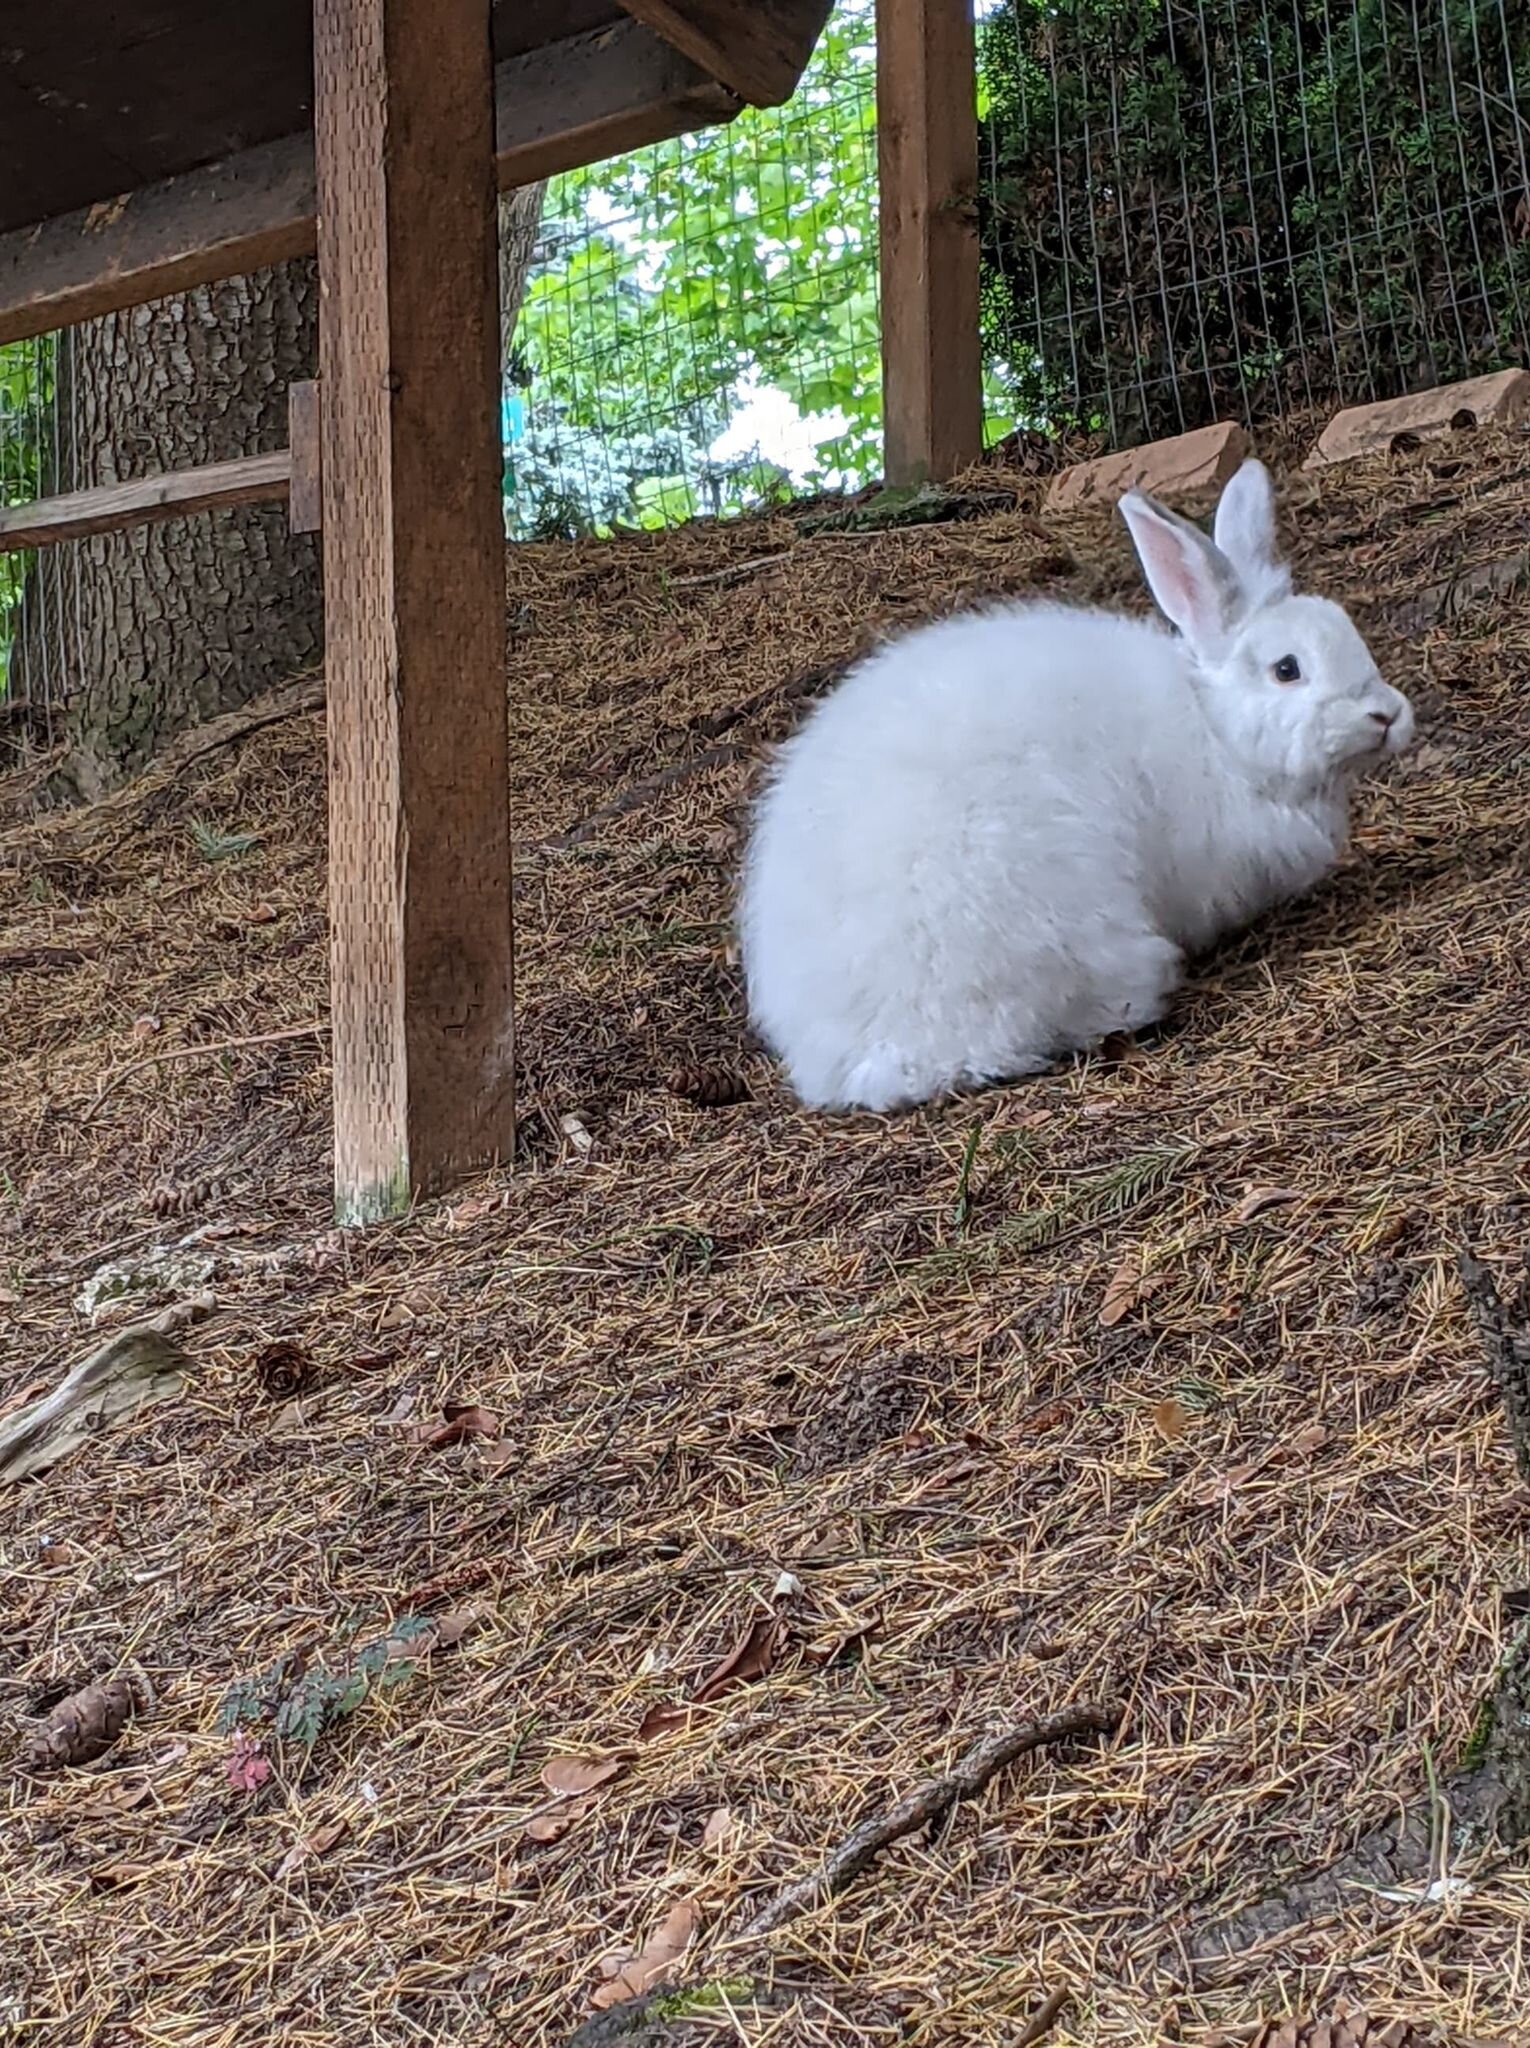
So, I decided to start making my own yarn. I live in an urban area, so sheep did not seem like an option. After doing some research, I found a few Angora rabbits on Craigslist (Hermes and Iphigenia, Satin-German breeds), bought a spinning wheel, pulled up some YouTube videos, and got to work. By the way, I should mention that the bunnies and all my fiber processing equipment currently live in my two-car garage (the bunnies have a fourth of it to themselves and like to run underfoot all the time).
Why Are You Using Sheep’s Wool, Then?
Angora wool is not elastic the way sheep wool is. Sheep wool has kinks in it that help yarn keep its shape and bounce. Angora wool used alone runs the risk of becoming droopy or stretched out over time. For that reason, most people recommend blending Angora fiber with some sheep wool to improve performance and longevity. It also makes the Angora wool easier to spin. The ratio I typically use is 75 percent Angora wool to 25 merino wool, give or take.
So, you see where I’m going with this. I had bunnies, but I still needed to find a reliable, local sheep farmer to get wool to blend with. For that reason, I also needed to learn what sheep farming entails and how to process wool from start to finish.
Skirtings vs. Fleece
When you buy a “fleece” from a farmer, that is typically the grade-A quality wool from a single sheep. That is the sheared fleece with as little of the second cuts and vegetable matter (VM) as possible.
High-quality fleece from a “next-to-skin” soft wool breed like merinos cost anywhere between $25-45 per pound of raw fleece (meaning you still have to wash and process it yourself). Skirtings, on the other hand, cost about $10-25 per pound and may include wool from many sheep. So, if you don’t mind lumpy yarn and picking out vegetable matter, it’s a steal. Plus, you’re using wool that few other people want, which gives you the chance to make a sustainable product and waste very little.
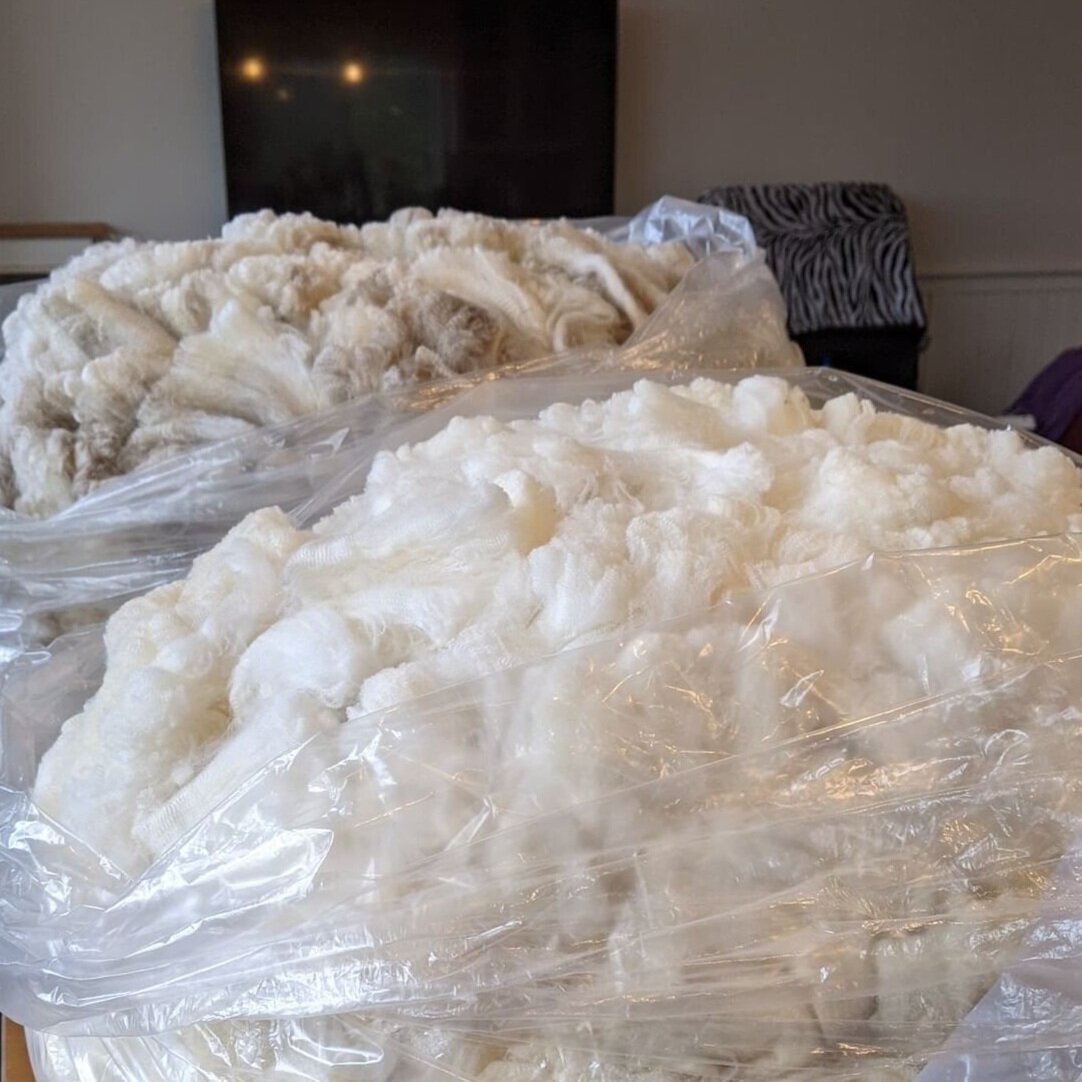
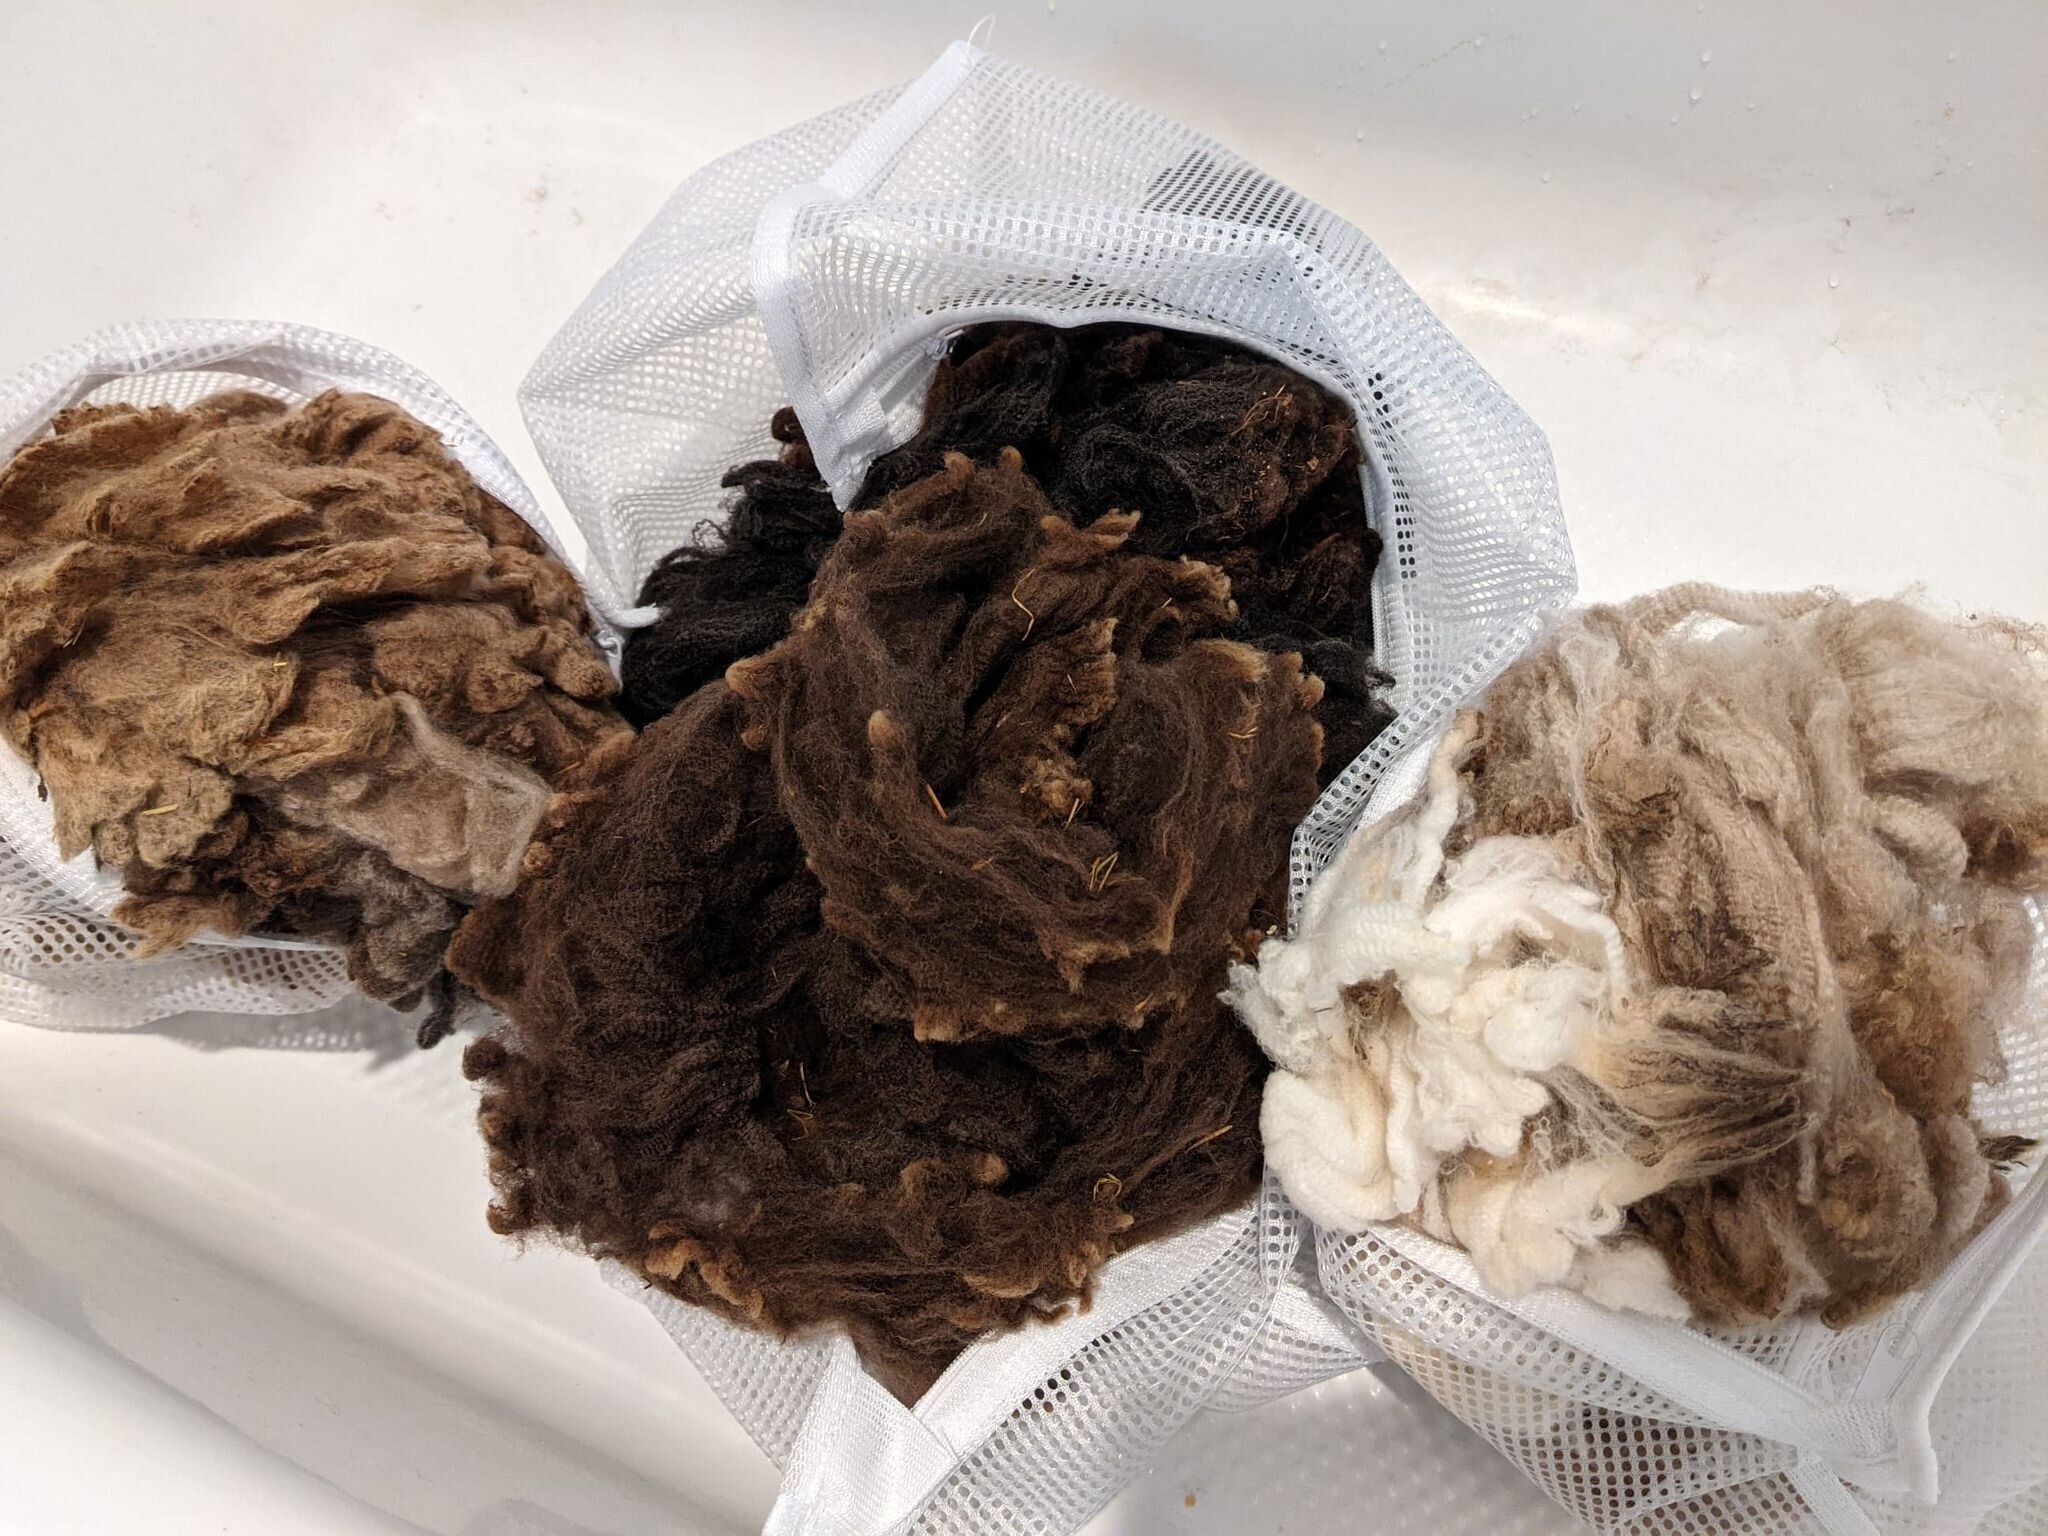
To learn how to process raw wool for myself, I bought 10.41 ounces of skirtings in 3-4 colors for $15 from Apple Creek Merinos. When it arrived and I opened the bag, I was overcome from how much it smelled like “farm.”

Raw skirtings before washing.
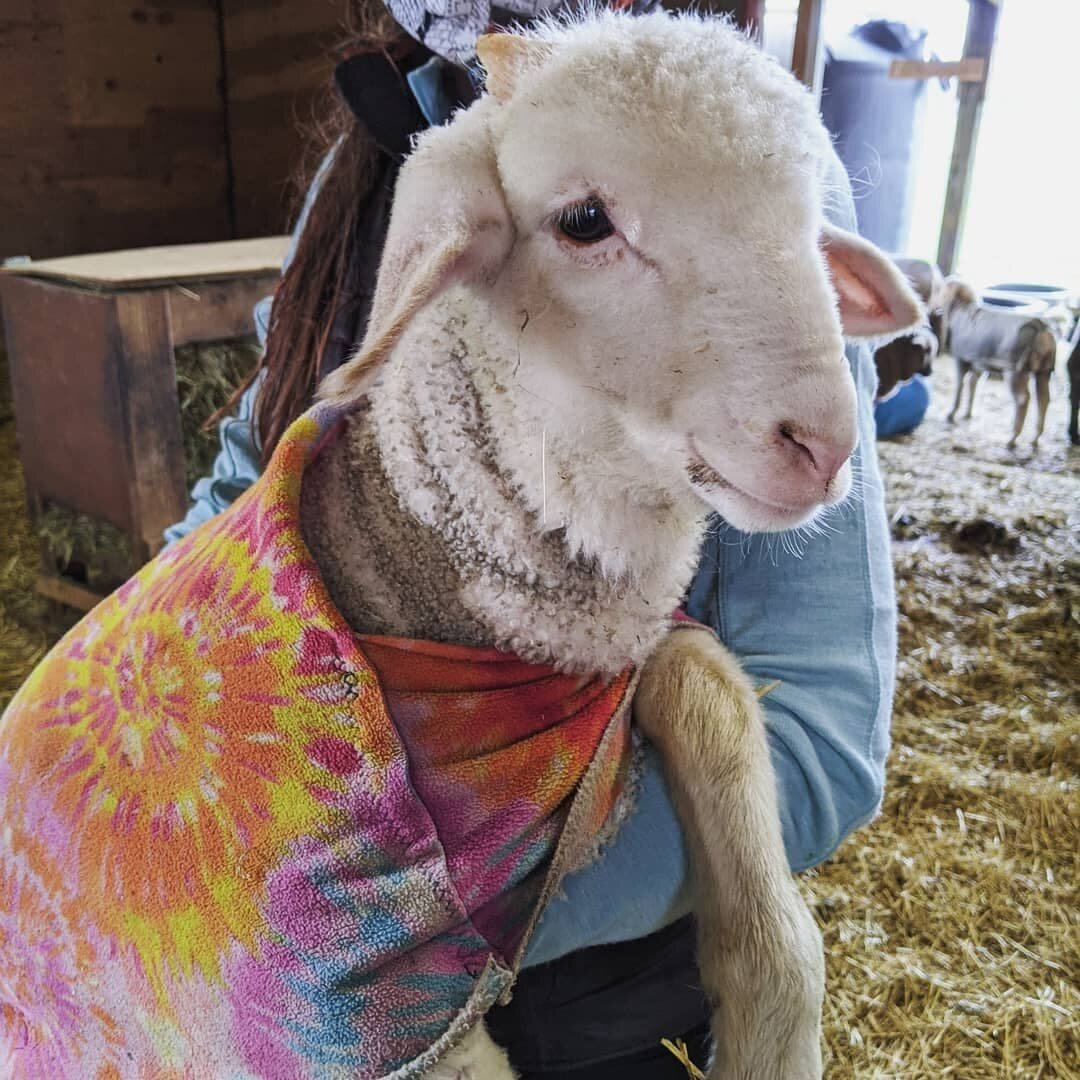
It was greasy and full of hay, and I honestly had no idea what to do with it. It sat on a shelf bundled up tight in the garage for about six weeks while I learned more about wool processing and even made a visit to Laurel’s farm (photos of Burt, Banana, and the crew below).
Step 1: Washing/Scouring the Wool (3-4 hours)
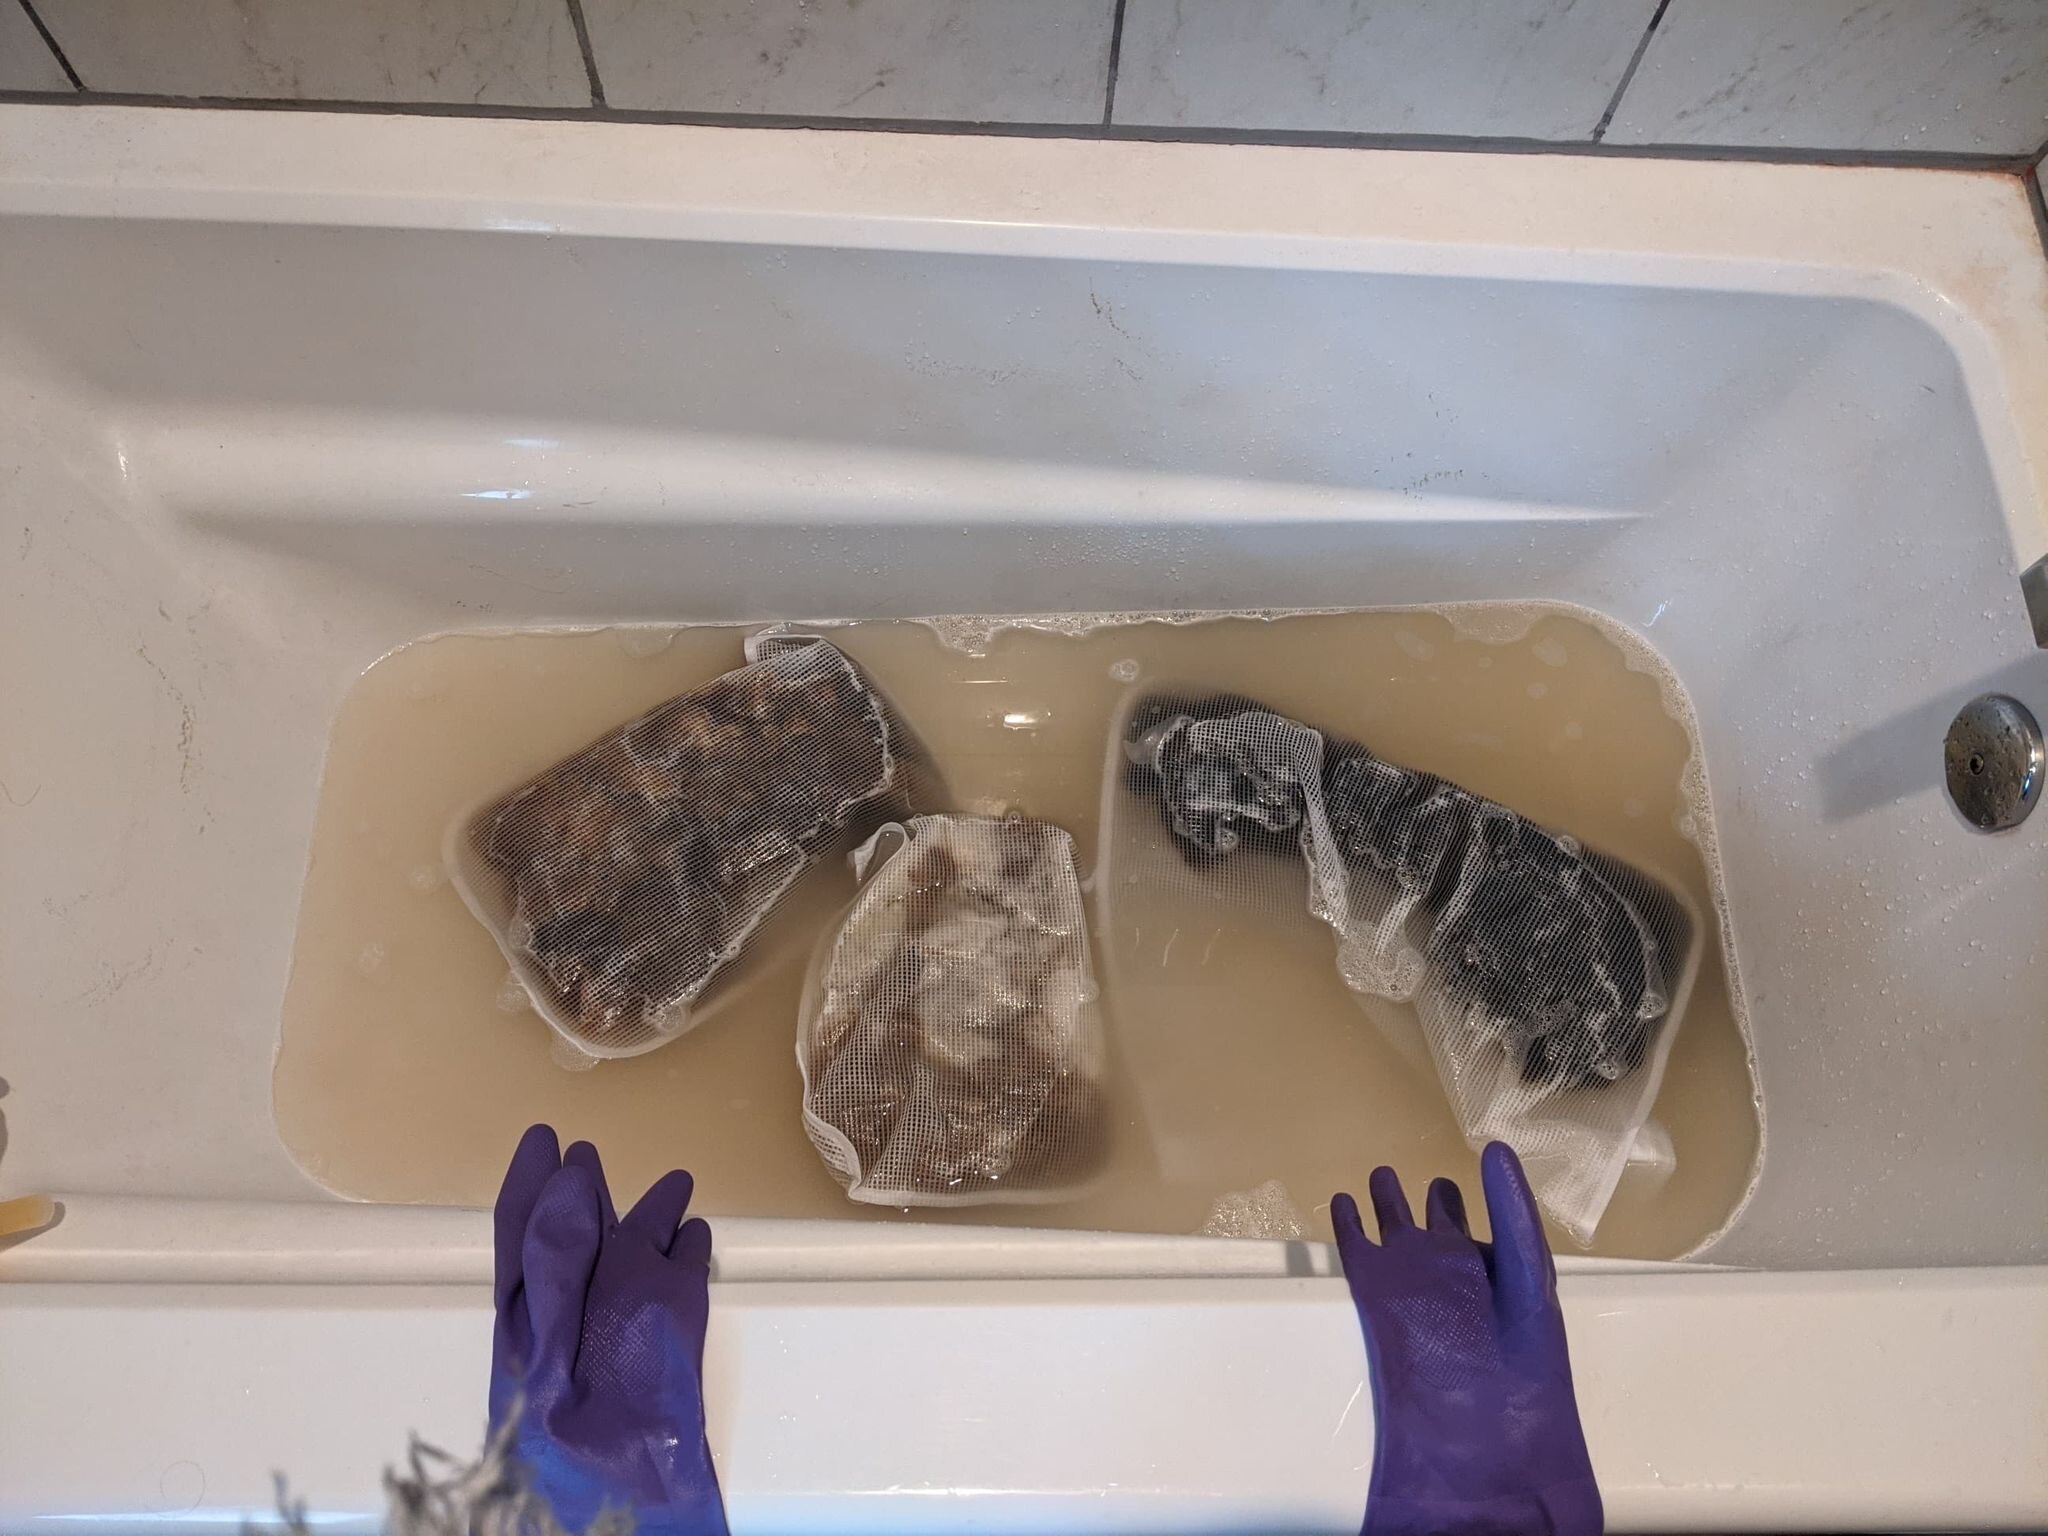
Washing (additionally called scouring, although that’s also a dyeing term that means something slightly different) is the process of removing urine, fecal matter, and lanolin from the wool. So, yes, it’s very dirty work, but that’s part of making yarn and working with animals. I put on my purple rubber gloves and was ready.
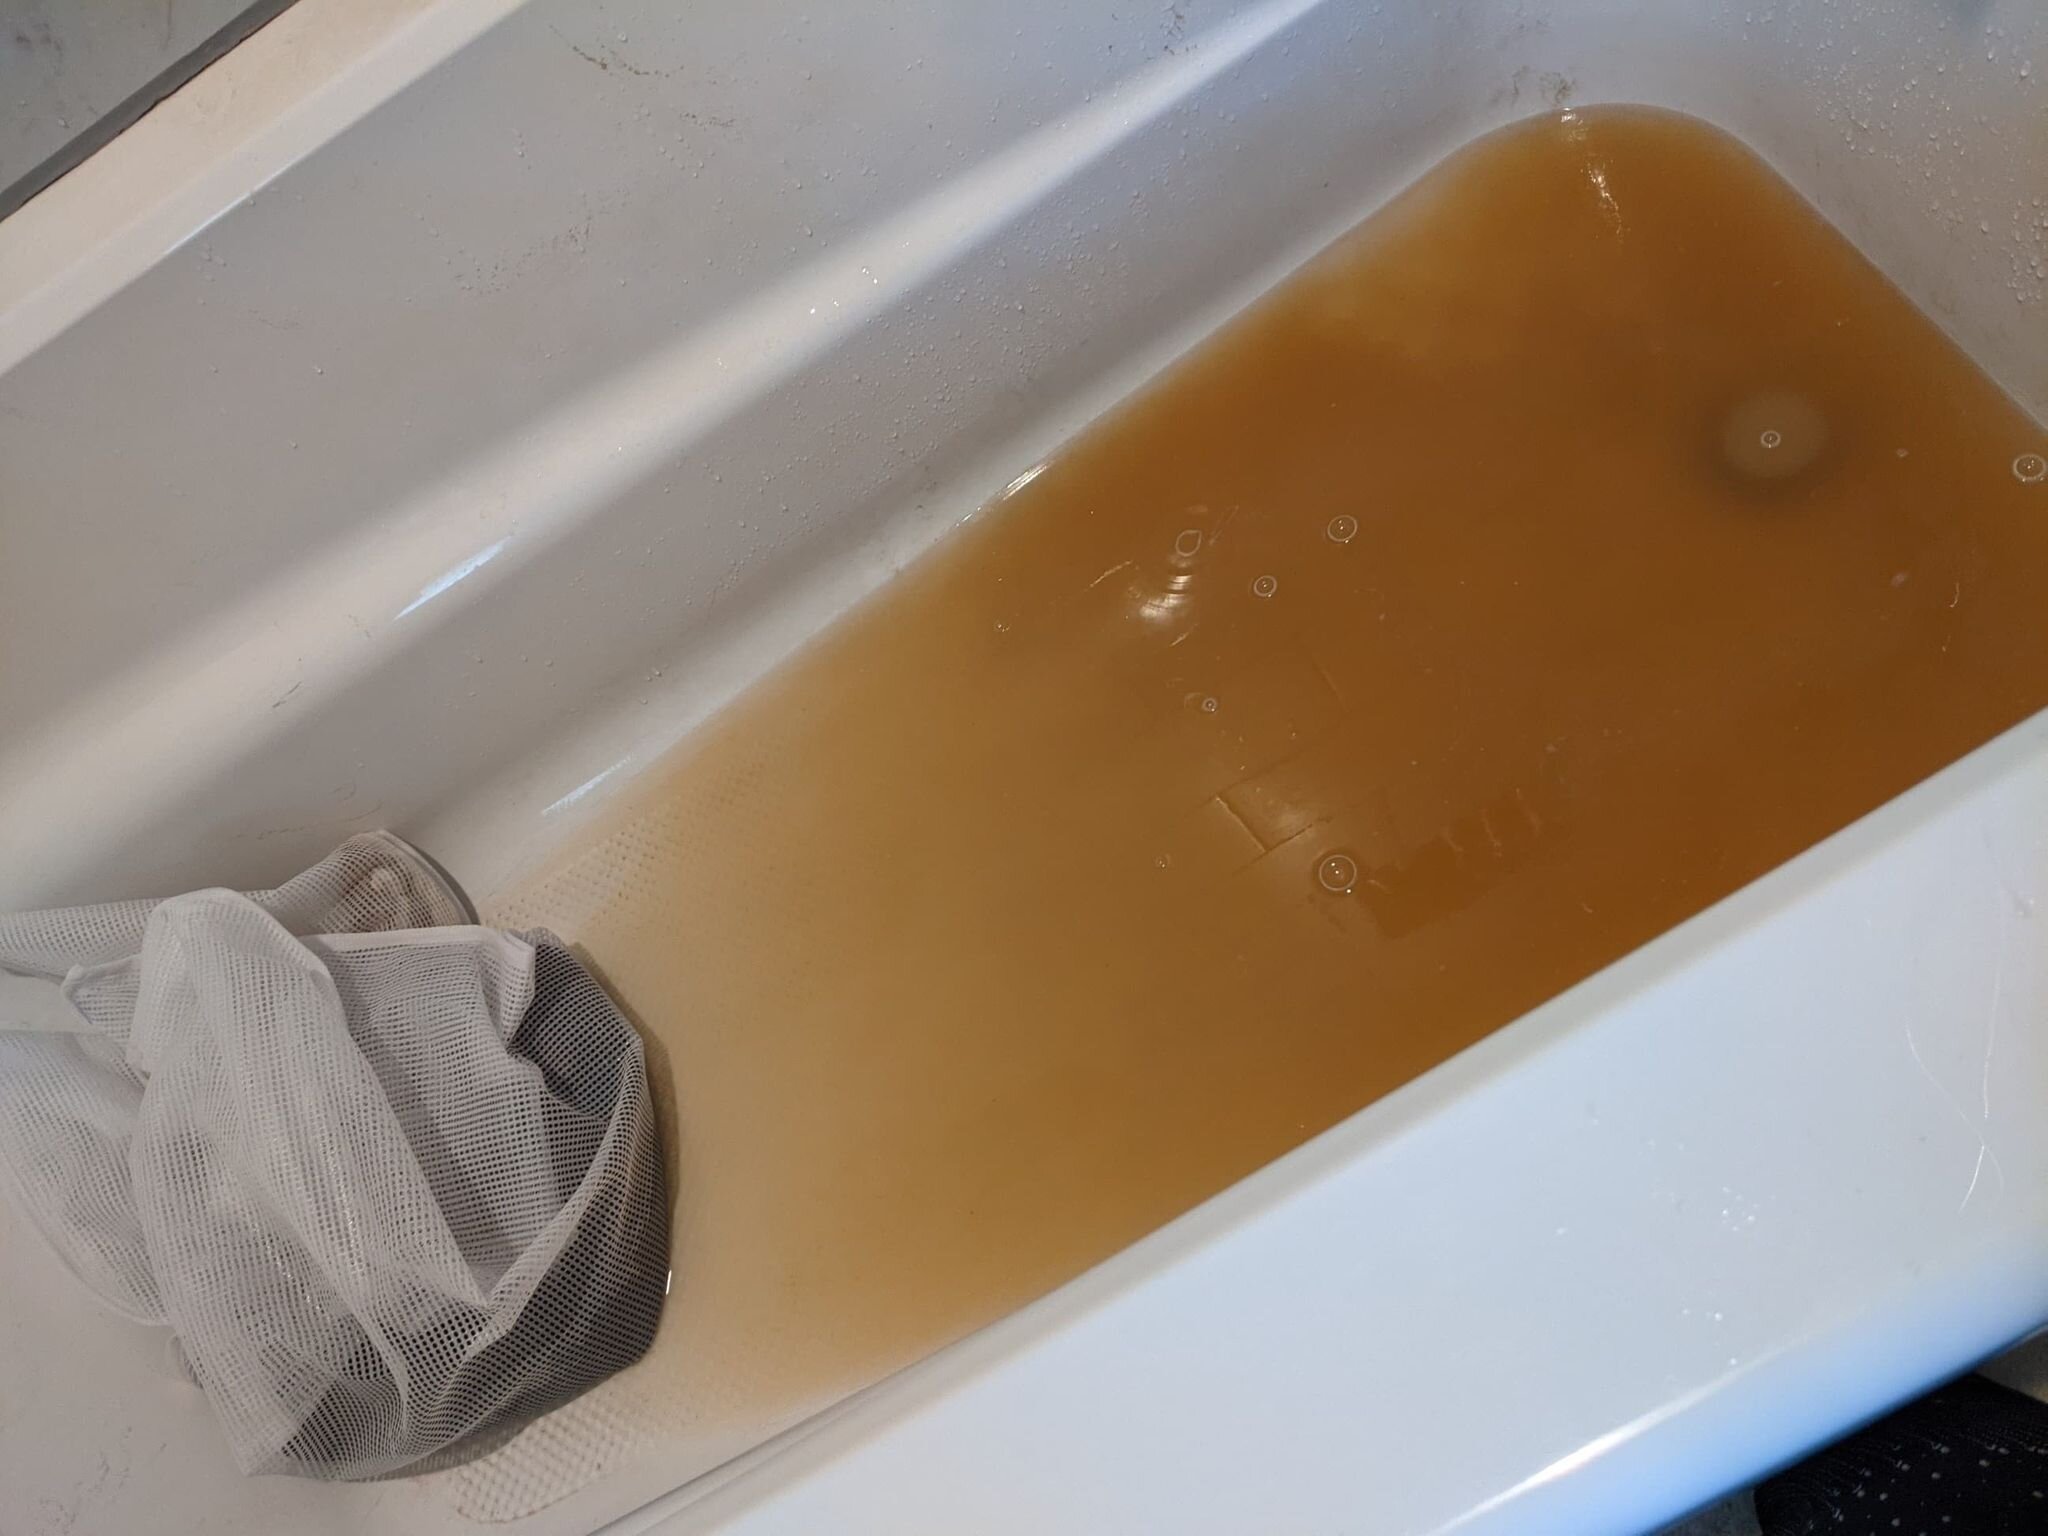
After buying a few large lingerie (ooh-la-la) bags from the grocery store for the purpose, I separated the skirtings into light, medium, and dark colors, with each color making up approximately a third of the total weight. Then, into the bathtub they went! The first rinse (just really hot water) was super gross. To be honest, the bathtub looked full of diarrhea water.
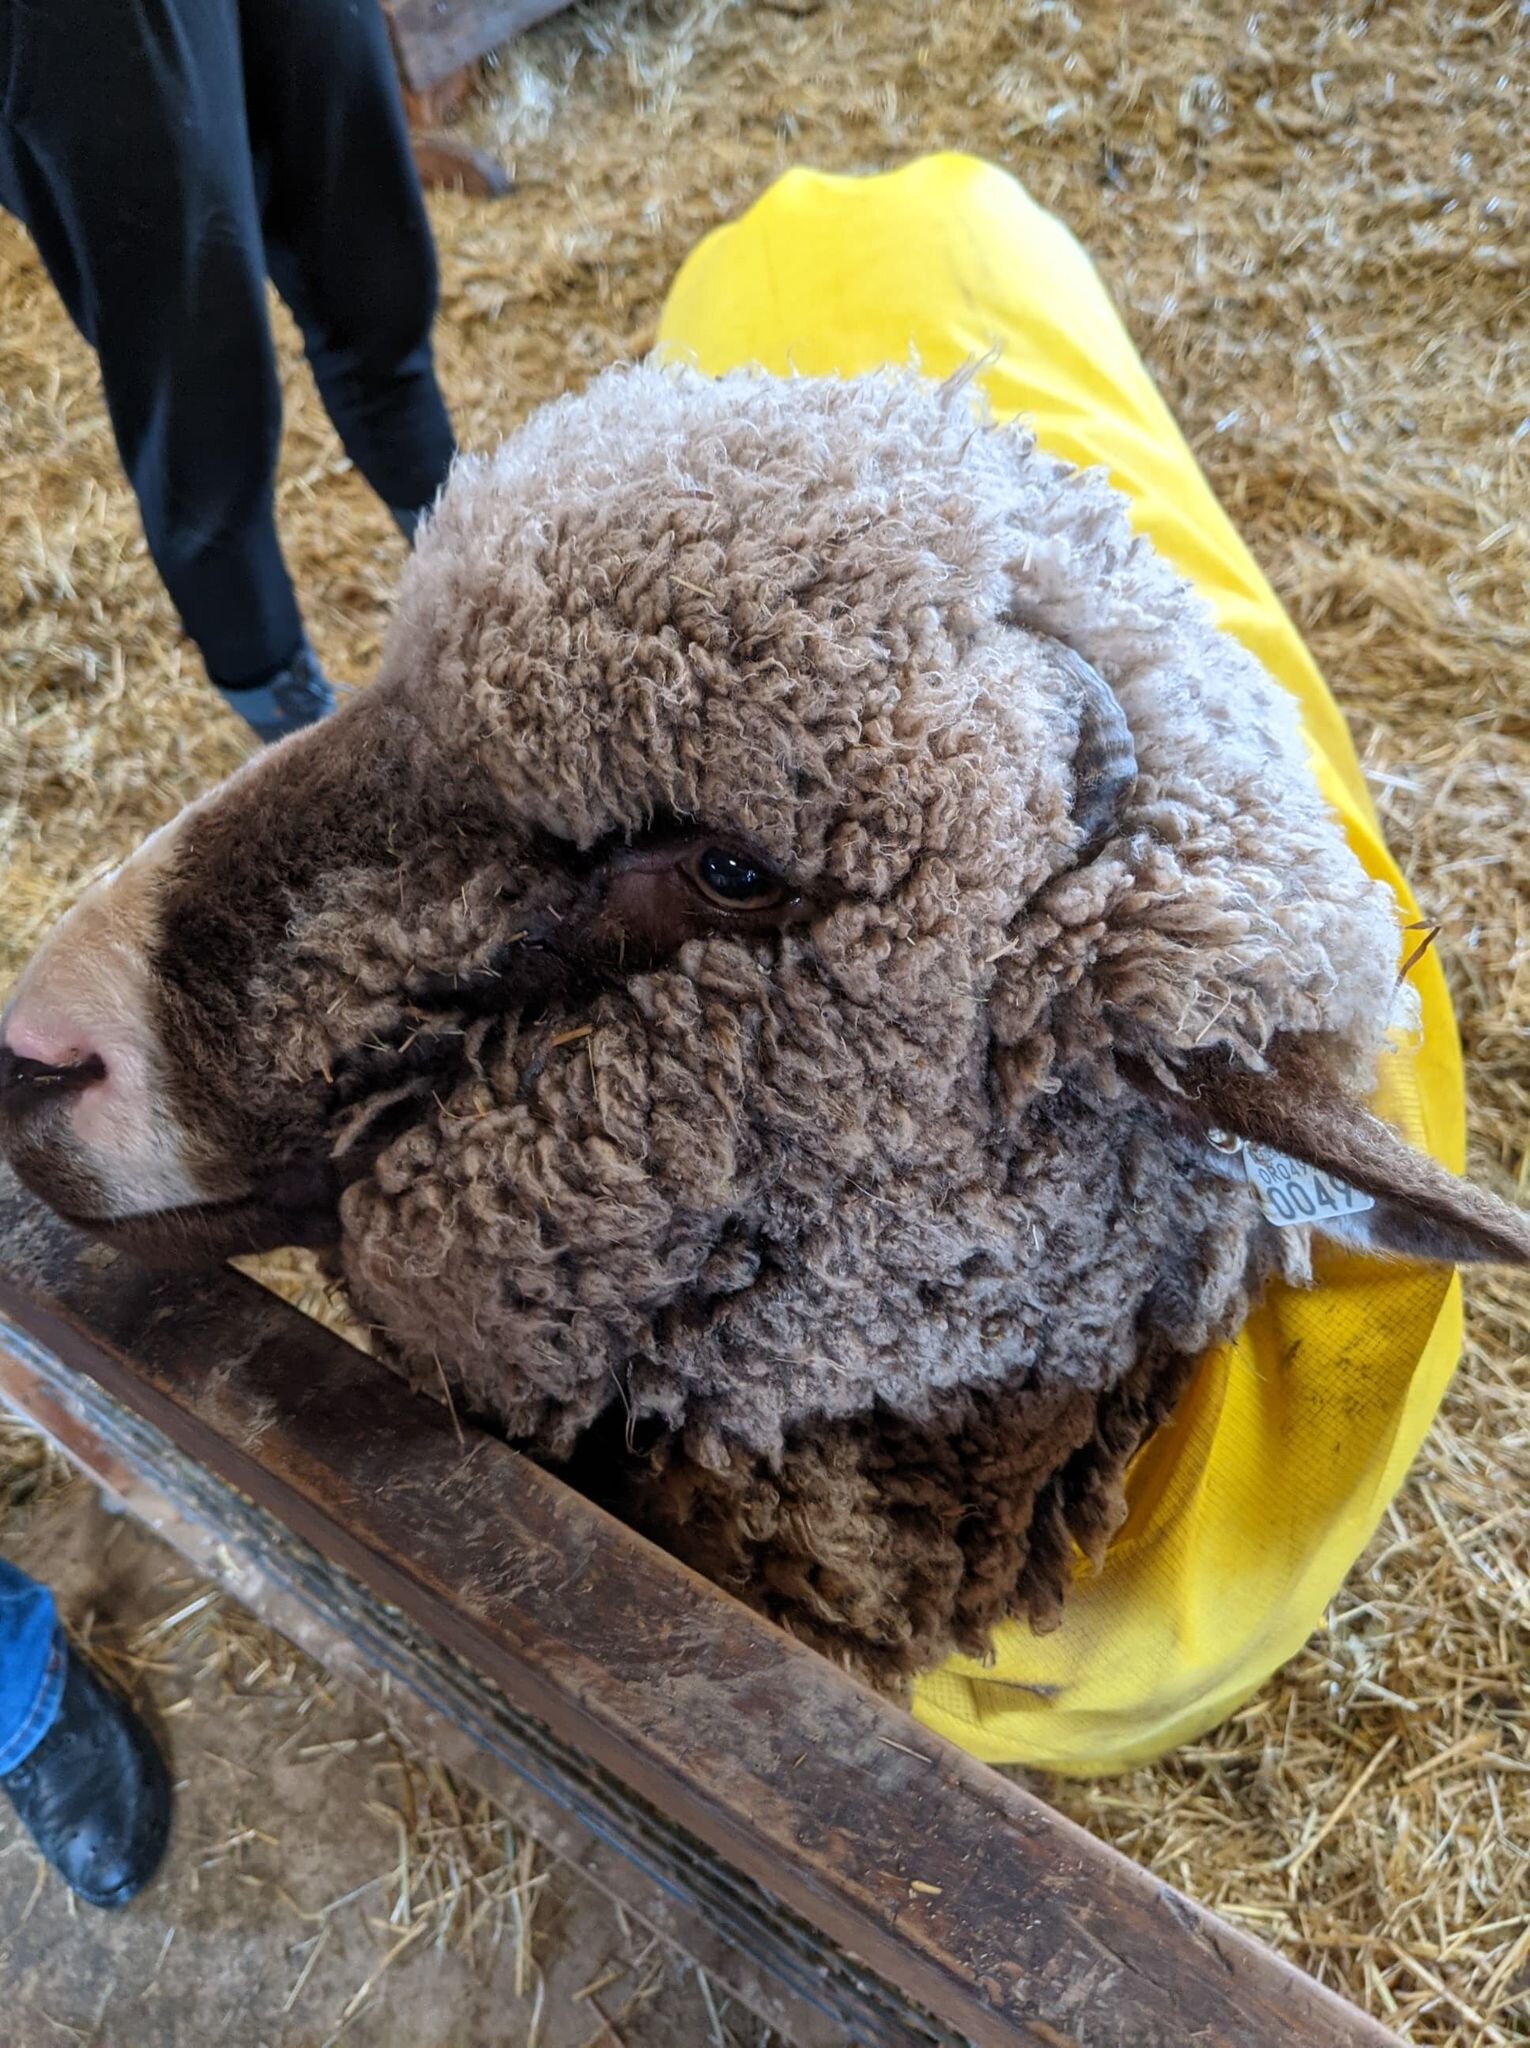
**Please note that Laurel’s raw fleeces are much, much cleaner than the skirtings! Skirtings are the dirtiest parts of the wool. Laurel has more awards on her wall for her wool than I could even count.**
Laurel’s award-winning fleeces.
While getting the wool hot and wet, it is important not to boil, agitate, or run water over the wool as it will felt, which means it will be very hard to pull apart later.
After three rinsing soaks, I felt ready for the scouring soap. I used Kookaburra scouring soap, which is biodegradable and safe for all septic systems, but it smells really, really strong and is very concentrated, so I put a big fan in the bathroom with the window open while working with it.
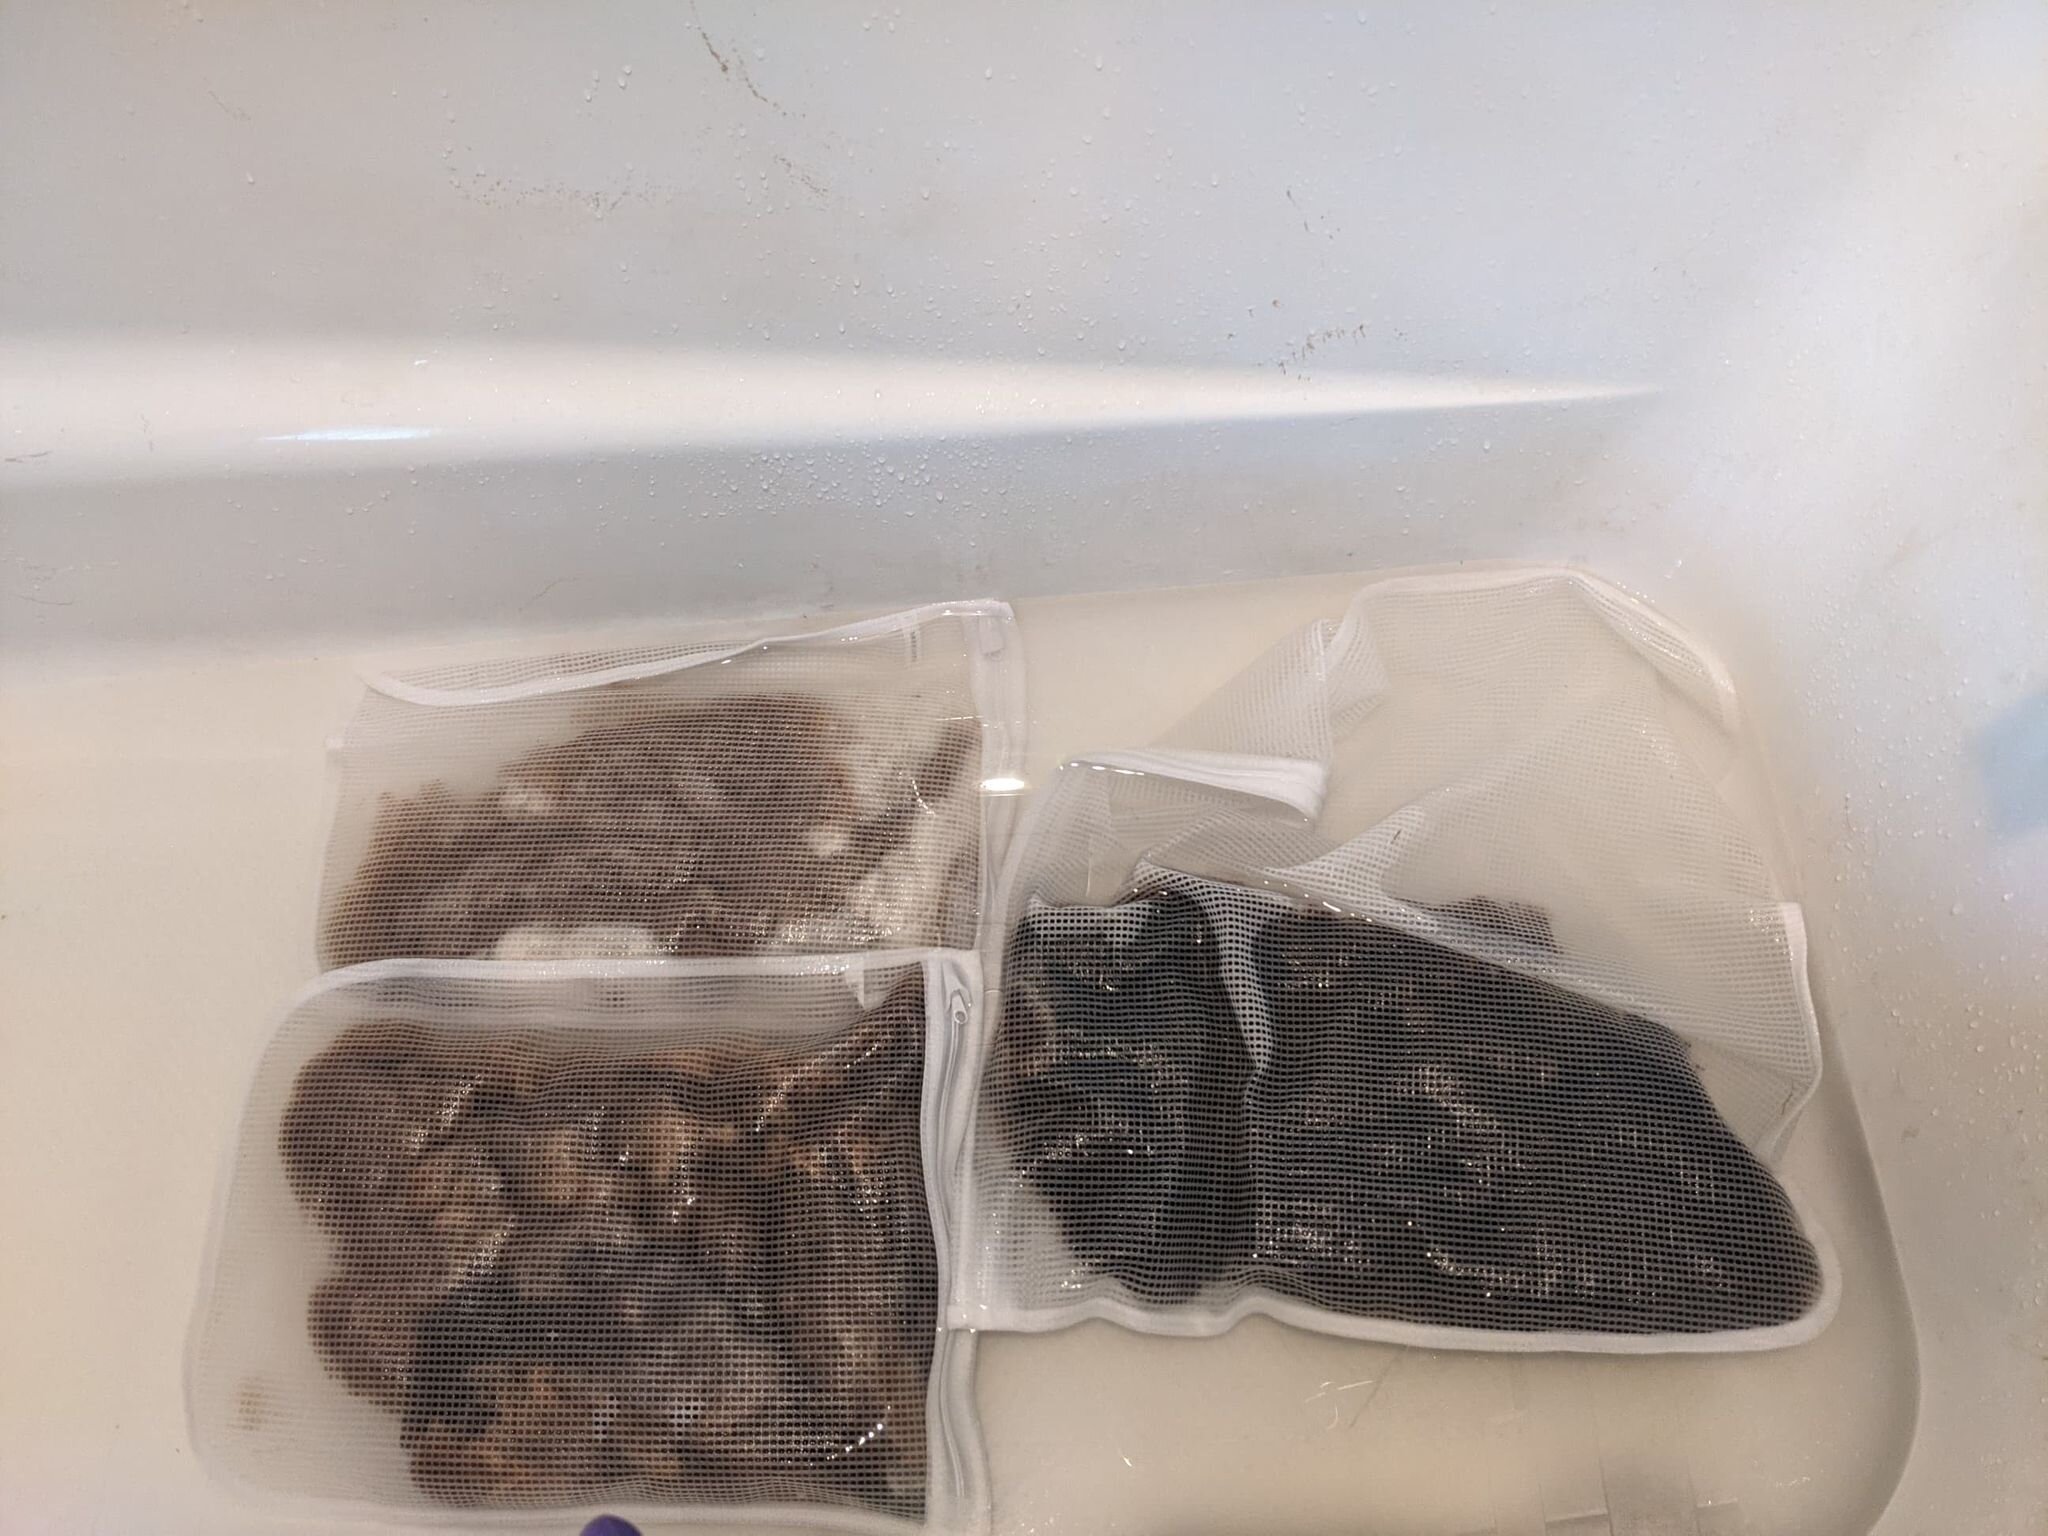
I did two more soaks with the soap, and the water was now the color of coffee with creamer. Much more delicious. Mmmm.
When the water was mostly clear, I set the wool out to dry.
To be completely honest, the wool was still a little greasy when it fully dried, and I wished I had decreased the time of the soaks (the lanolin re-congeals if it sits too long) and increased the temperature of the water (it cools while sitting in the bath). I did a couple extra washes after the initial drying, and the wool was still a little greasy, but I was determined to push ahead and do better the next time. Luckily, the lanolin came out of the finished yarn with some Dawn at the end (when all else fails).
Step 2: Drying the Wool (overnight)
Despite the advice I read online about putting the lingerie bags of wool into the spin cycle of the washer (I had bunny towels in there at the time), I tried to press out the water from the wool by hand and leave it horizontal on an old window screen to dry, turning it and separating the fibers periodically. IT TOOK OVER THREE DAYS TO DRY THIS WAY! I was very eager to work on the wool, and this was a major setback.

Wet skirtings set out to dry.
After subsequent washes, I definitely used the spin cycle, which greatly improved the drying time such that I could work on the wool the following evening.
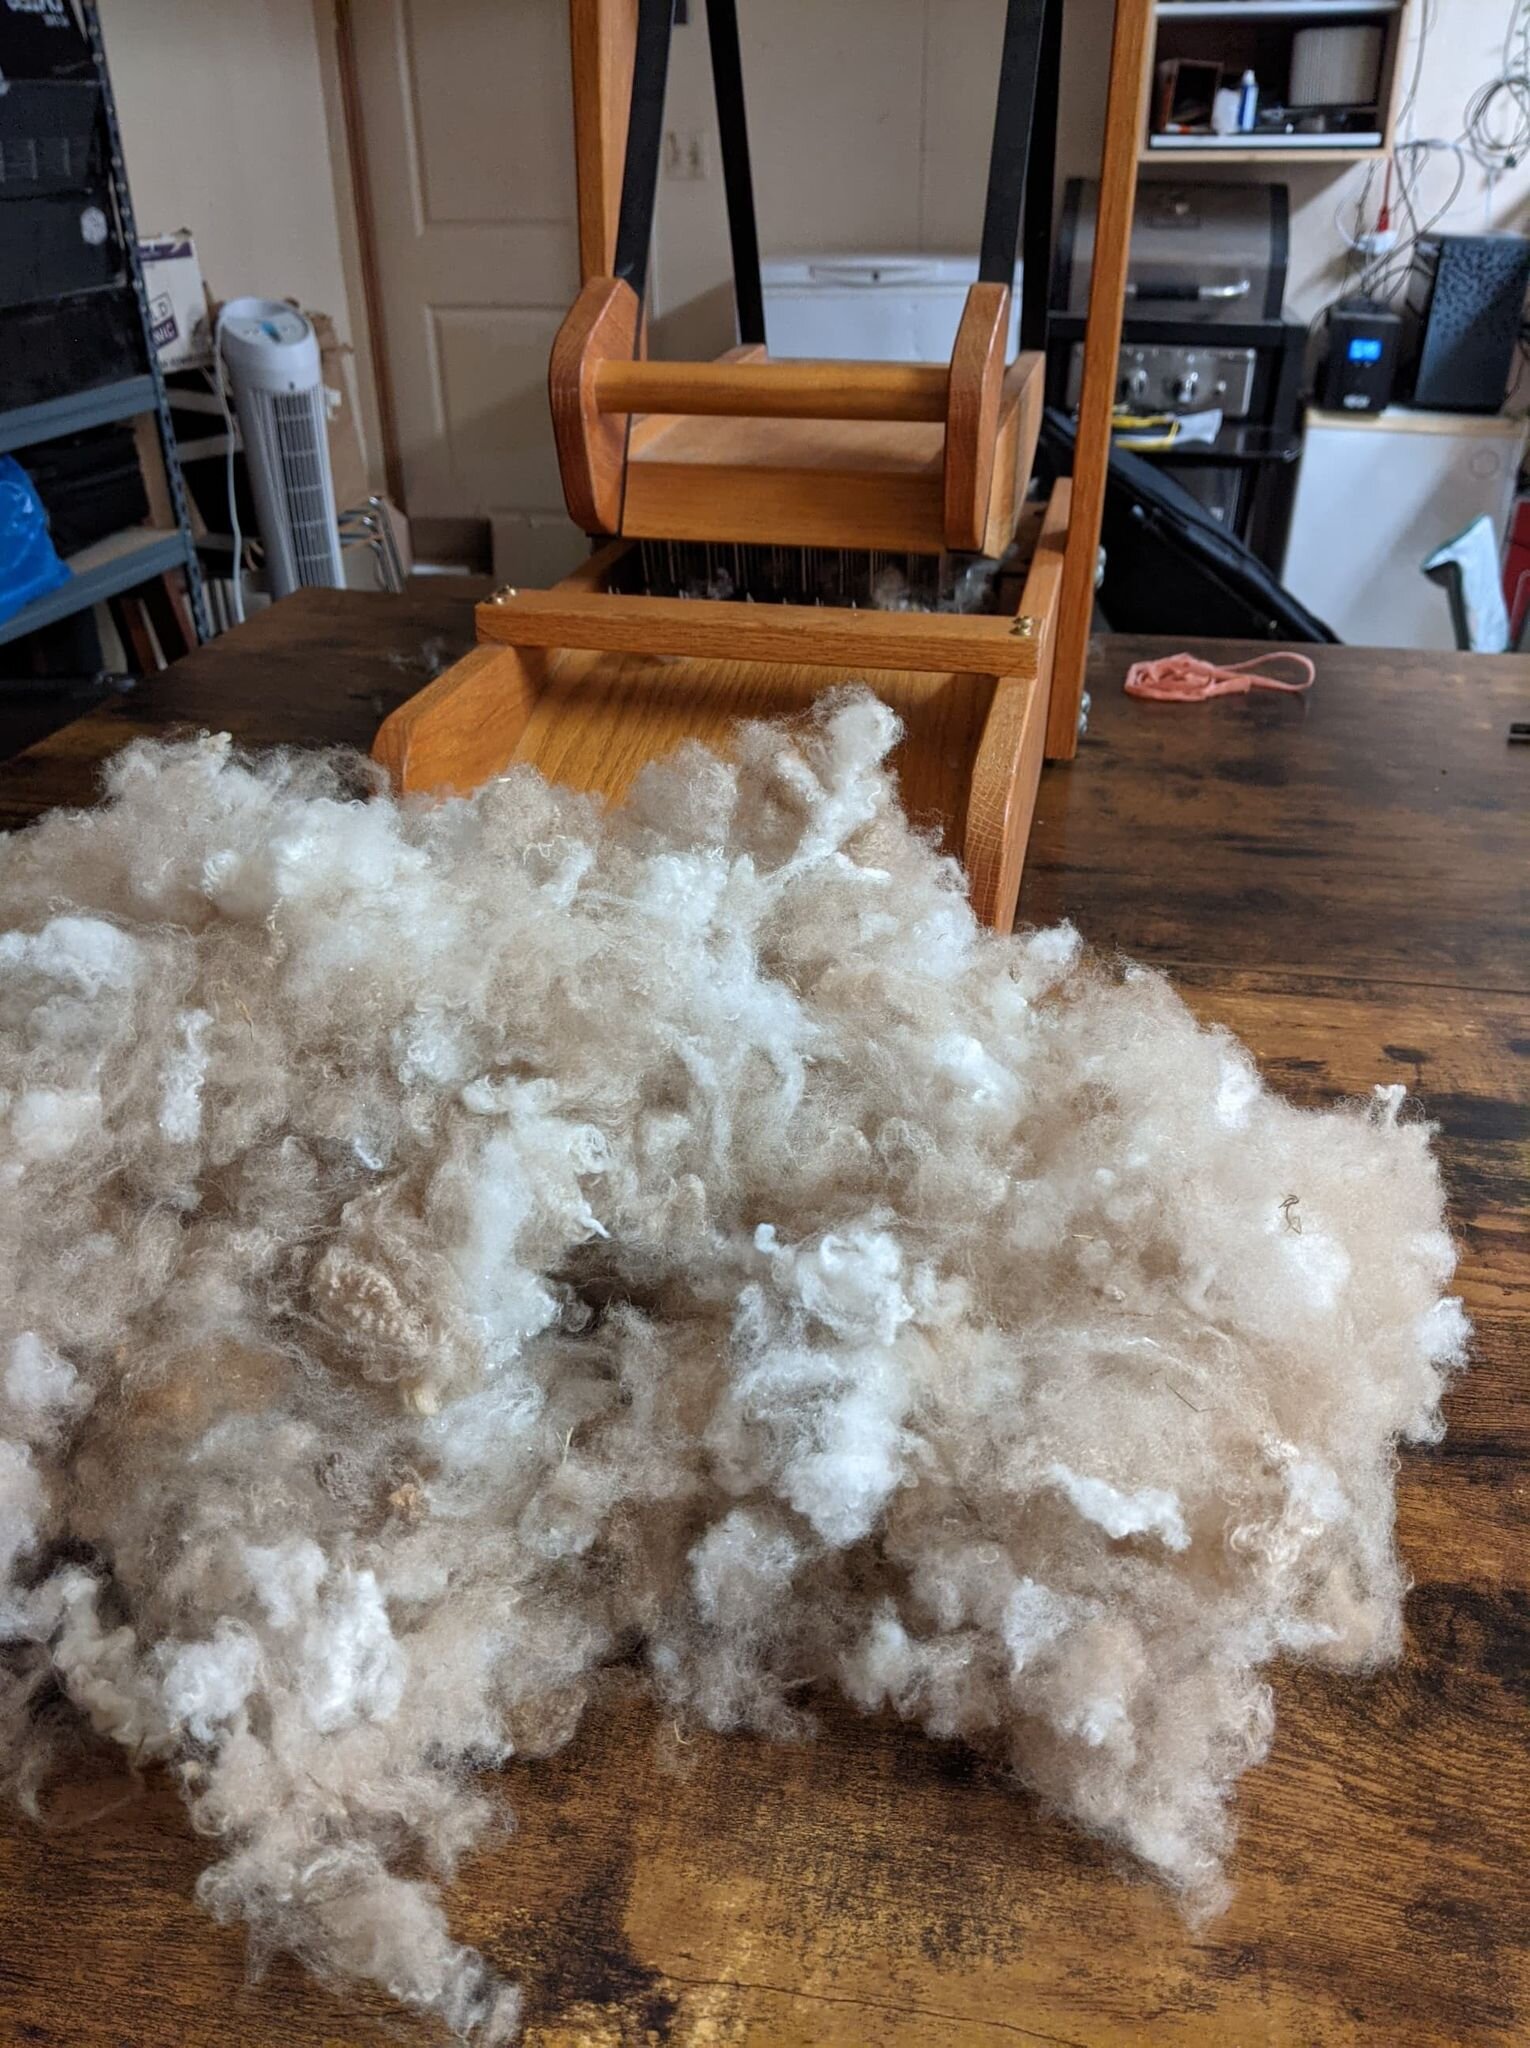
Step 3: The Swing Picker and Hand Picking (4 hours)
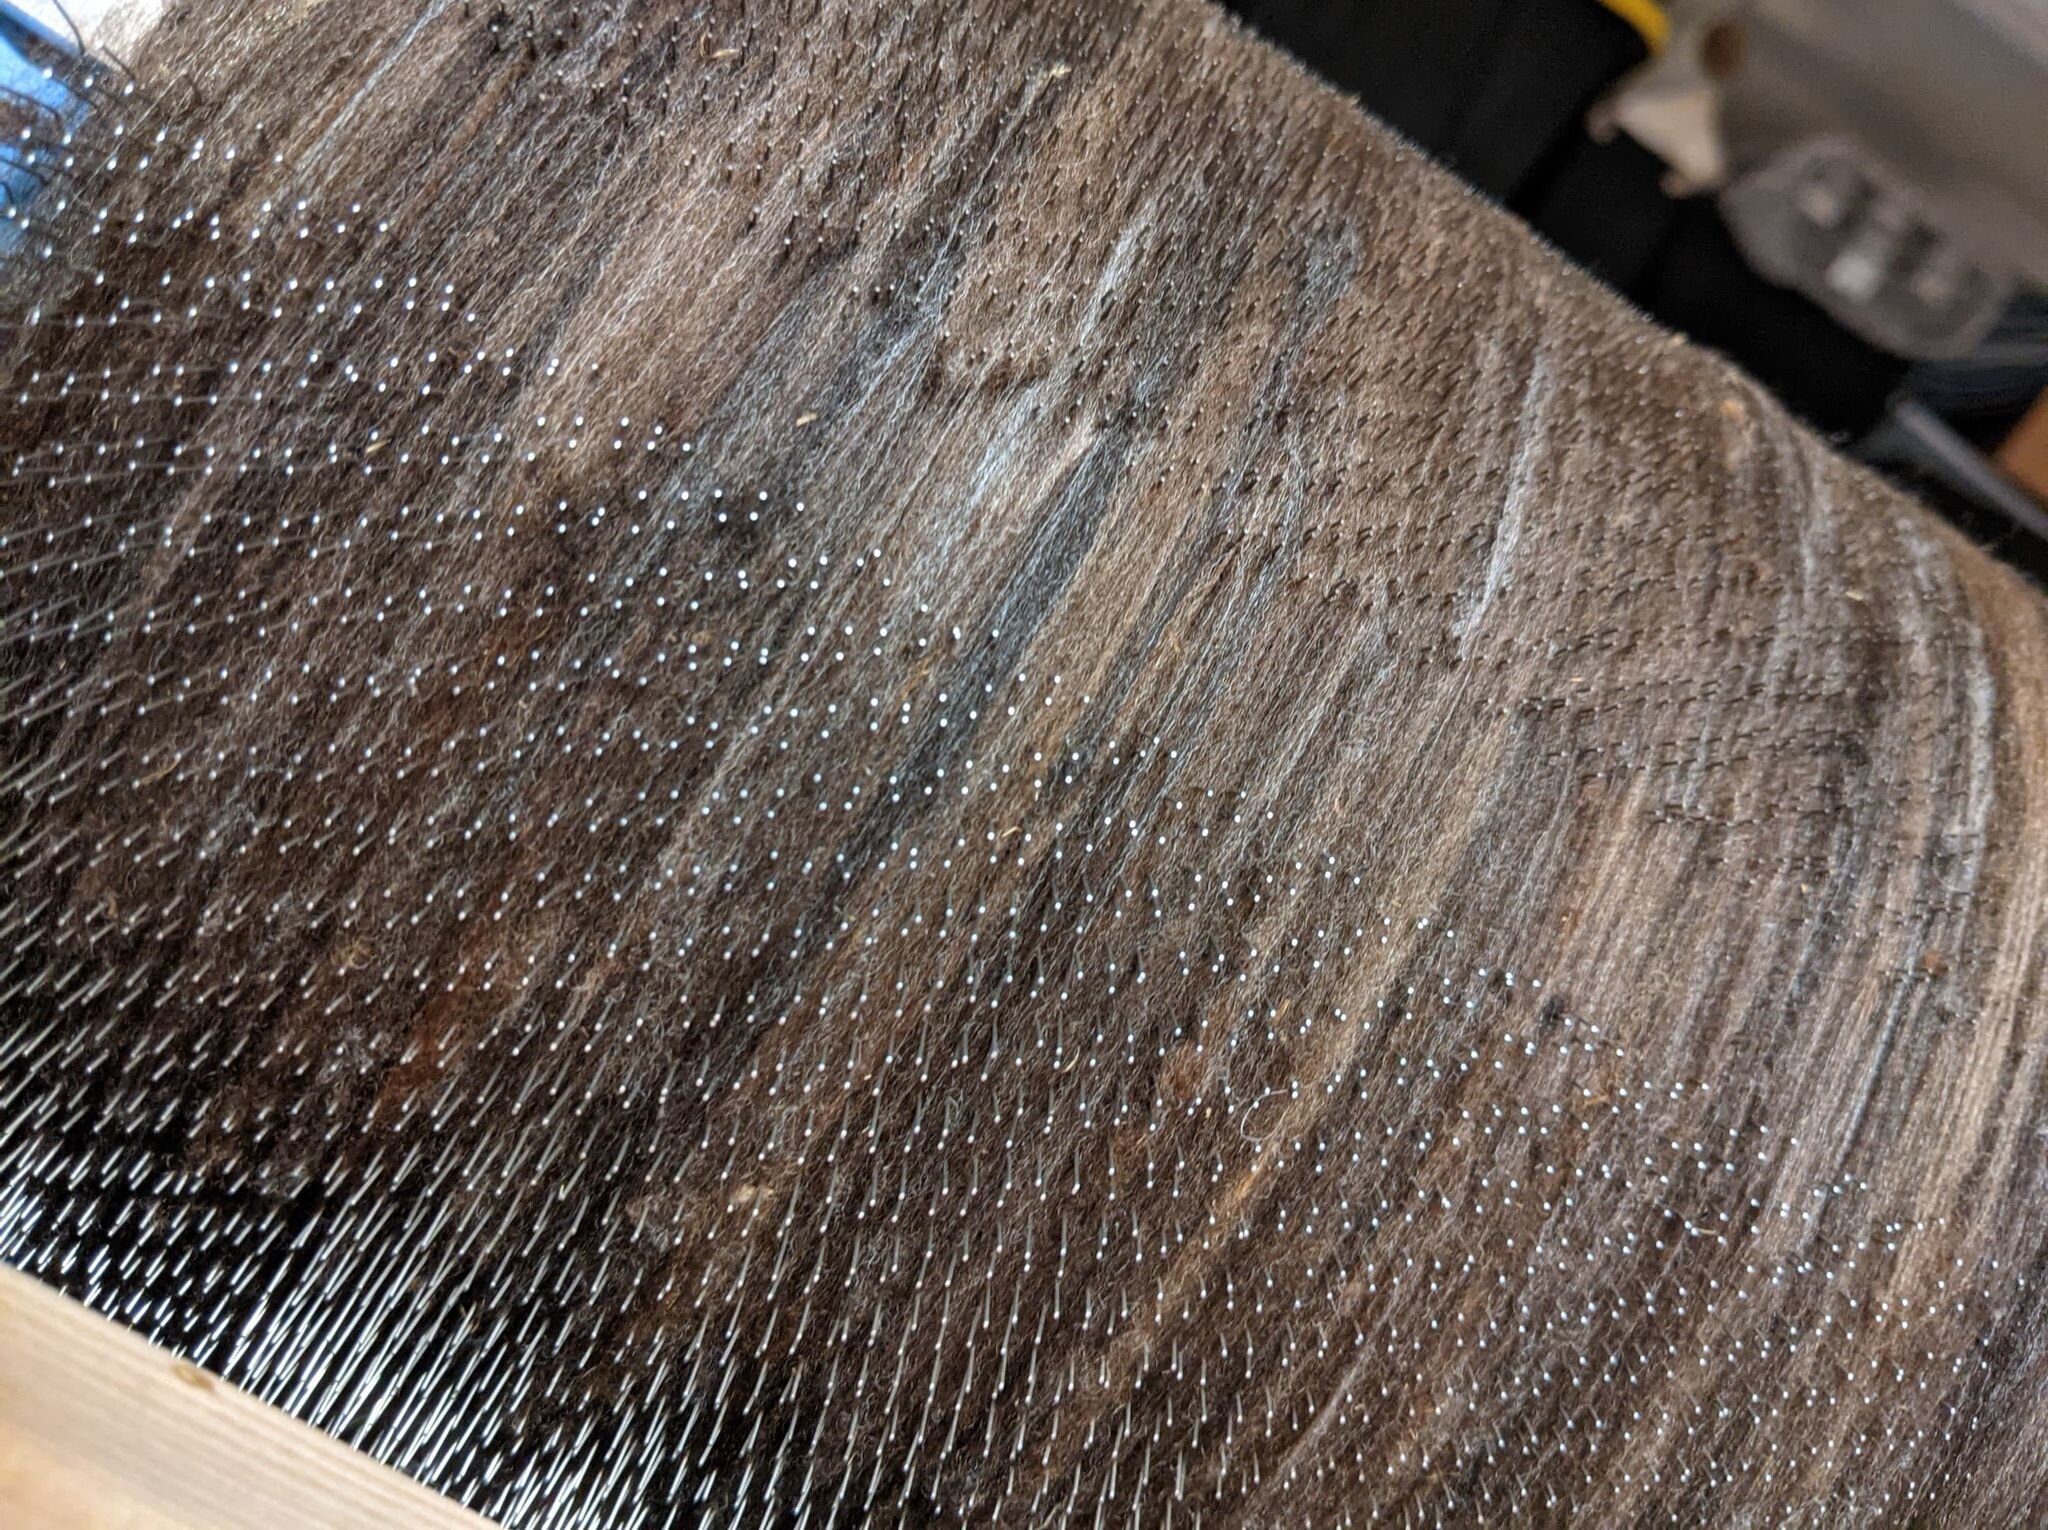
Laurel told me she picks all her fleeces and skirtings by hand, and with 30-50 sheep on her farm, that’s a lot of picking. Picking is the process of removing VM from the wool. I found an amazing deal on a swing picker when I visited Eugene Textile Center on the way back from Laurel’s farm, and I was eager to put it to the test. And, yes, it does look like a cross between an iron maiden and a guillotine. Danger! Pointy sharp! After the drum carder and the spinning wheel, this was my third piece of fiber processing equipment.
Because I wanted to see how well the swing picker would do, I left almost all the VM in the wool until this point. Most people recommend hand picking before washing so you don’t incidentally break up pieces of hay since that makes them more difficult to remove.
In sending the wool through the swing picker one color at a time (see videos here), the nails pulled the wool apart such that the wool became much, much fluffier on the way out. While a lot of the dirt and some of the hay dropped out during this process, there were still quite a few pieces of smaller hay in the wool after going through the swing picker three times. I do think it saved a lot of time, and fluffing the wool definitely made it easier to find the hay, but I still spent hours on this part of the process, even after soliciting some help from my housemates.
Photo below of before and after picking the light colored section.
After washing and picking, the total weight of the wool was 8.31 ounces, which means that, at this point in the process, I had a 79.83% yield. Yield with commercial equipment and grade-A fleece comes in around 60-70% of the total raw wool. So, yay! I was doing well. (Granted, I do think the remaining lanolin added to that weight.)
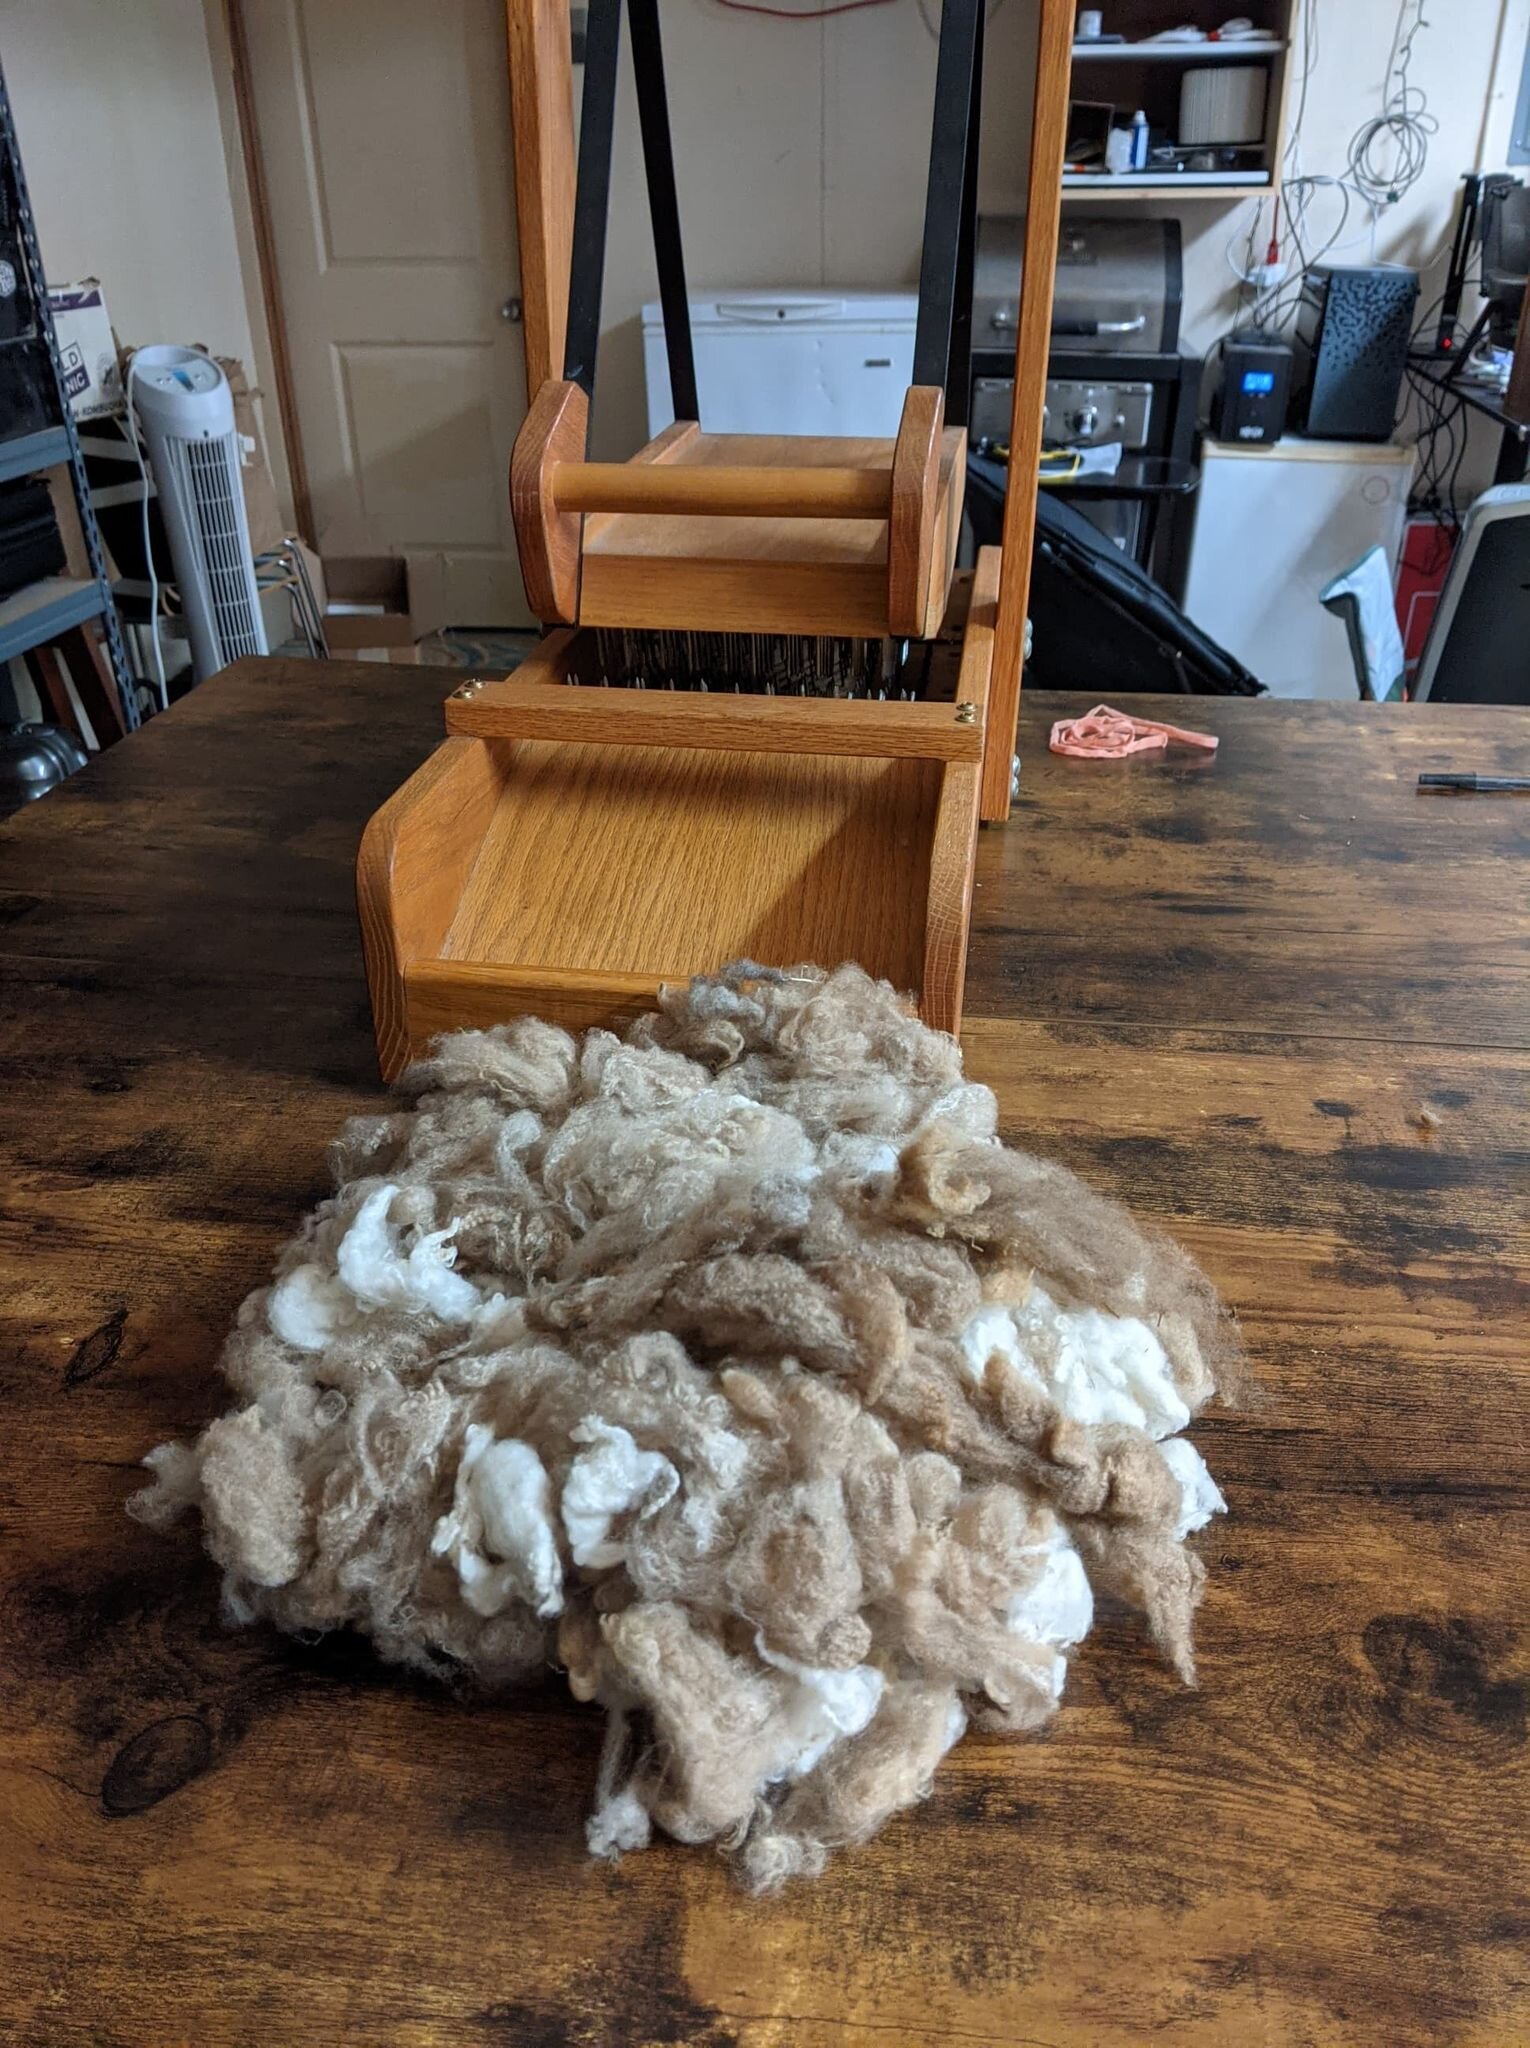
Step 4: Drum Carding and Blending (1.5 hours)
For merino wool, a fine-toothed carding drum is recommended, so I used the same one I use for my Angora rabbits’ wool. After my first time processing fiber on the drum carder, I potently realized that anything you process on your fiber equipment will get into everything you process on that equipment. While it’s possible to vacuum and clean the equipment, fiber (like human hair and glitter) gets everywhere. There are just going to be trace amounts of Angora in everything I process on that carding cloth. That’s why it’s so, so important to feel good about all the fiber you use. And to be honest about what everything comes into contact with.
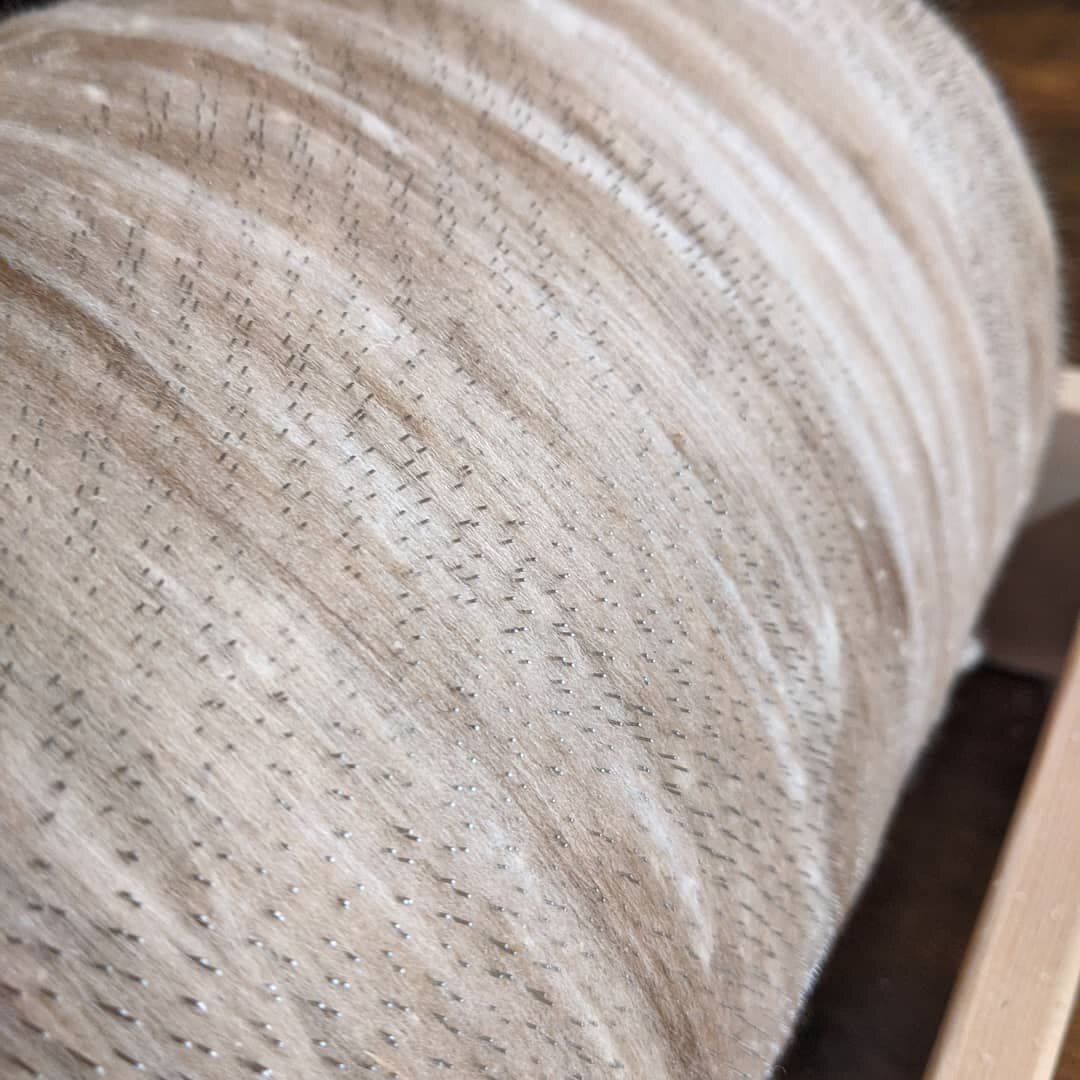
The drum carder takes the cleaned, picked wool and arranges it so all the little fibers go the same direction. It accomplishes this using two cylindrical brush drums. You can only feed a tiny amount of wool onto it at a time or it will jam and create too-dense sections.
In my opinion, this is the most artistic part of fiber processing because you decide where the colors show up and how blended those colors become, which is why it is my favorite part. Subsequent runs through the drum carder will produce more blended fibers, which will make the finished yarn look more like a single color even if there are many. This can make your colors look “muddy” if you are not careful, but sometimes that’s the look you are going for.
I only ran the skirtings through the carder once, and I did it in three sections because my drum carder only comfortably holds about 2-3 ounces of fiber at a time. The fiber as it appears on the drum carder will start to give you a pretty good indication of what the finished spinning will look like. If there’s lumps in your carding, there will likely be lumps in your yarn. See the drum carder in action here.
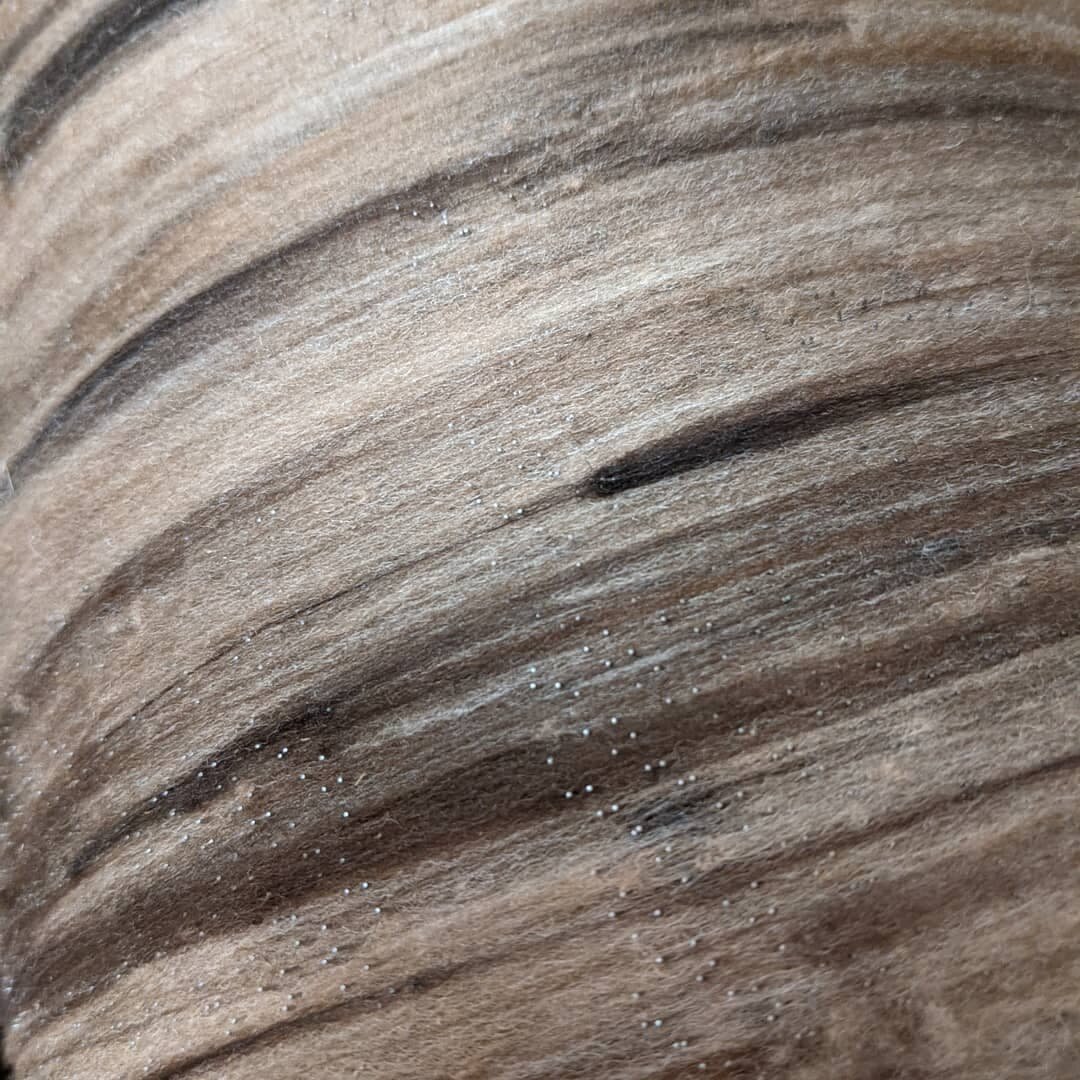
The drum carder does not clean the wool, so any VM you were not able to get out of the wool will stay in the wool after carding. Notably, even Lionbrand’s LB collection yarn made from 100 percent wool has the occasional piece of hay, so it’s never going to be perfect. That’s just part of it.
I lost some fiber in the carding process because some of it will always stick to the drums, and it’s difficult to put it back in the carded wool at that point. I will use it to make felt later.
Step 5: Dizzing and Roving (3 hours)
Once the carding is done, you can either pull it all off the drum carder at once as a batt (essentially a sheet of wool) or you can diz it off the carder directly. I have found that high-quality, very clean wool is much easier to diz directly, whereas it’s a nightmare for fibers that are greasy or have shorter fiber lengths (also called staple lengths). Dizzing is the process of pulling a thin strip of carded fiber through a very small hole (5.0 mm in diameter or smaller, typically) to create roving. Roving is fiber that is prepared and ready for spinning.
I like to diz with a Japanese coin that has a hole in it—because why not—even though I have a proper diz. I have also heard of people using keyholes from door keys. Whatever works.
Since these skirtings had many second cuts and were still a little greasy, dizzing off the drum carder directly not great. I did one section that way, it took over an hour. I took the other sections off as batts and tore them by hand in long zig-zagging strips before pulling those strips through my coin to even out and pre-draft the hand-torn roving (never, ever cut wool!). This was much faster.
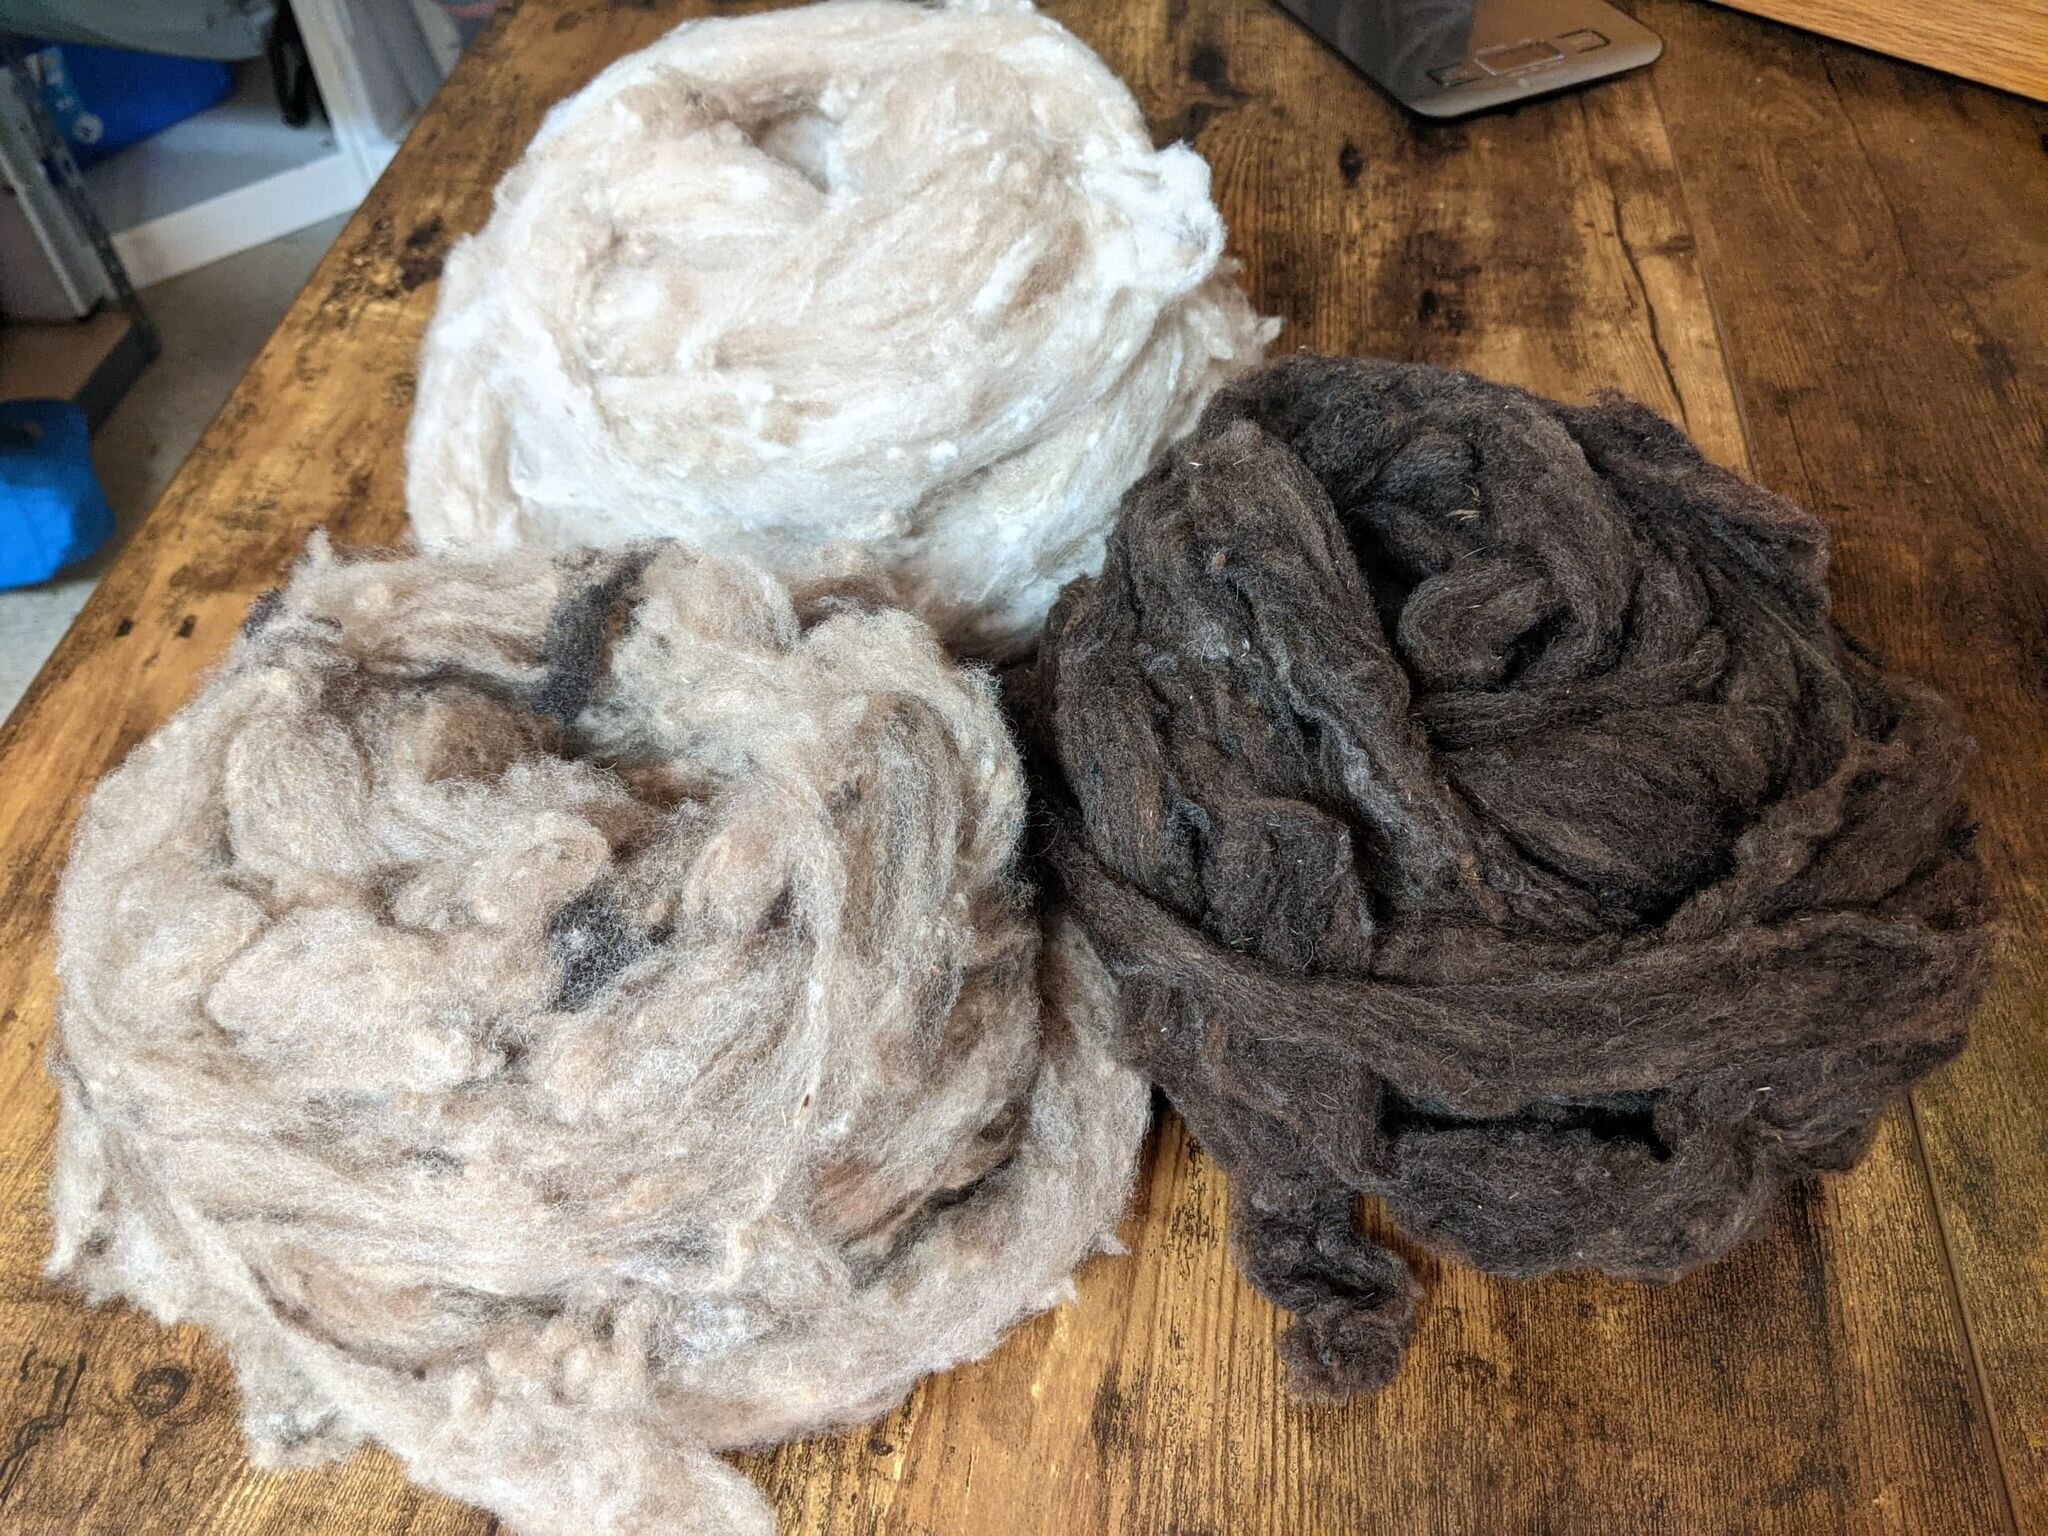
Three little bundles of roving ready to spin.
Step 6: Spinning and Plying (12 hours)
The quality of the spinning depends heavily on how the fiber was prepared. Greasy fibers with lots of VM and second cuts mean that you will be stopping your wheel regularly to pull out all kinds of stuff from what you are spinning. Each interruption of your spinning flow will put your yarn at risk. Any distractions could mean a mistake. For this reason, I try to wait until I have at least an hour of uninterrupted time to work on my spinning. I like to take the bunnies and the spinning outside in our little yard when the temperature is compatible (Angoras prefer temperatures between 50 and 70 degrees).

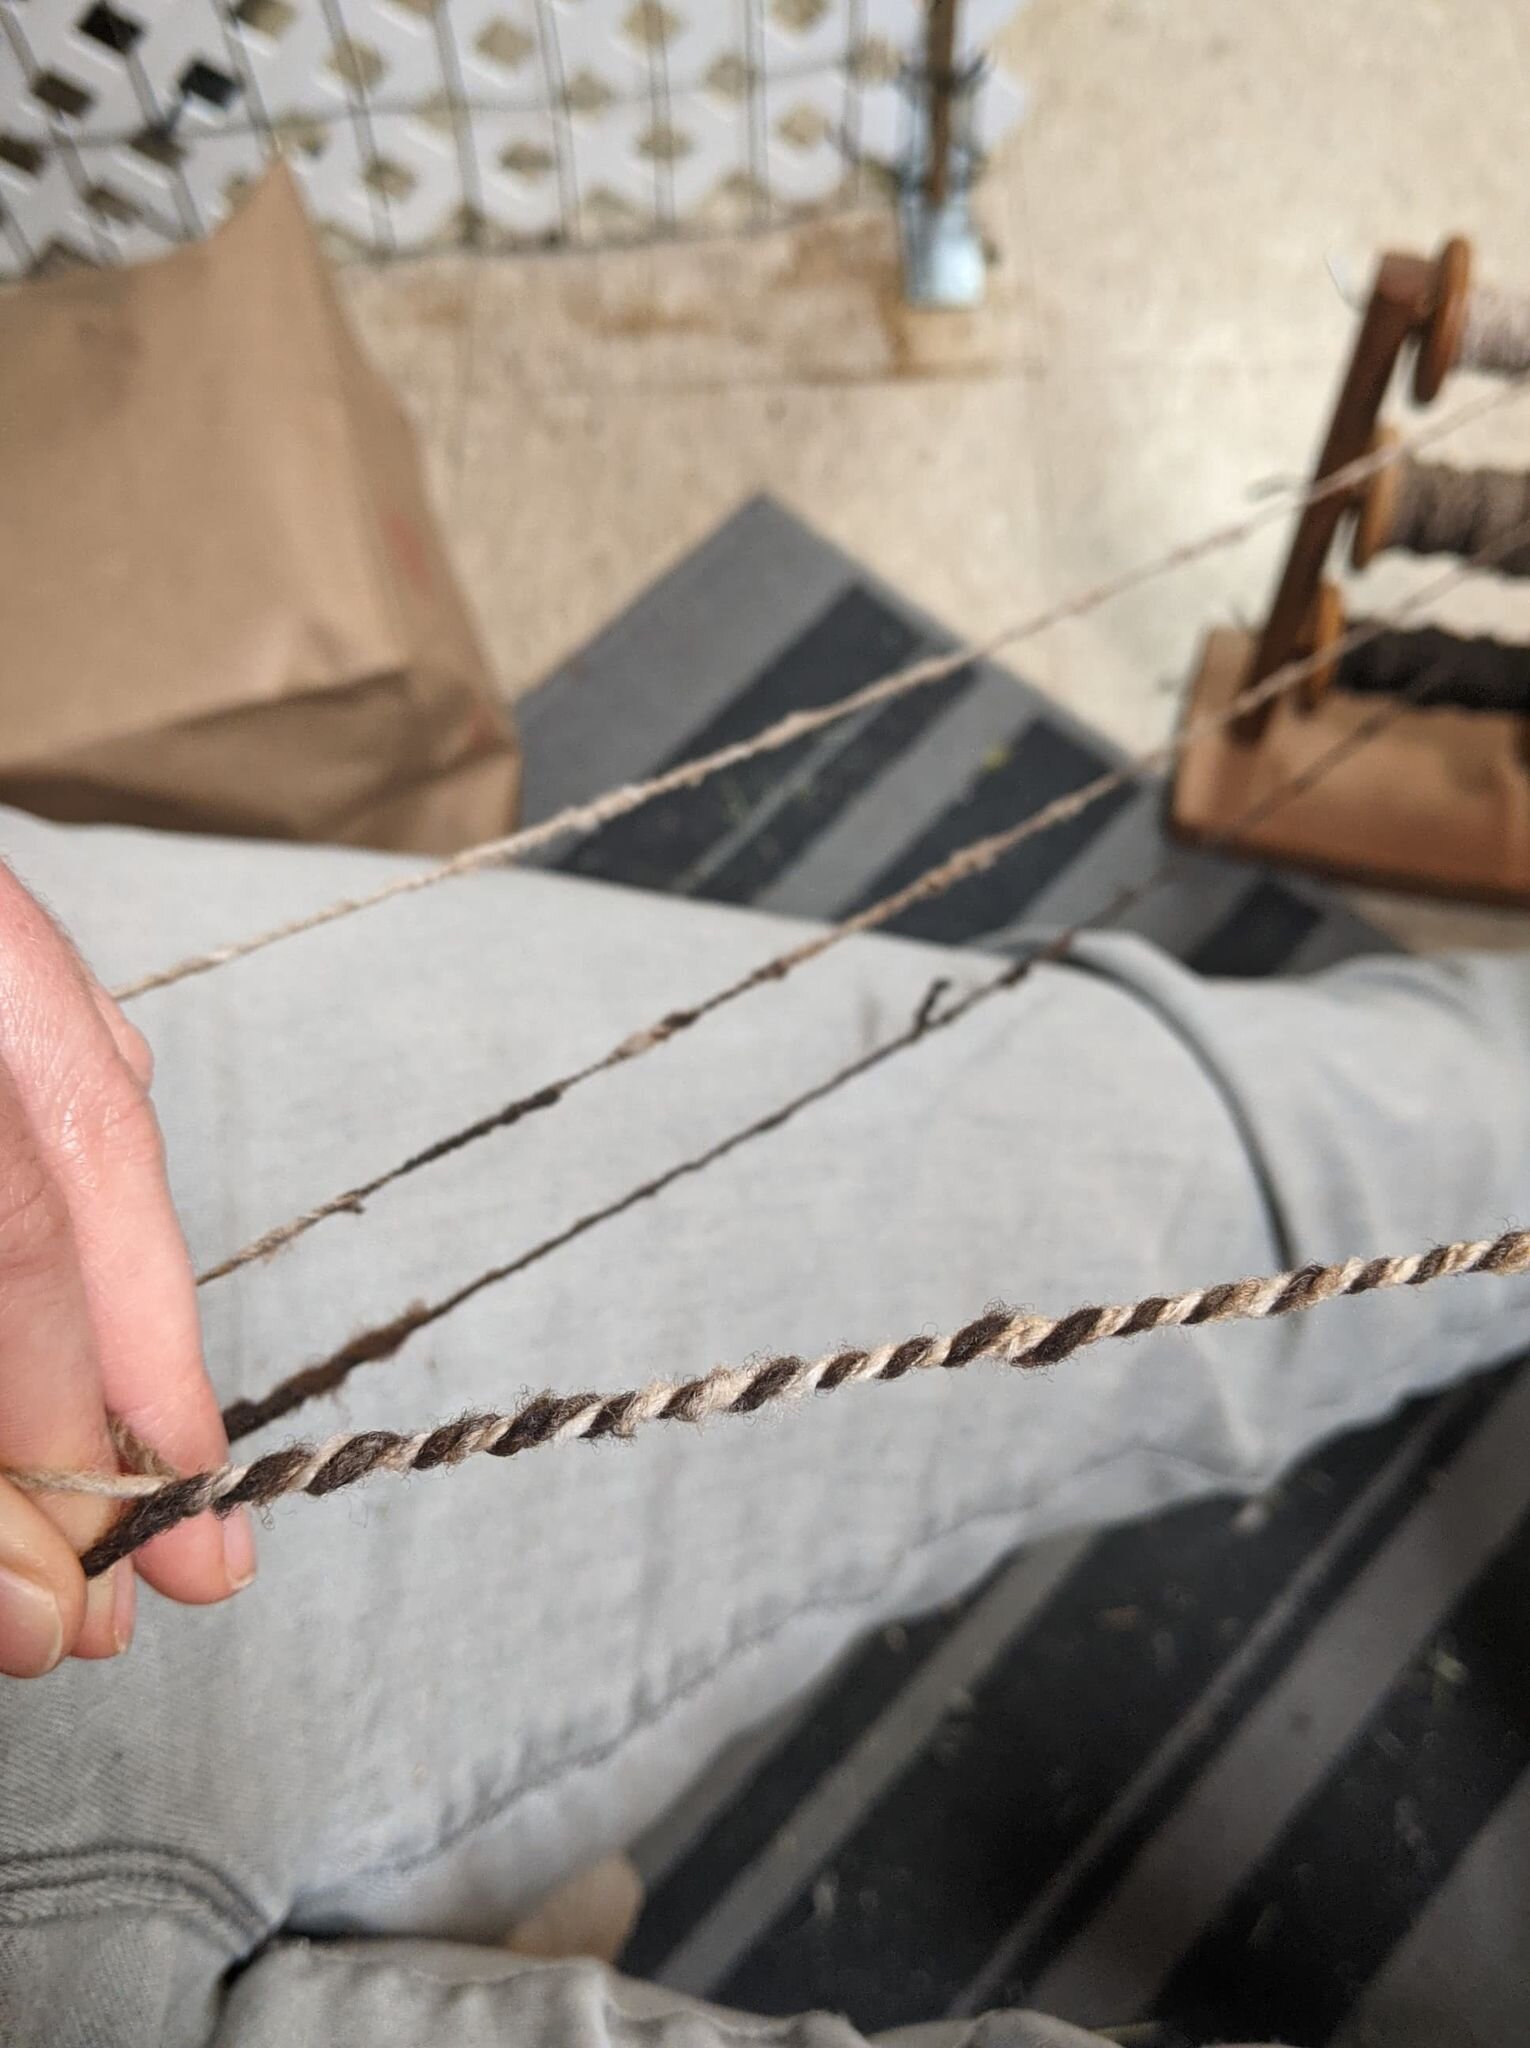
I pulled VM and second cuts out of the thread about every six inches of thread, which slowed down the process significantly, and there are still quite a few lumps. There are thinner sections and thicker sections. However, I decided to spin it on the thicker side as that does help to hide some of the imperfections.
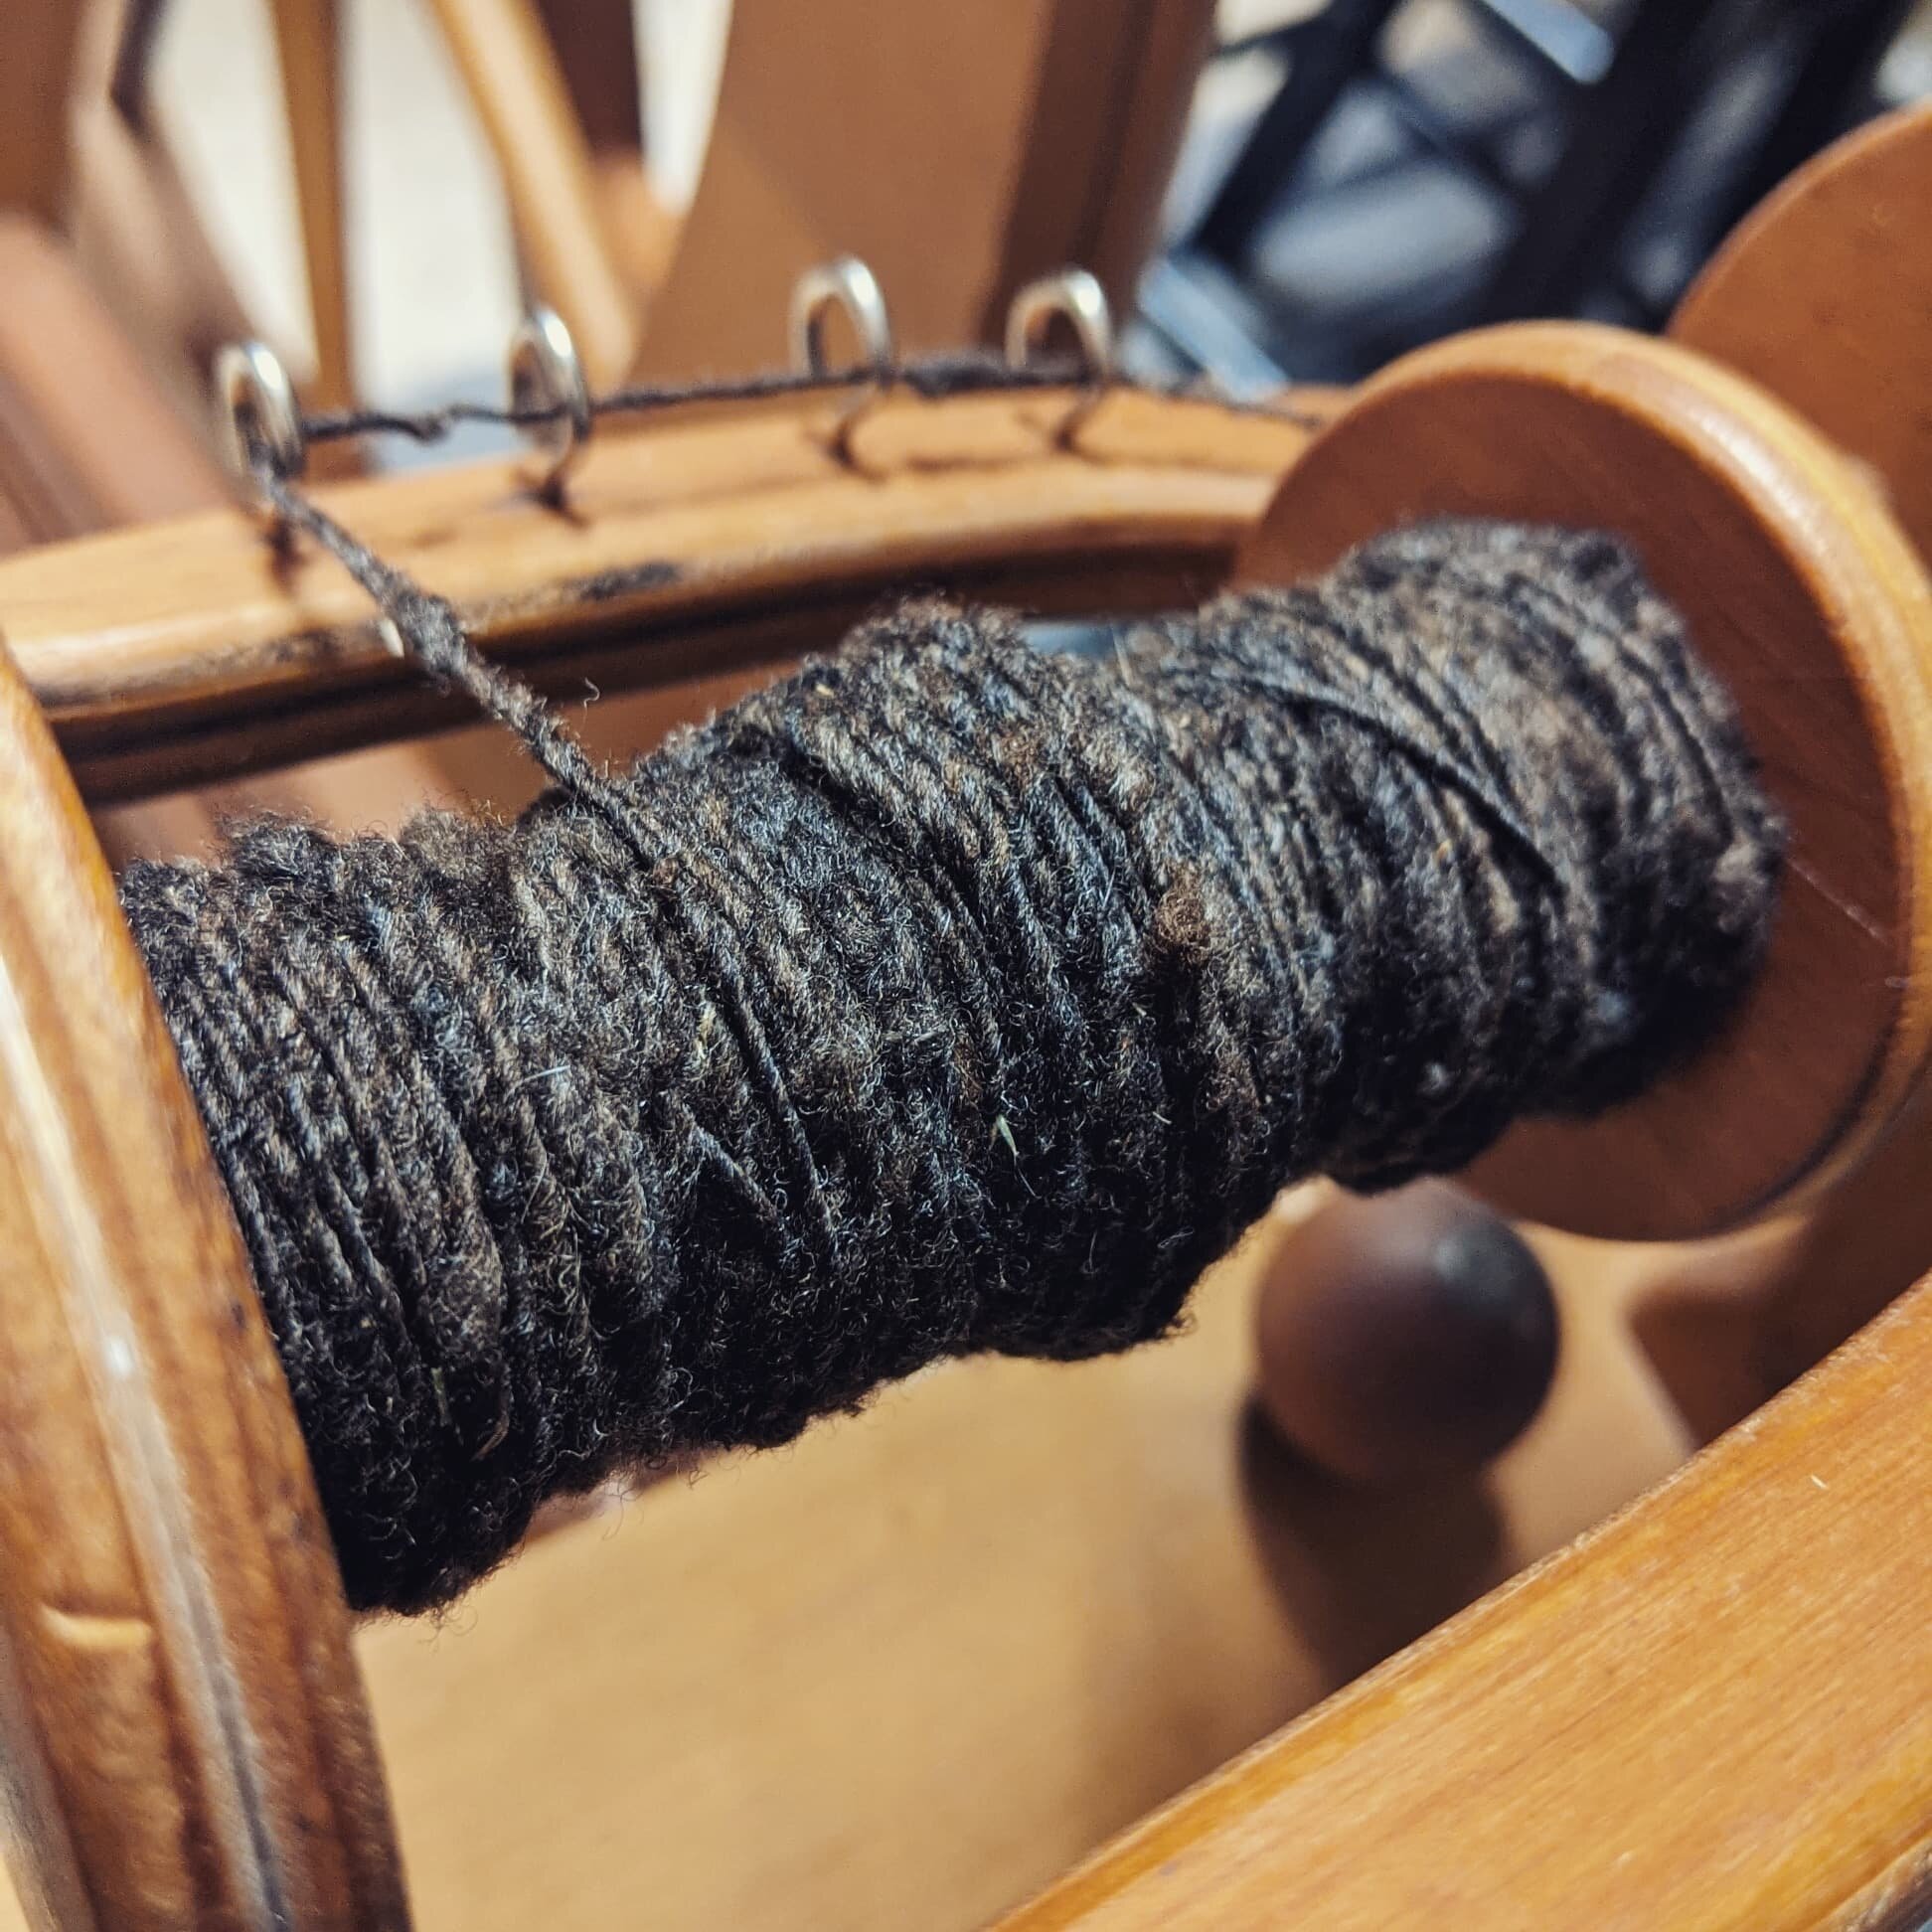
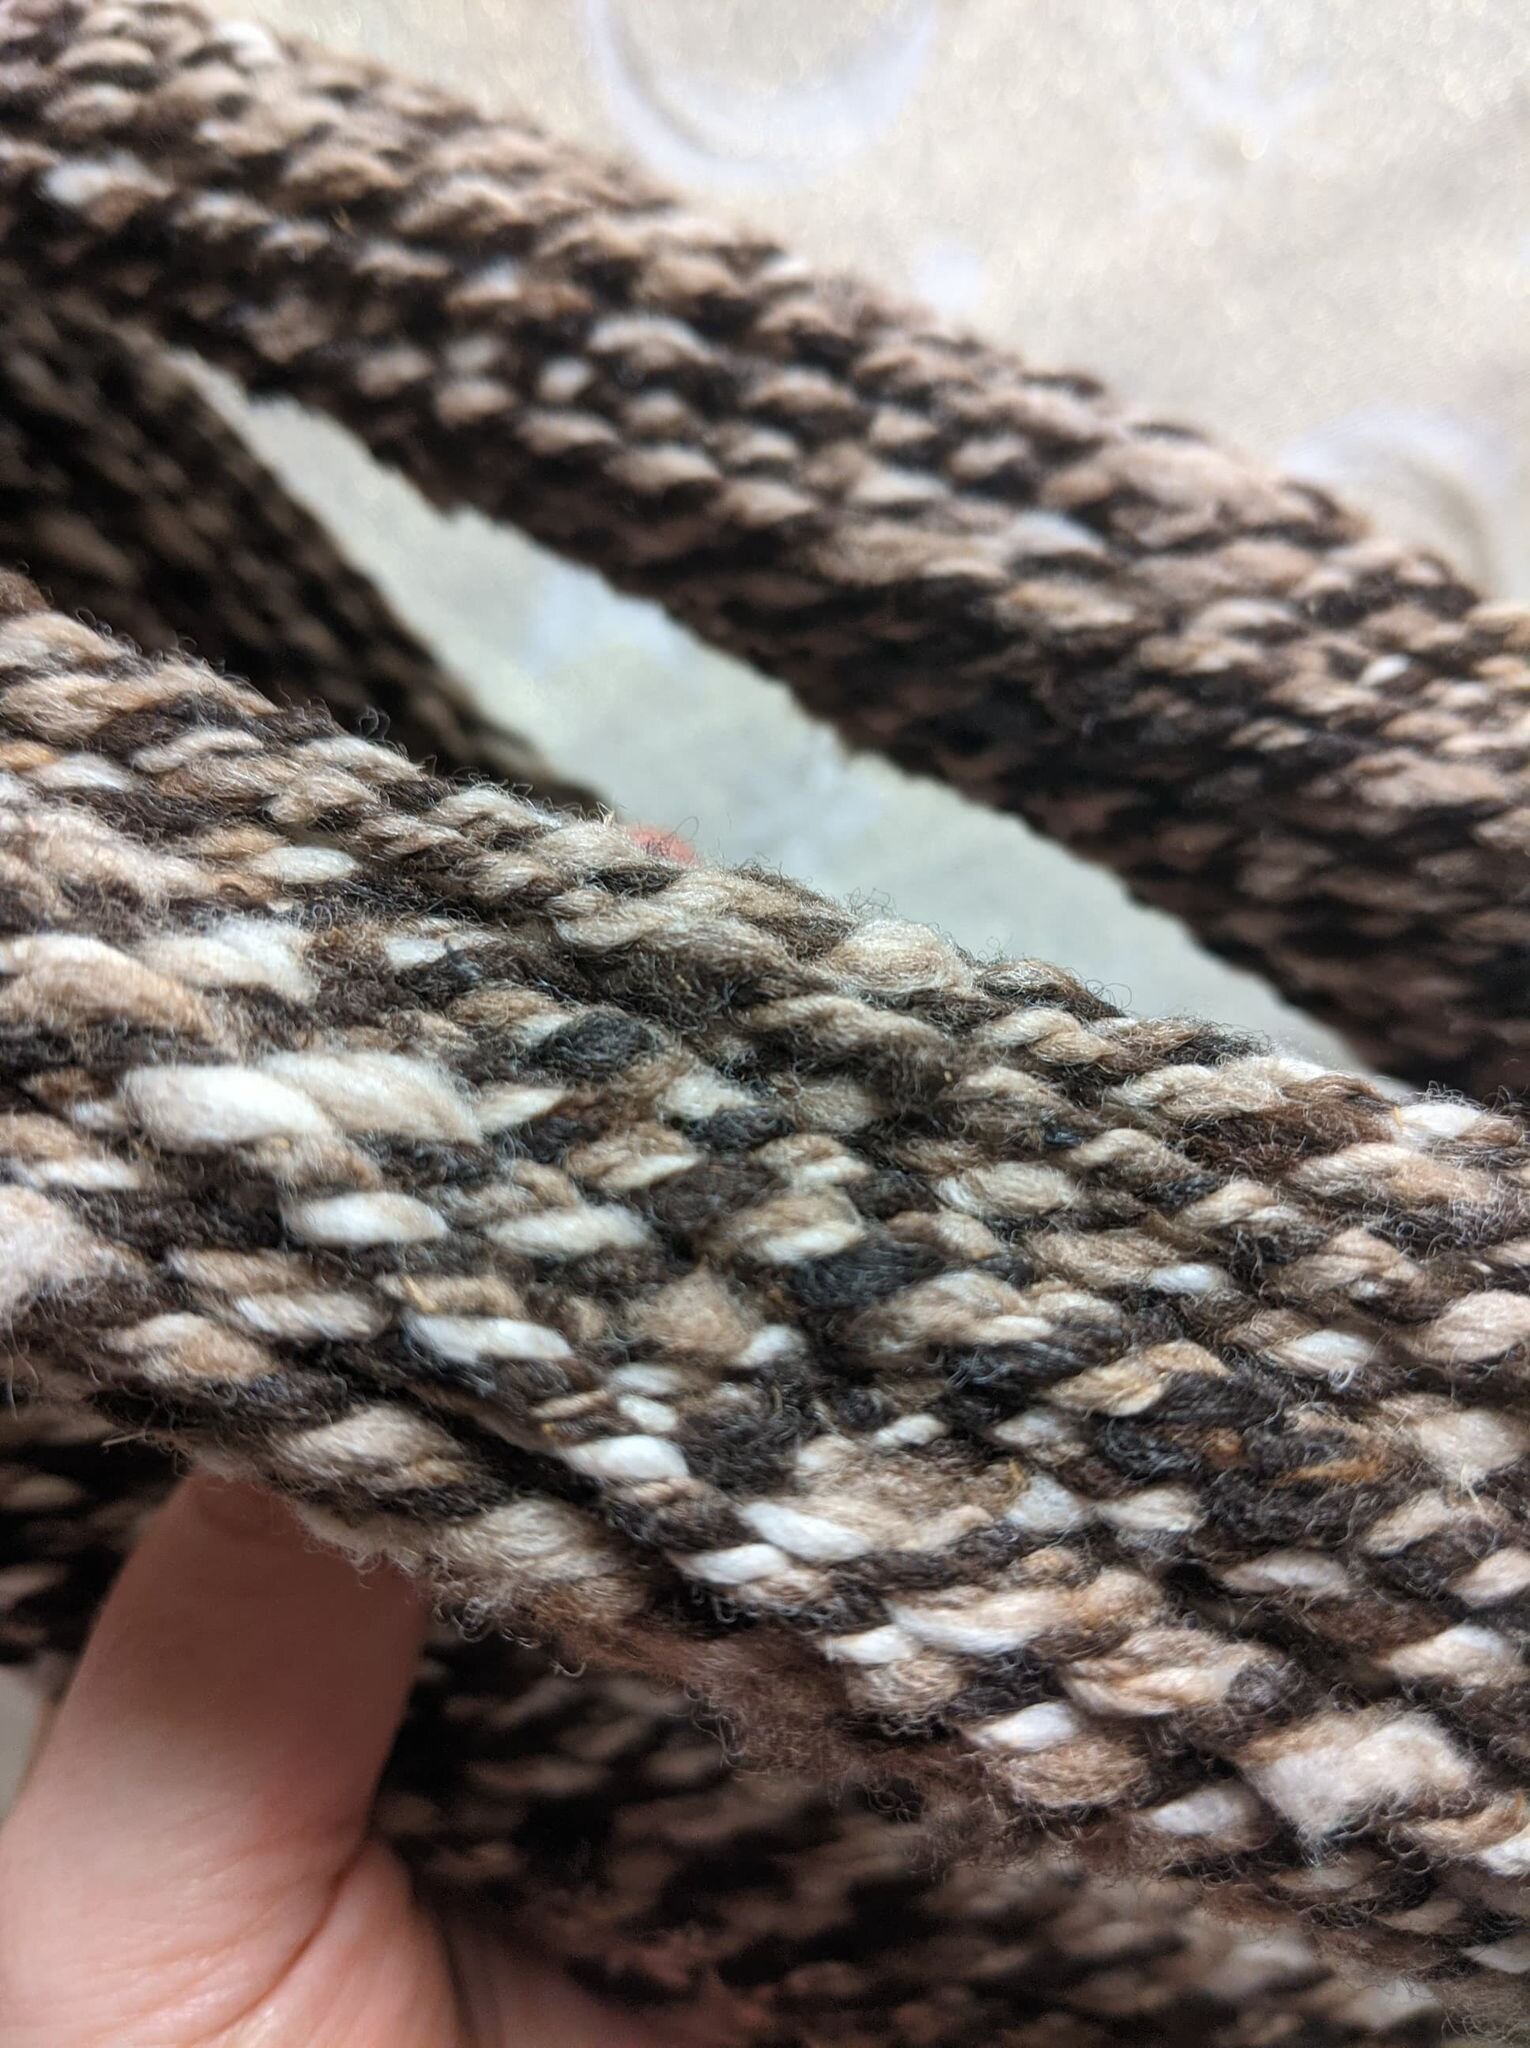
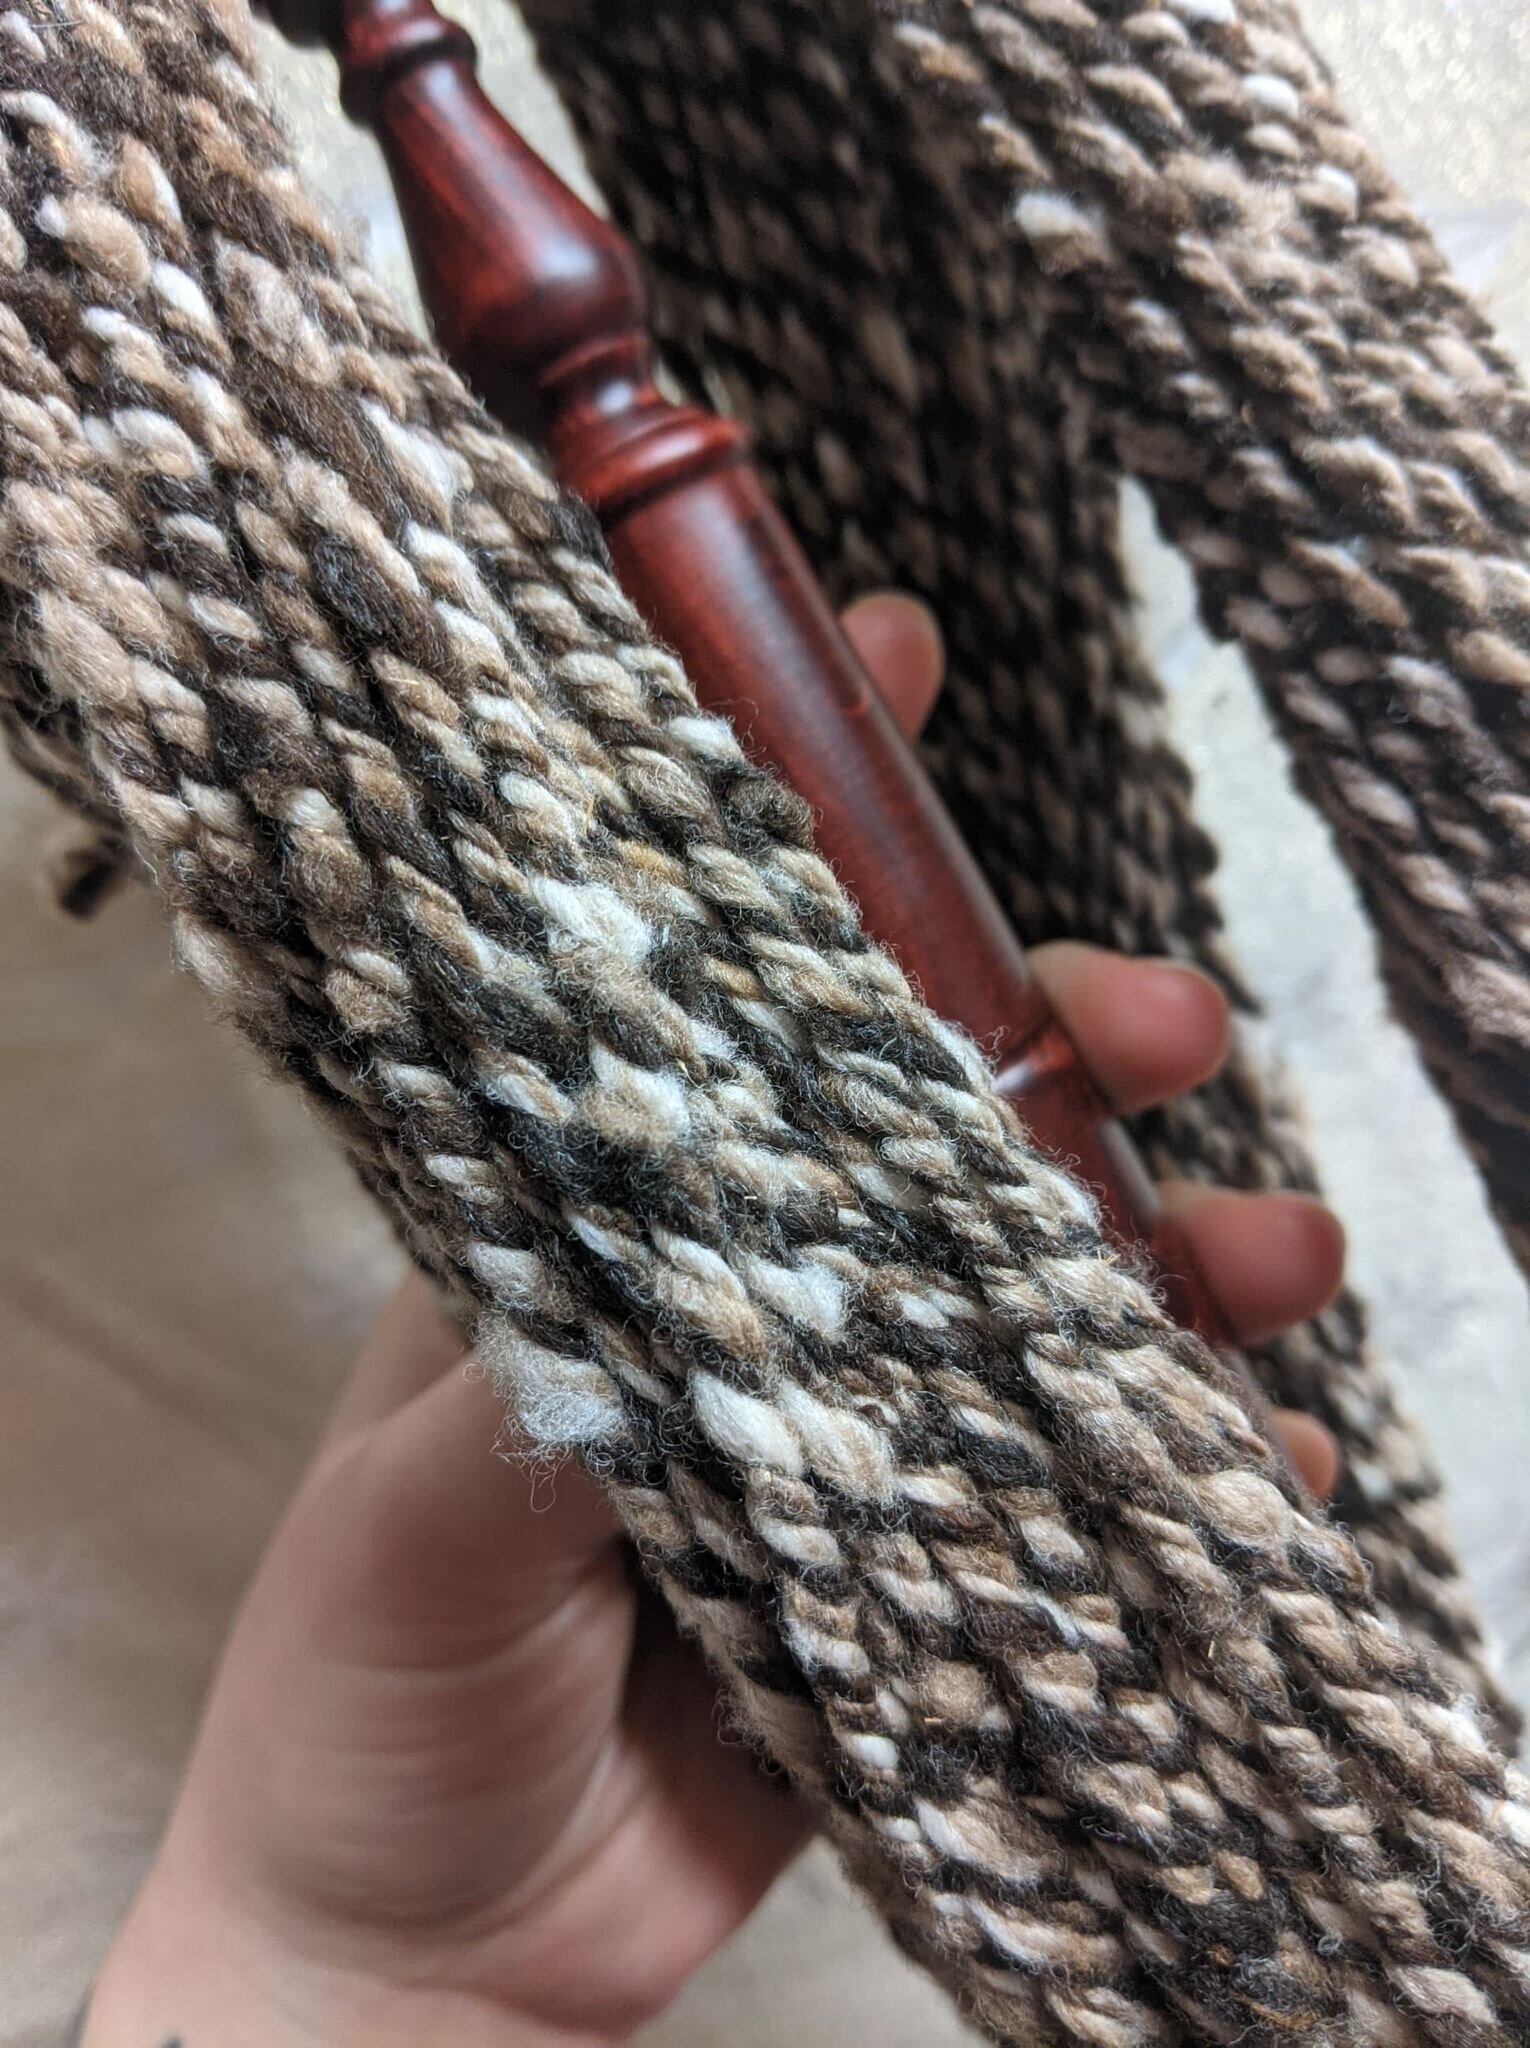
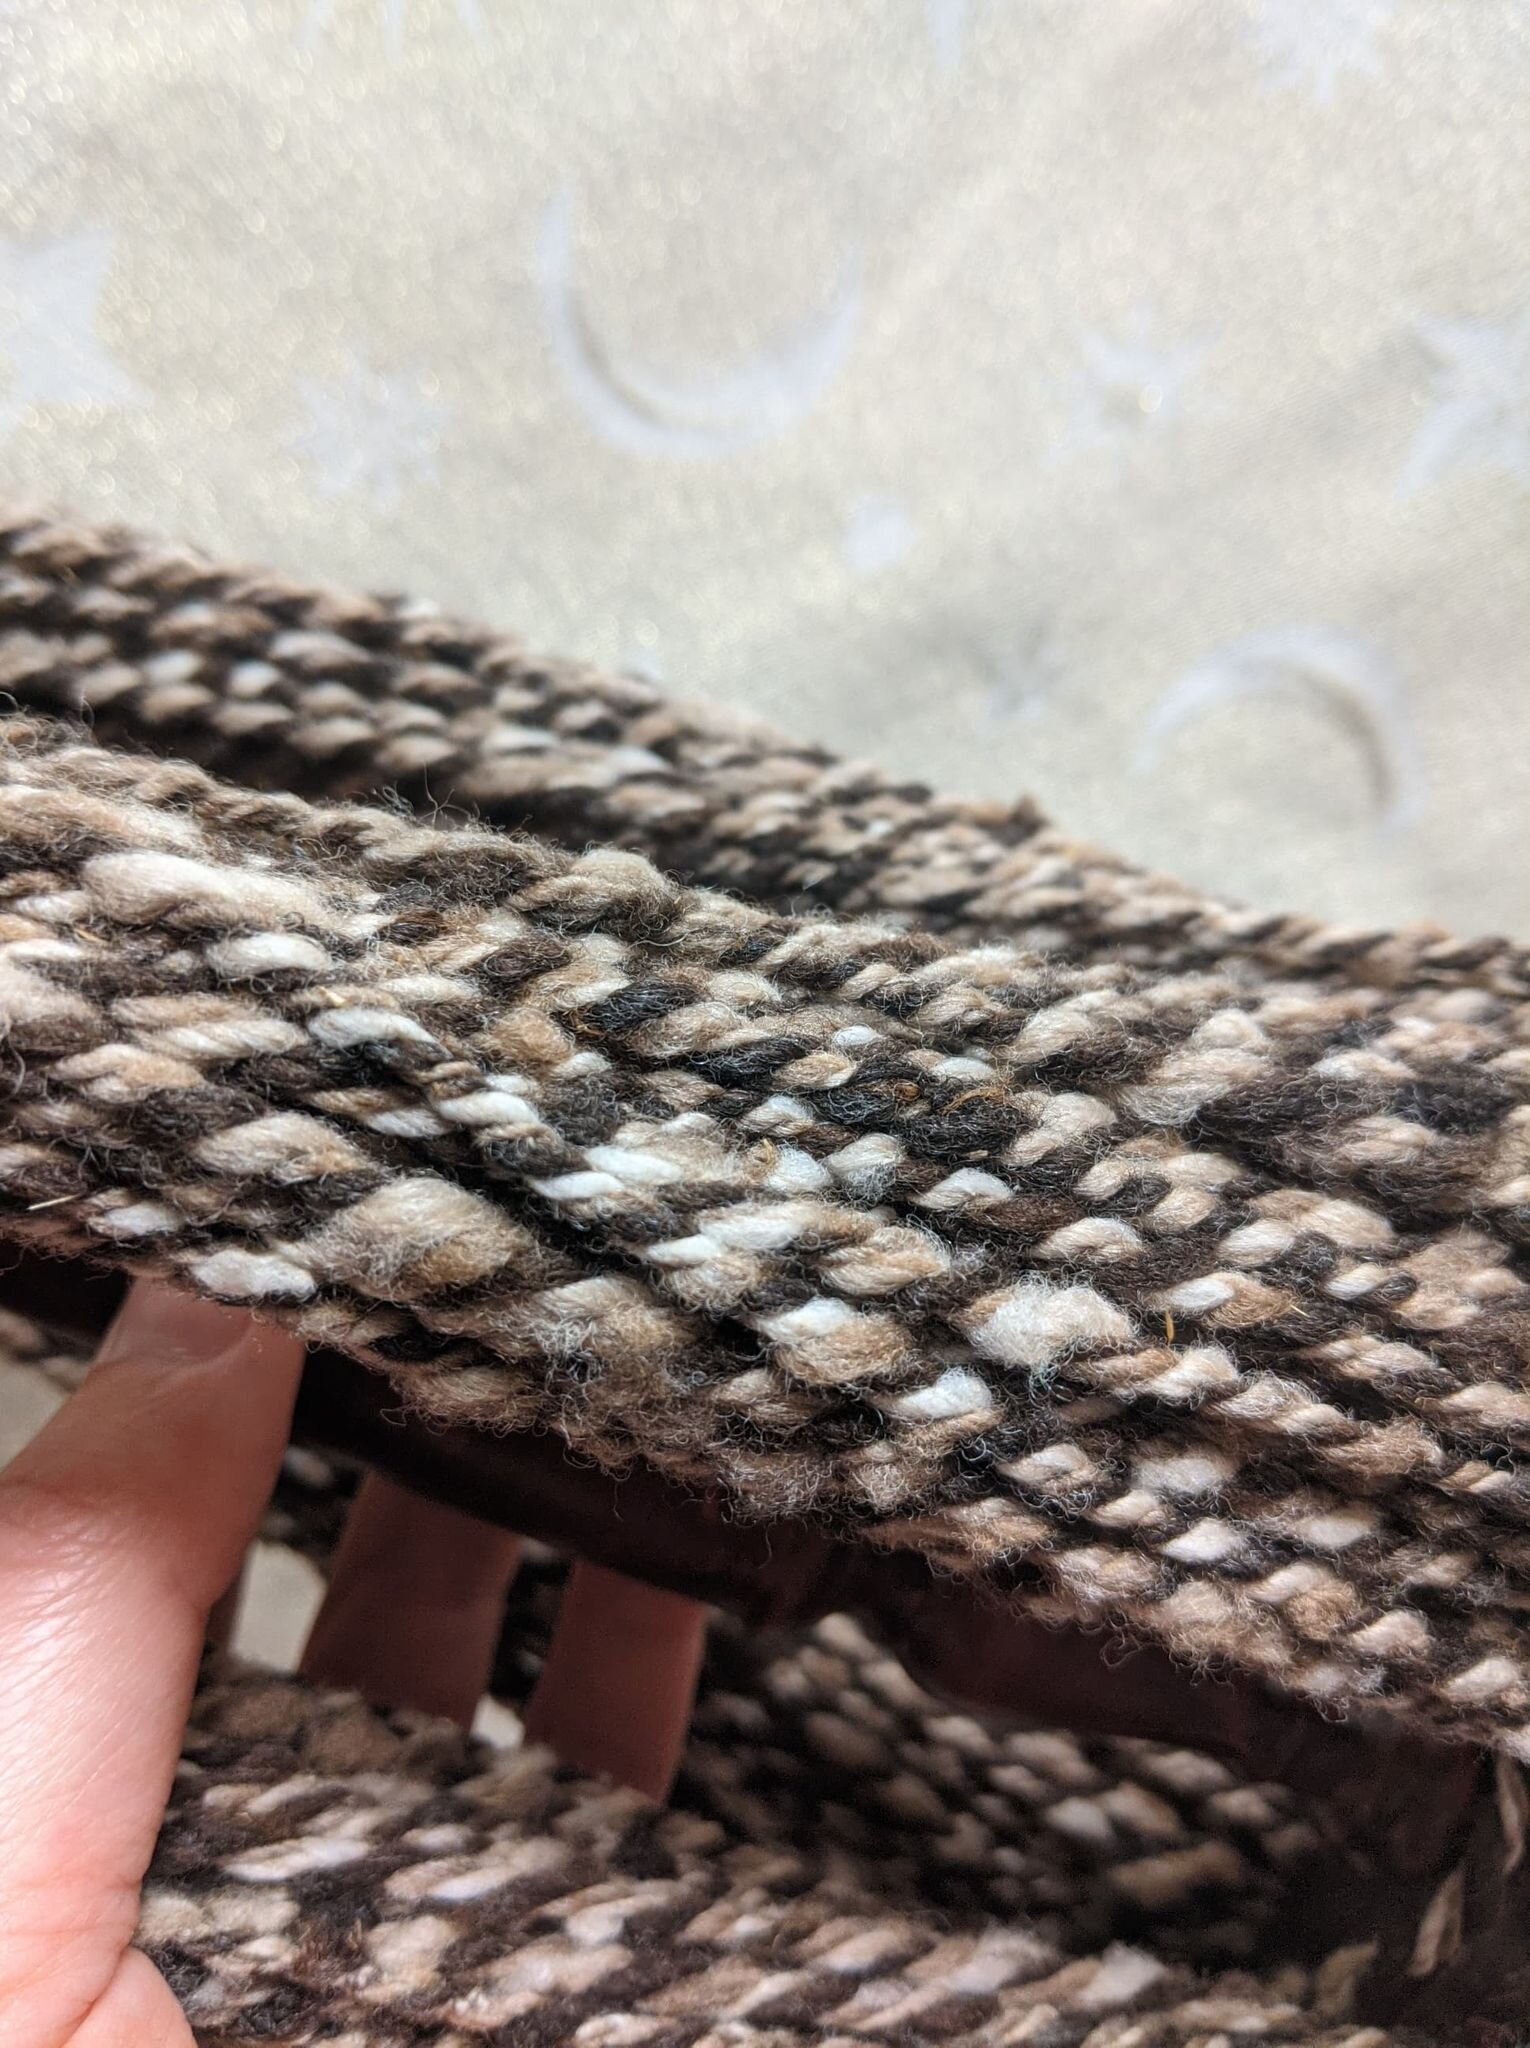
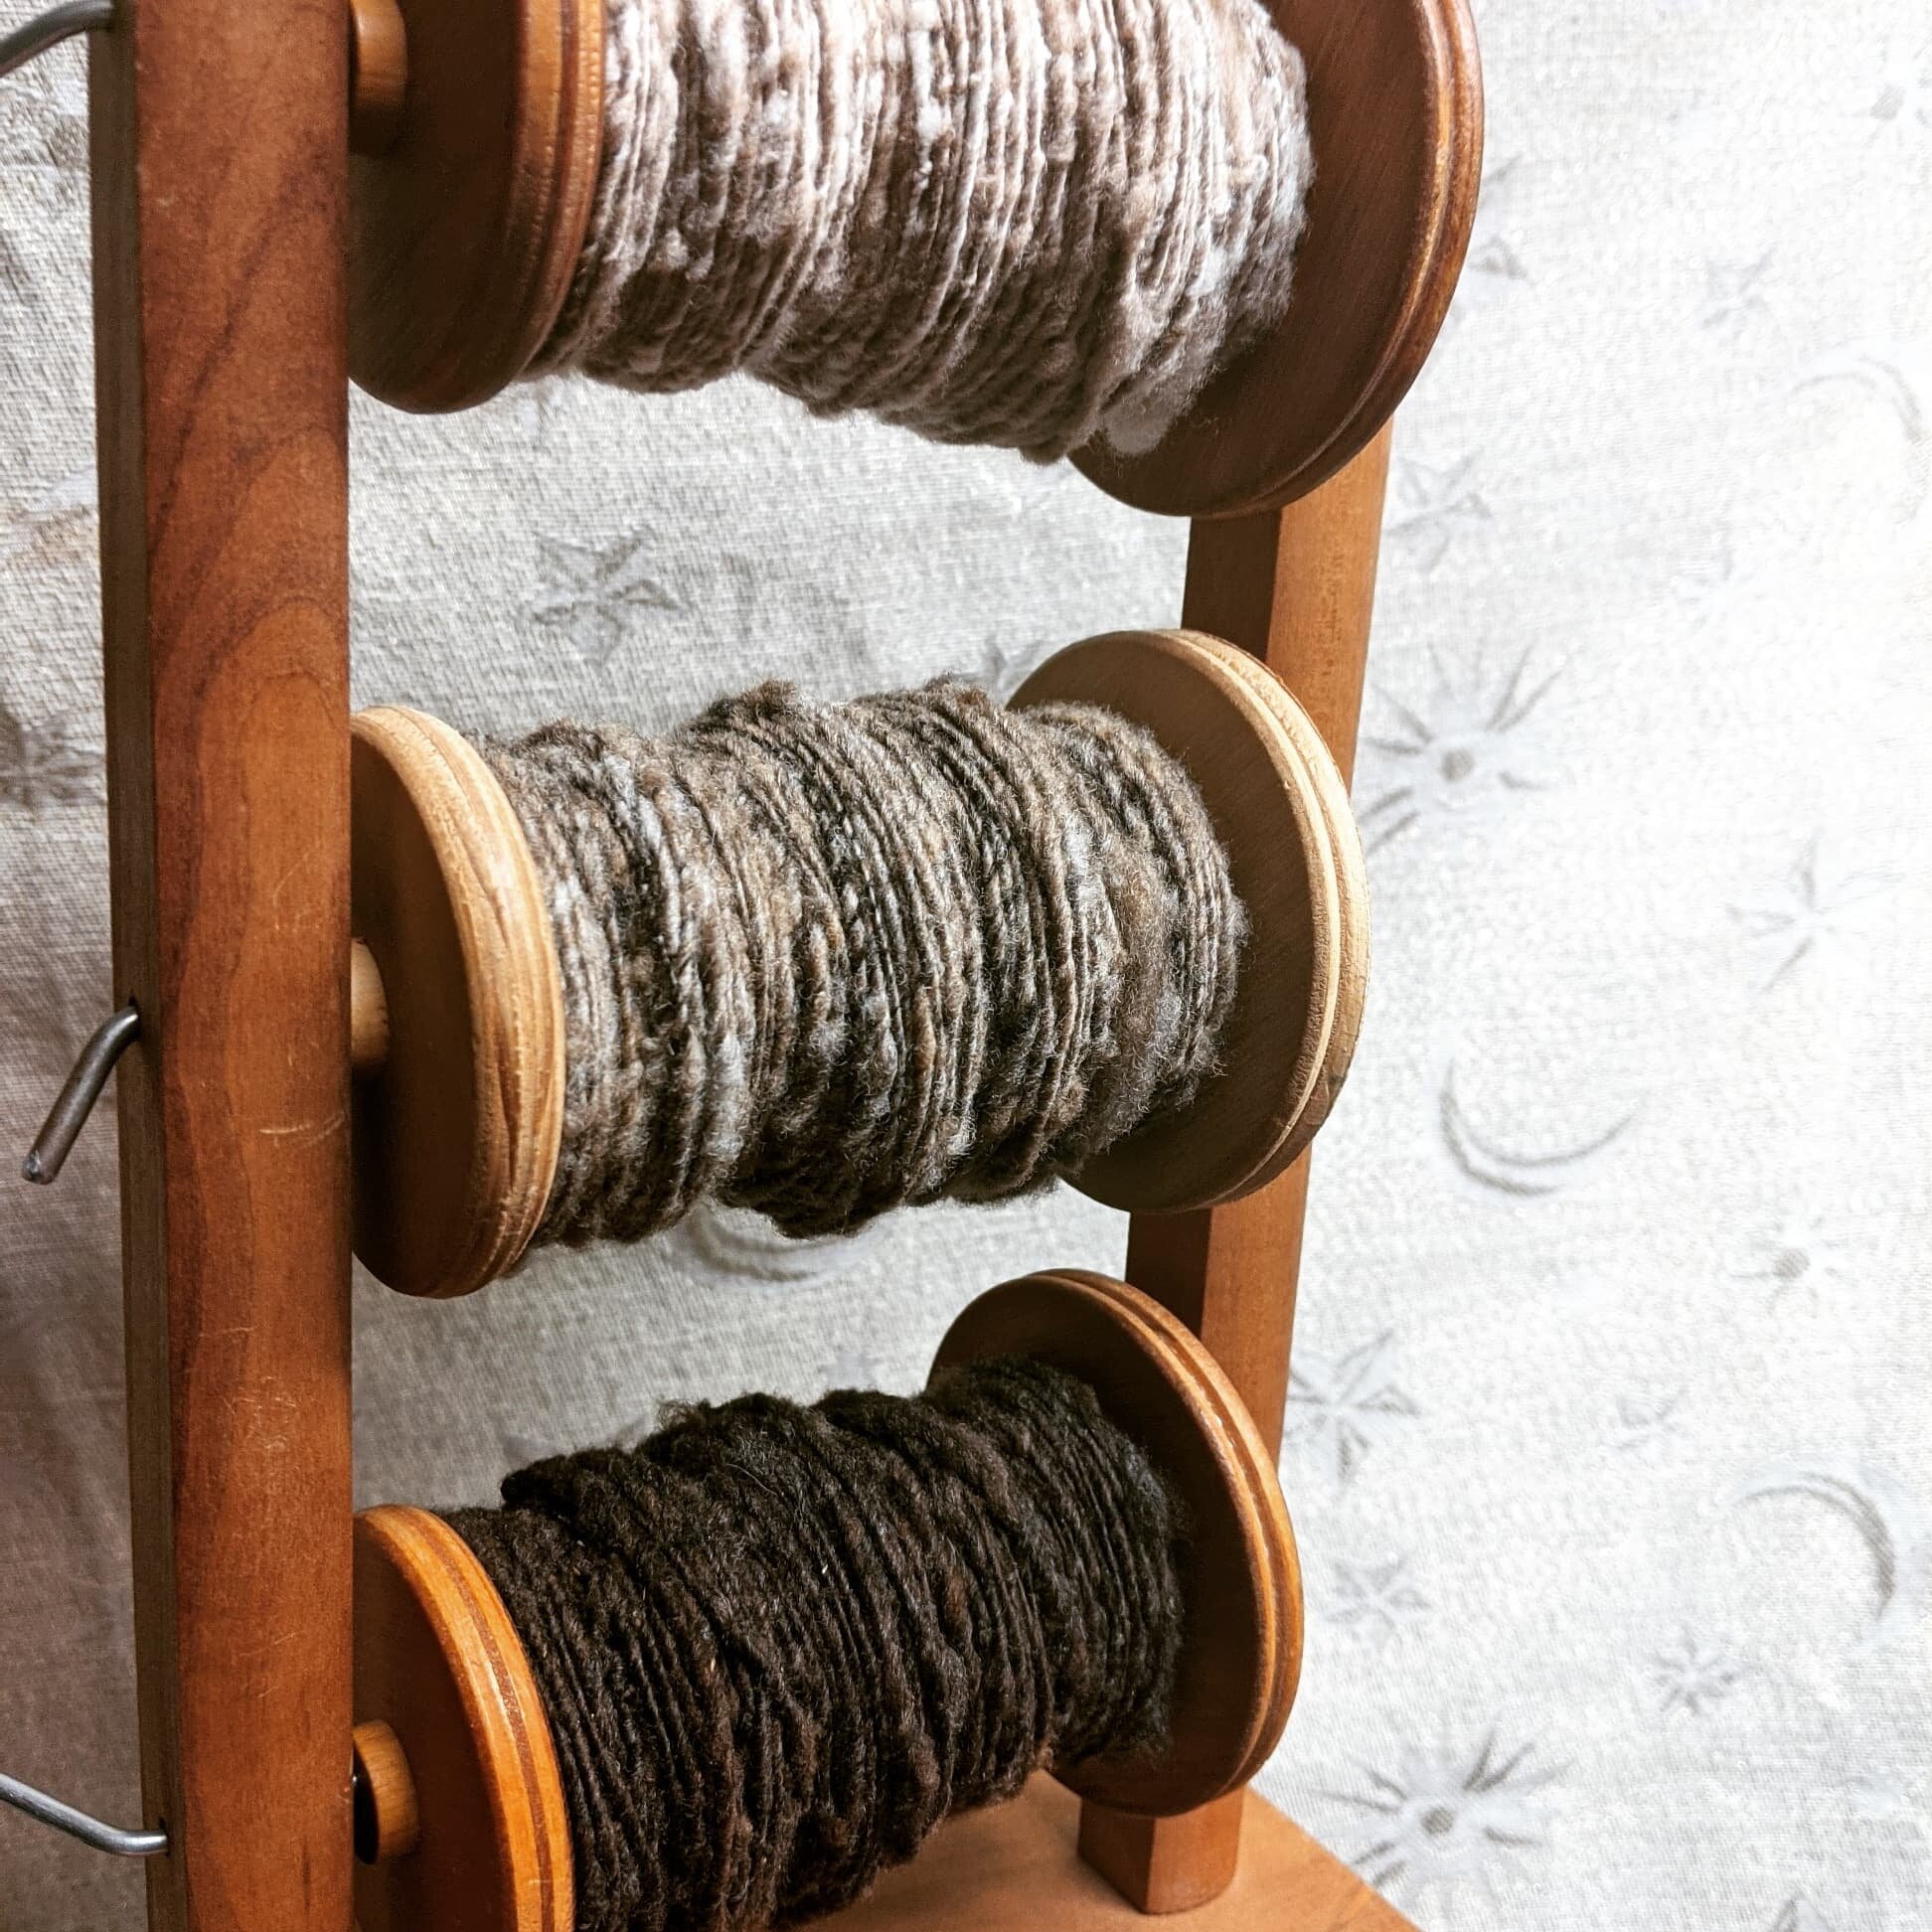
Since I had divided the skirtings into three colors—beige/white, medium brown/gray (also called “moorit”), and dark black/brown—I decided to spin them up on separate bobbins so I could ply them that way. I wanted to show off the natural colors of the sheep’s wool with color blends and variations in each strand.
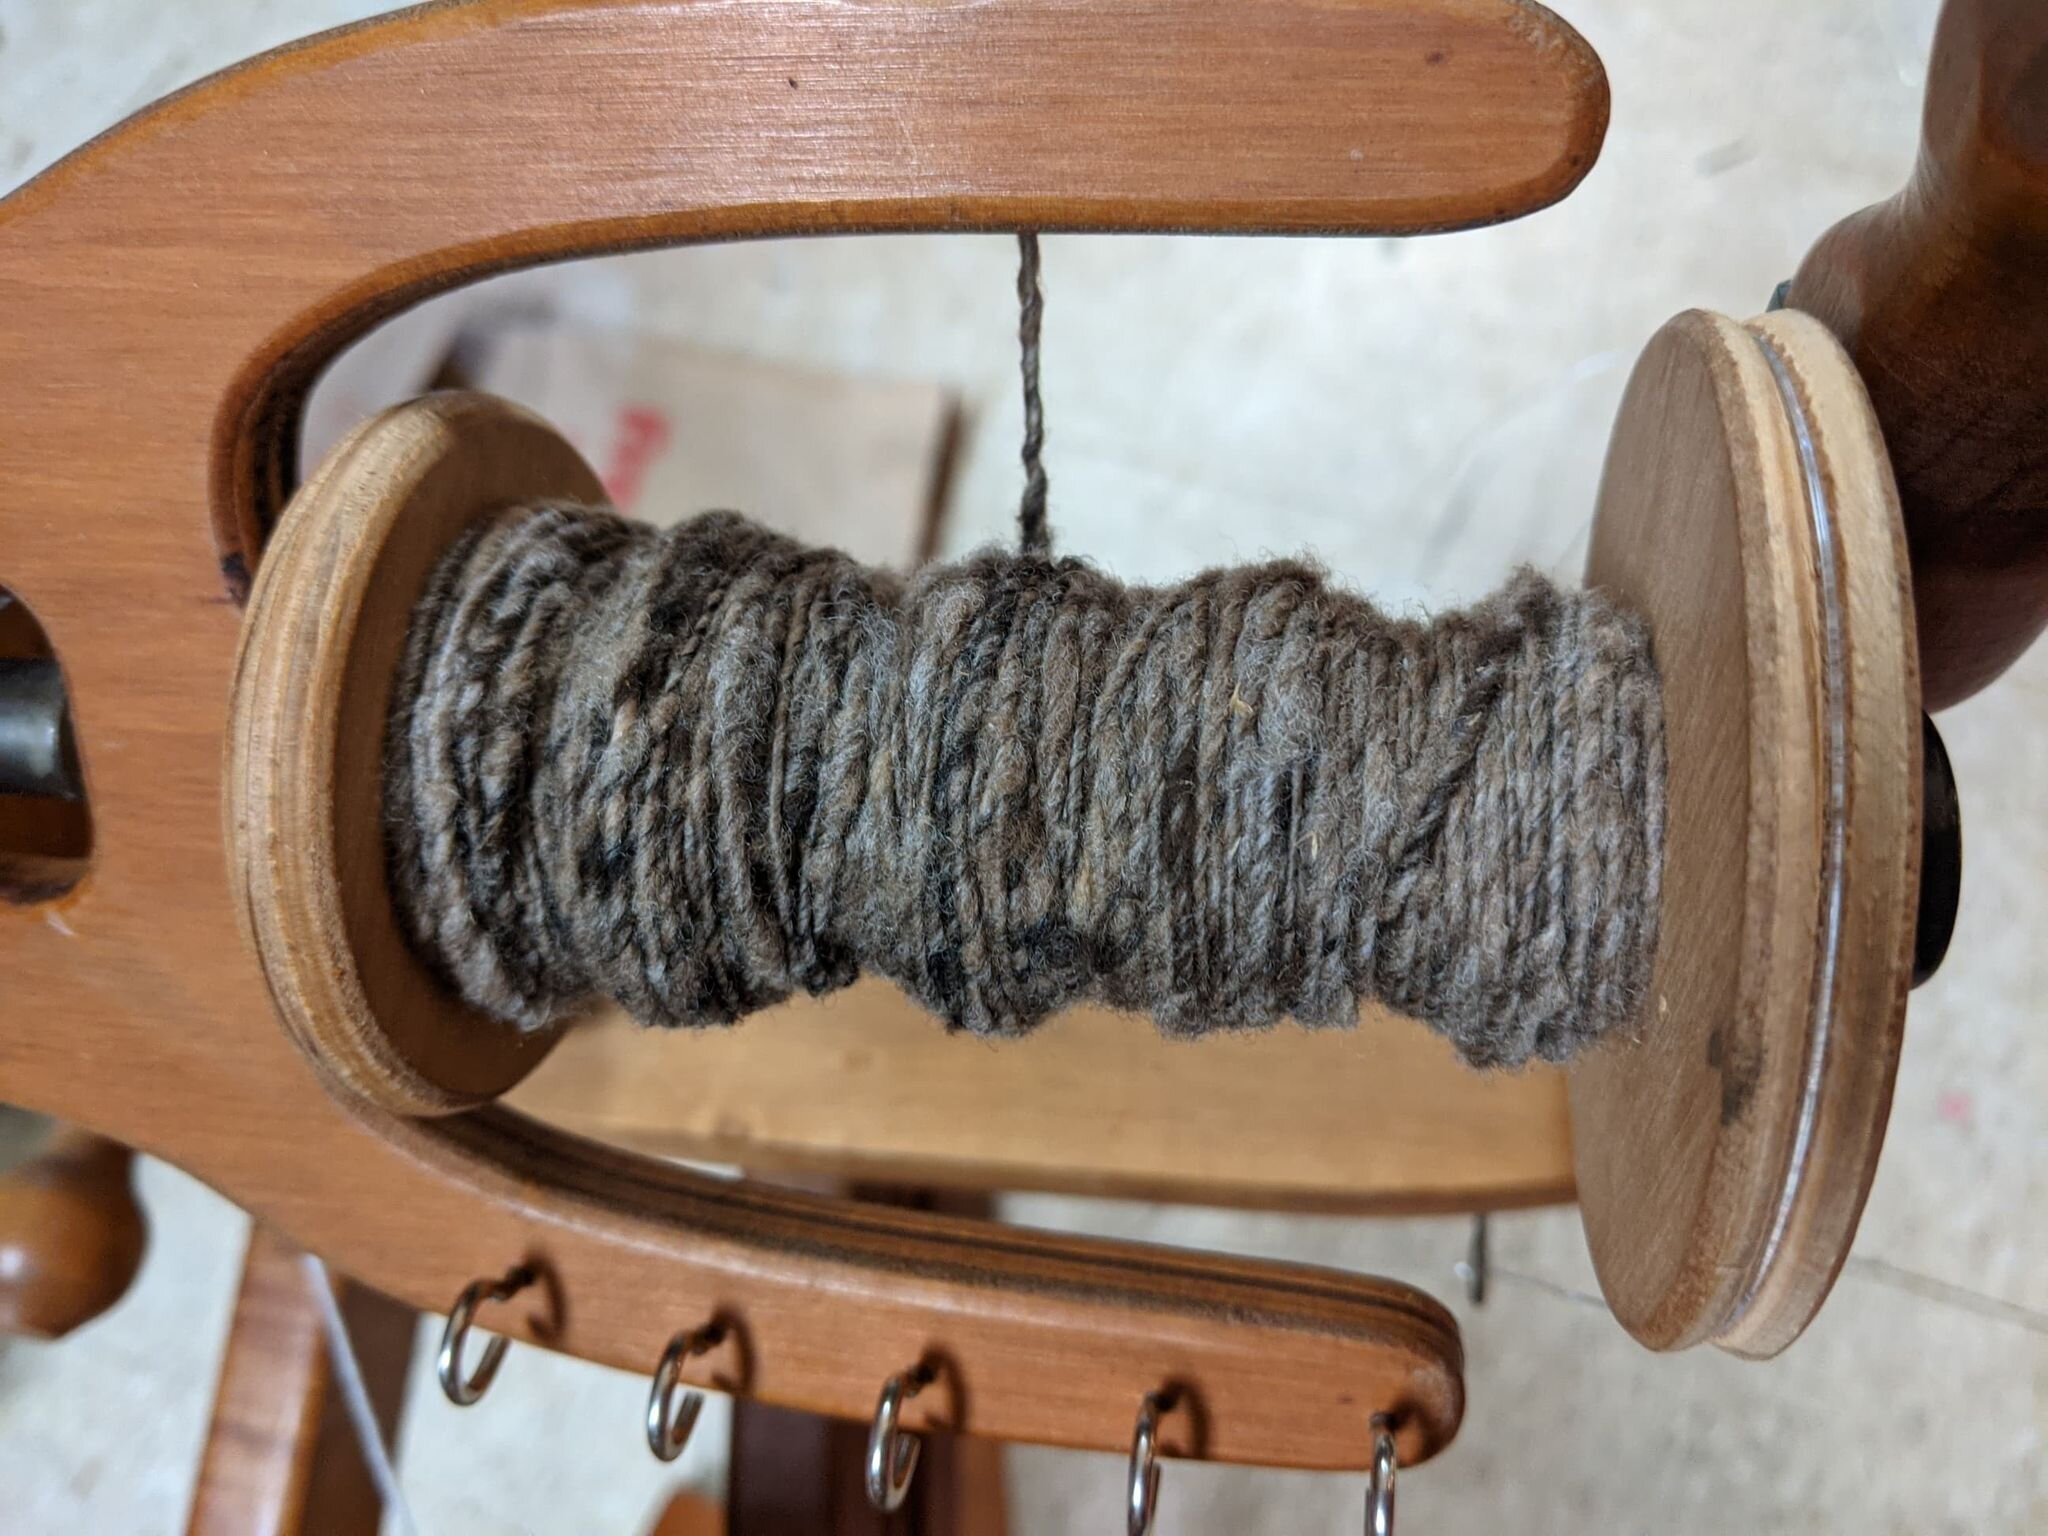
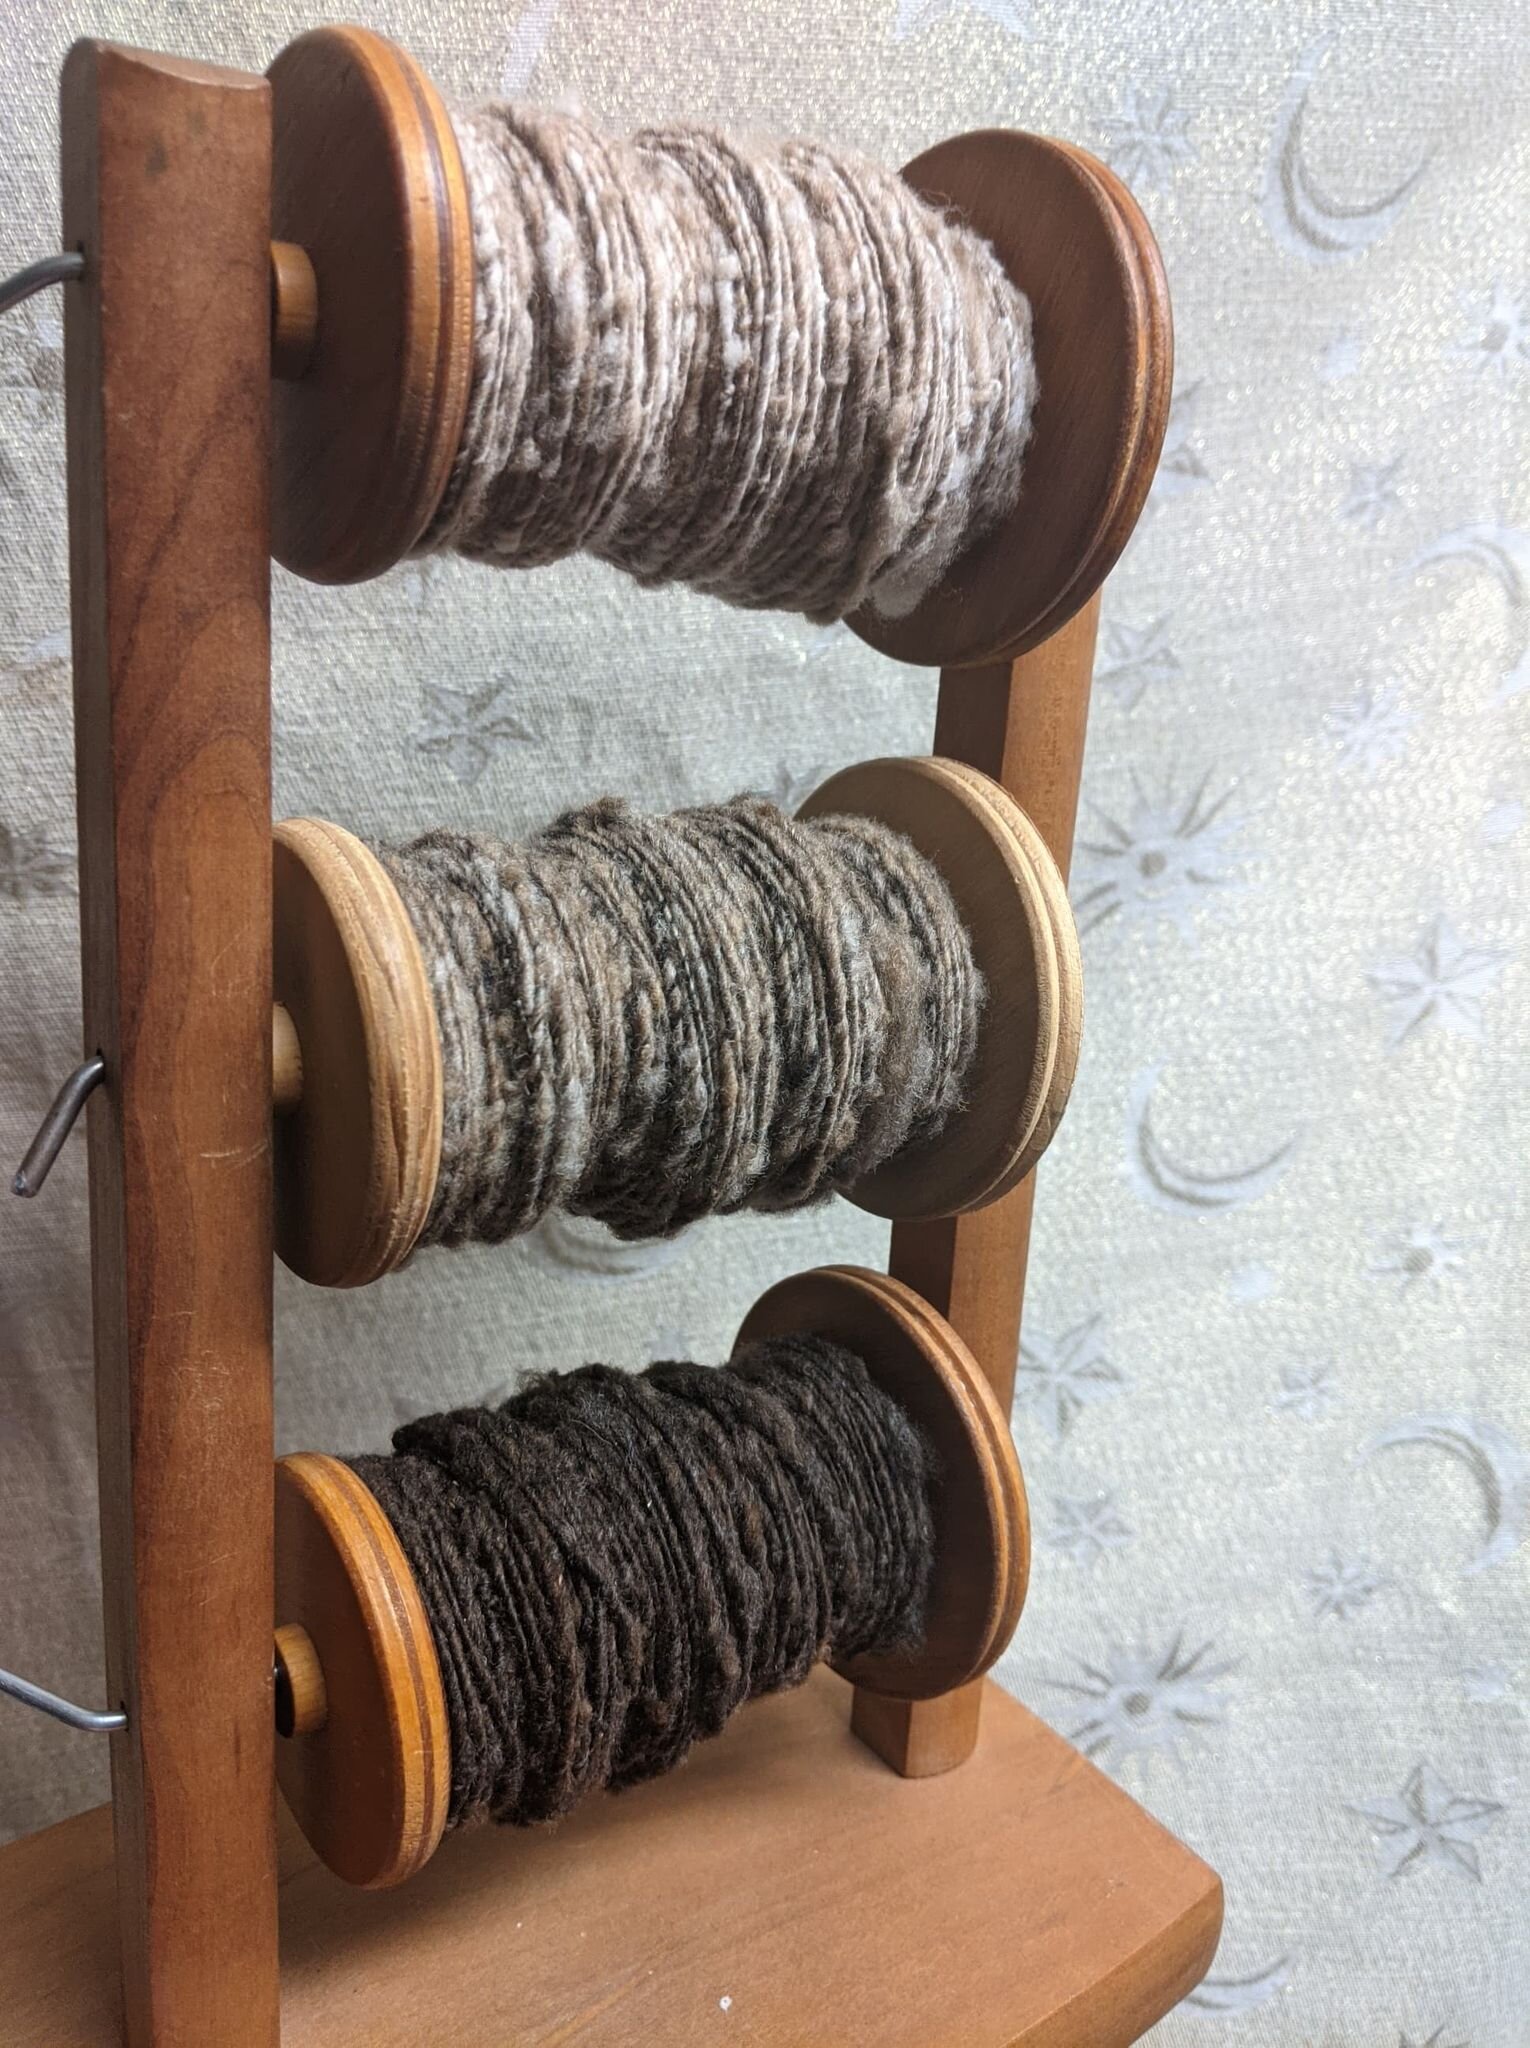
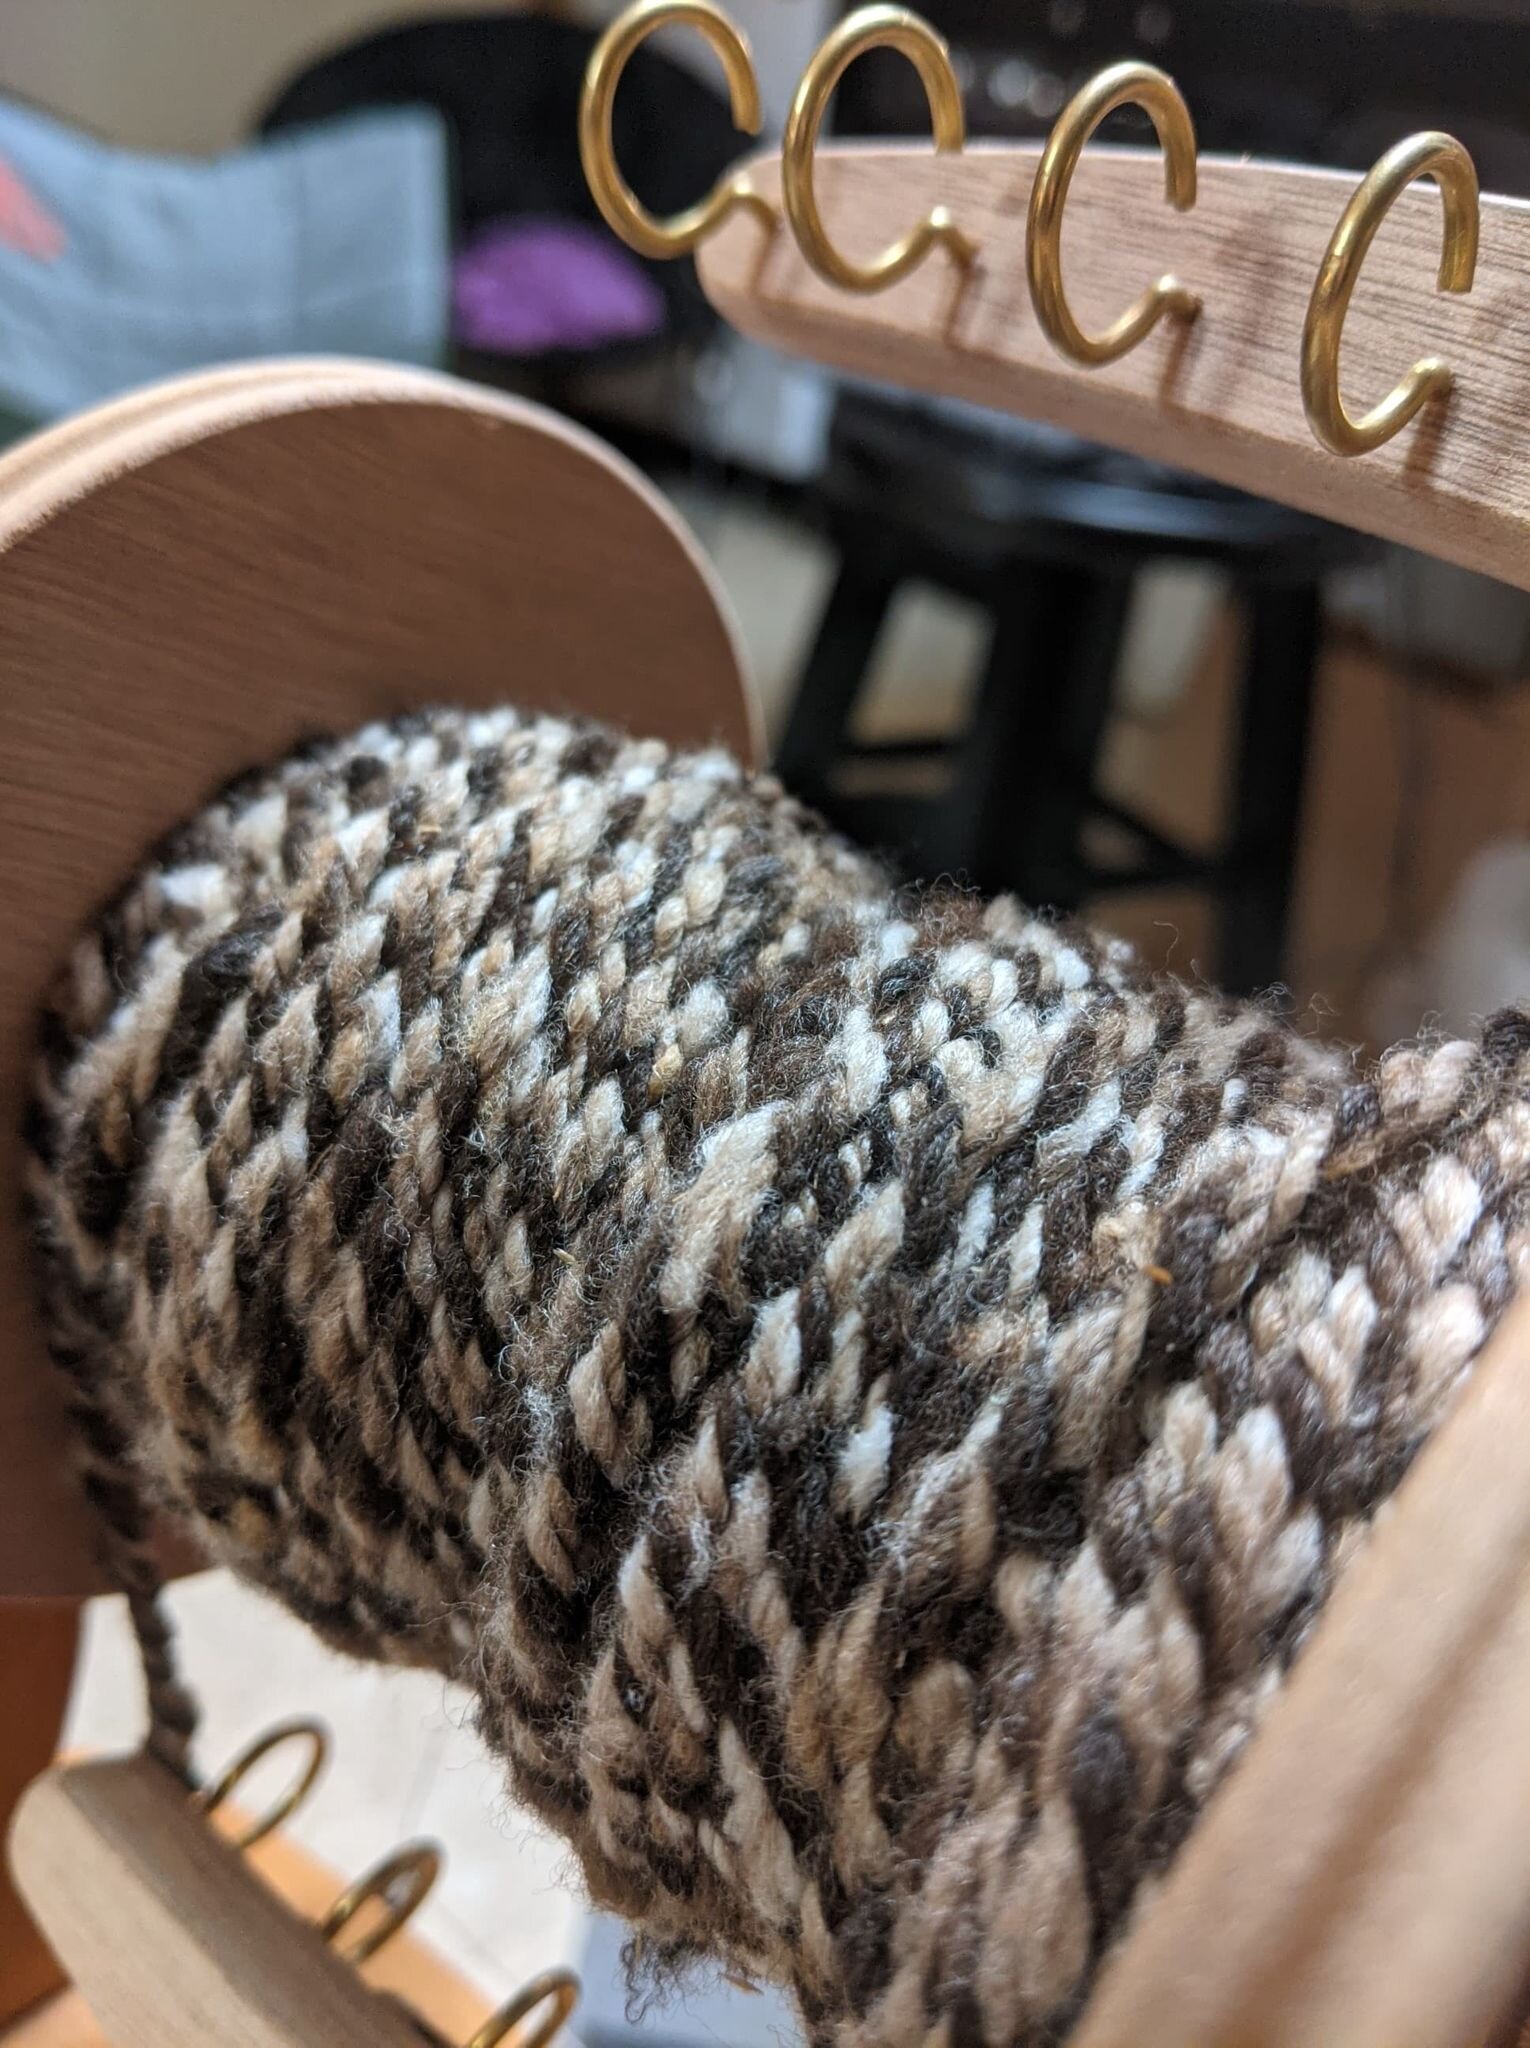
Plying is the process of twisting two or more strands of spun fiber together to give strength and texture to the yarn. While spinning twists a strand one direction (I go clockwise), plying spins multiple strands the opposite direction (so counter-clockwise for me), which preserves the initial twist. Two-ply yarn is best for lace crocheting and knitting as it emphasizes any holes in the project. Three-ply makes a more rounded yarn and is best for denser projects. Whenever possible, I make yarn based on the behavior and style of the fibers, not based on what I want to make with it, and three-ply made the most sense for these skirtings. Plying also helps hide imperfections, as you can see below.

It is recommended that you let your strands “rest” overnight before plying them together, especially if each bobbin was spun on a different day. I spun up my roving over the course of a few weeks in 3-4 hour-long sessions of spinning per bobbin. With higher quality fiber, fewer second cuts, and better preparation, I can usually spin up a bobbin in about two hours.
In plying this yarn, it very quickly began to look like s’mores to me. I’m not sure why all the yarn I make looks like dessert, but I’m not complaining! The plying process really transforms the yarn and gives it character.
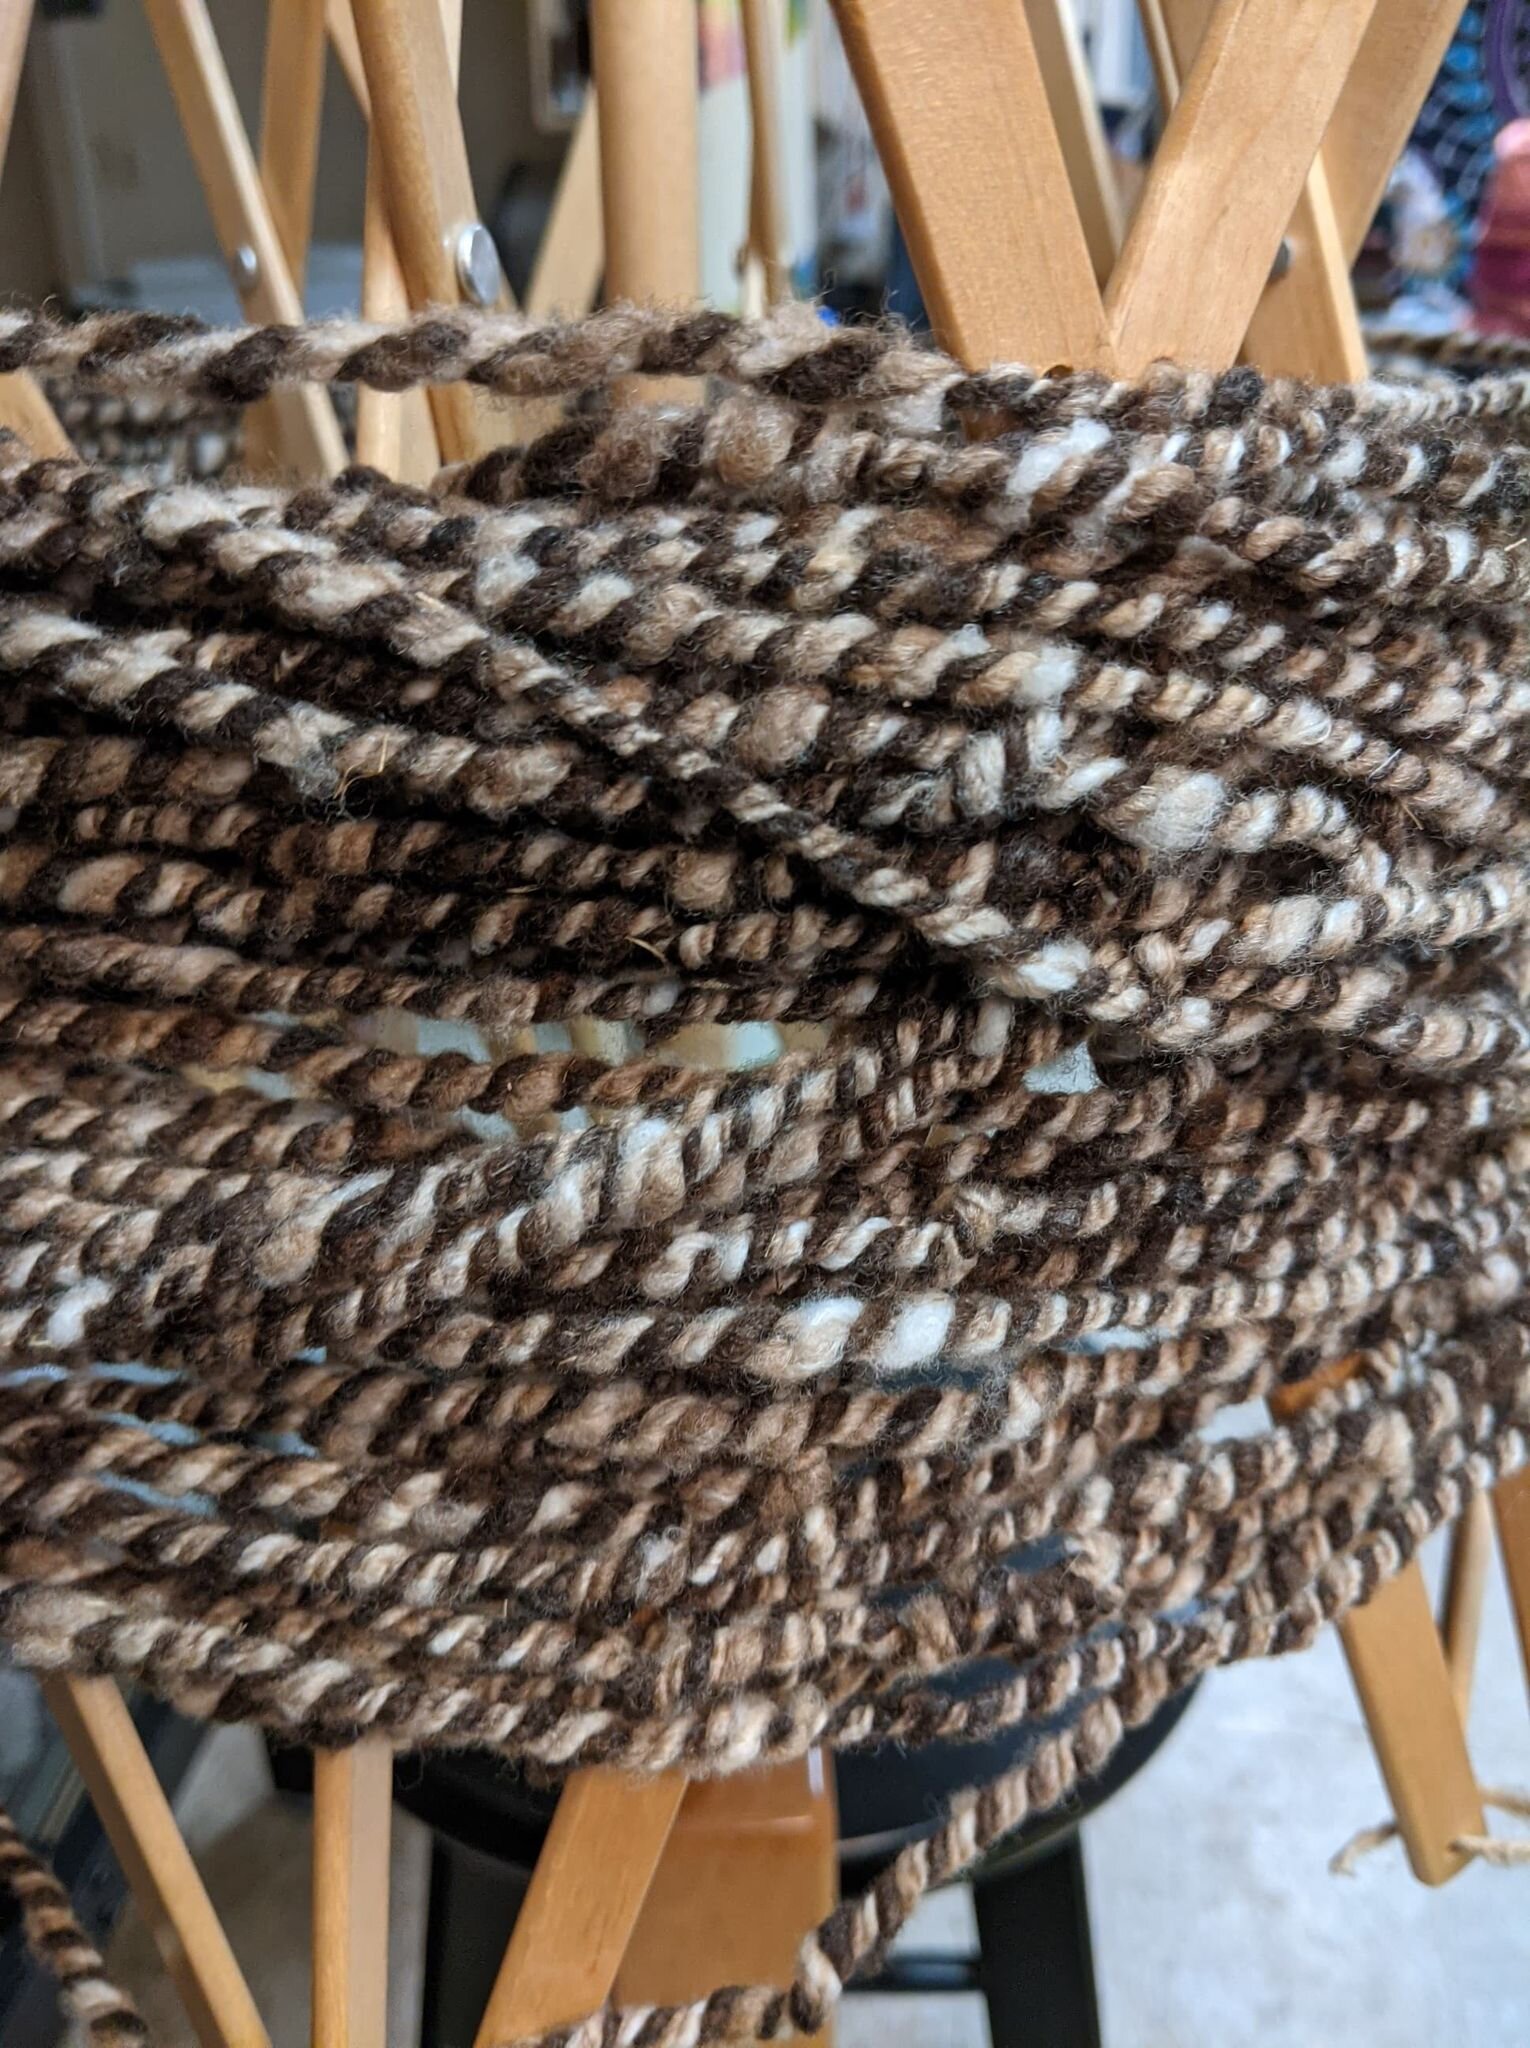
Step 7: Setting the Twist and Drying Again (overnight)
To “set” the twist, I wet the yarn, first winding the yarn onto a niddy-noddy to measure yardage and create a hank, which I then tie off so the yarn stays neat while under water. Again, it is important not to felt the yarn with boiling water, quick temperature changes, too much soap, or agitation.
I use all-natural dish soap in the kitchen sink for this part. I wet the yarn with warm water and then let it soak in very hot (but not boiling) soapy water. Then, I rinse it in warm water until the soap is gone. Then, I rinse it in cold water before hanging it to dry. Hanging it while wet puts weight on the yarn such that it maintains its shape and bounce better when dry.
Step 8: Winding the Skein (30 minutes)
Once the hank is dry, it’s time for winding! I put the hank on a yarn swift, which is an umbrella-shaped wooden device that holds the yarn and spins while you wind. Thankfully, my yarn swift came with my spinning wheel (as did the niddy-noddy). When I got them, I had no idea what to use them for. I thought the yarn swift was a fancy yarn drying rack.
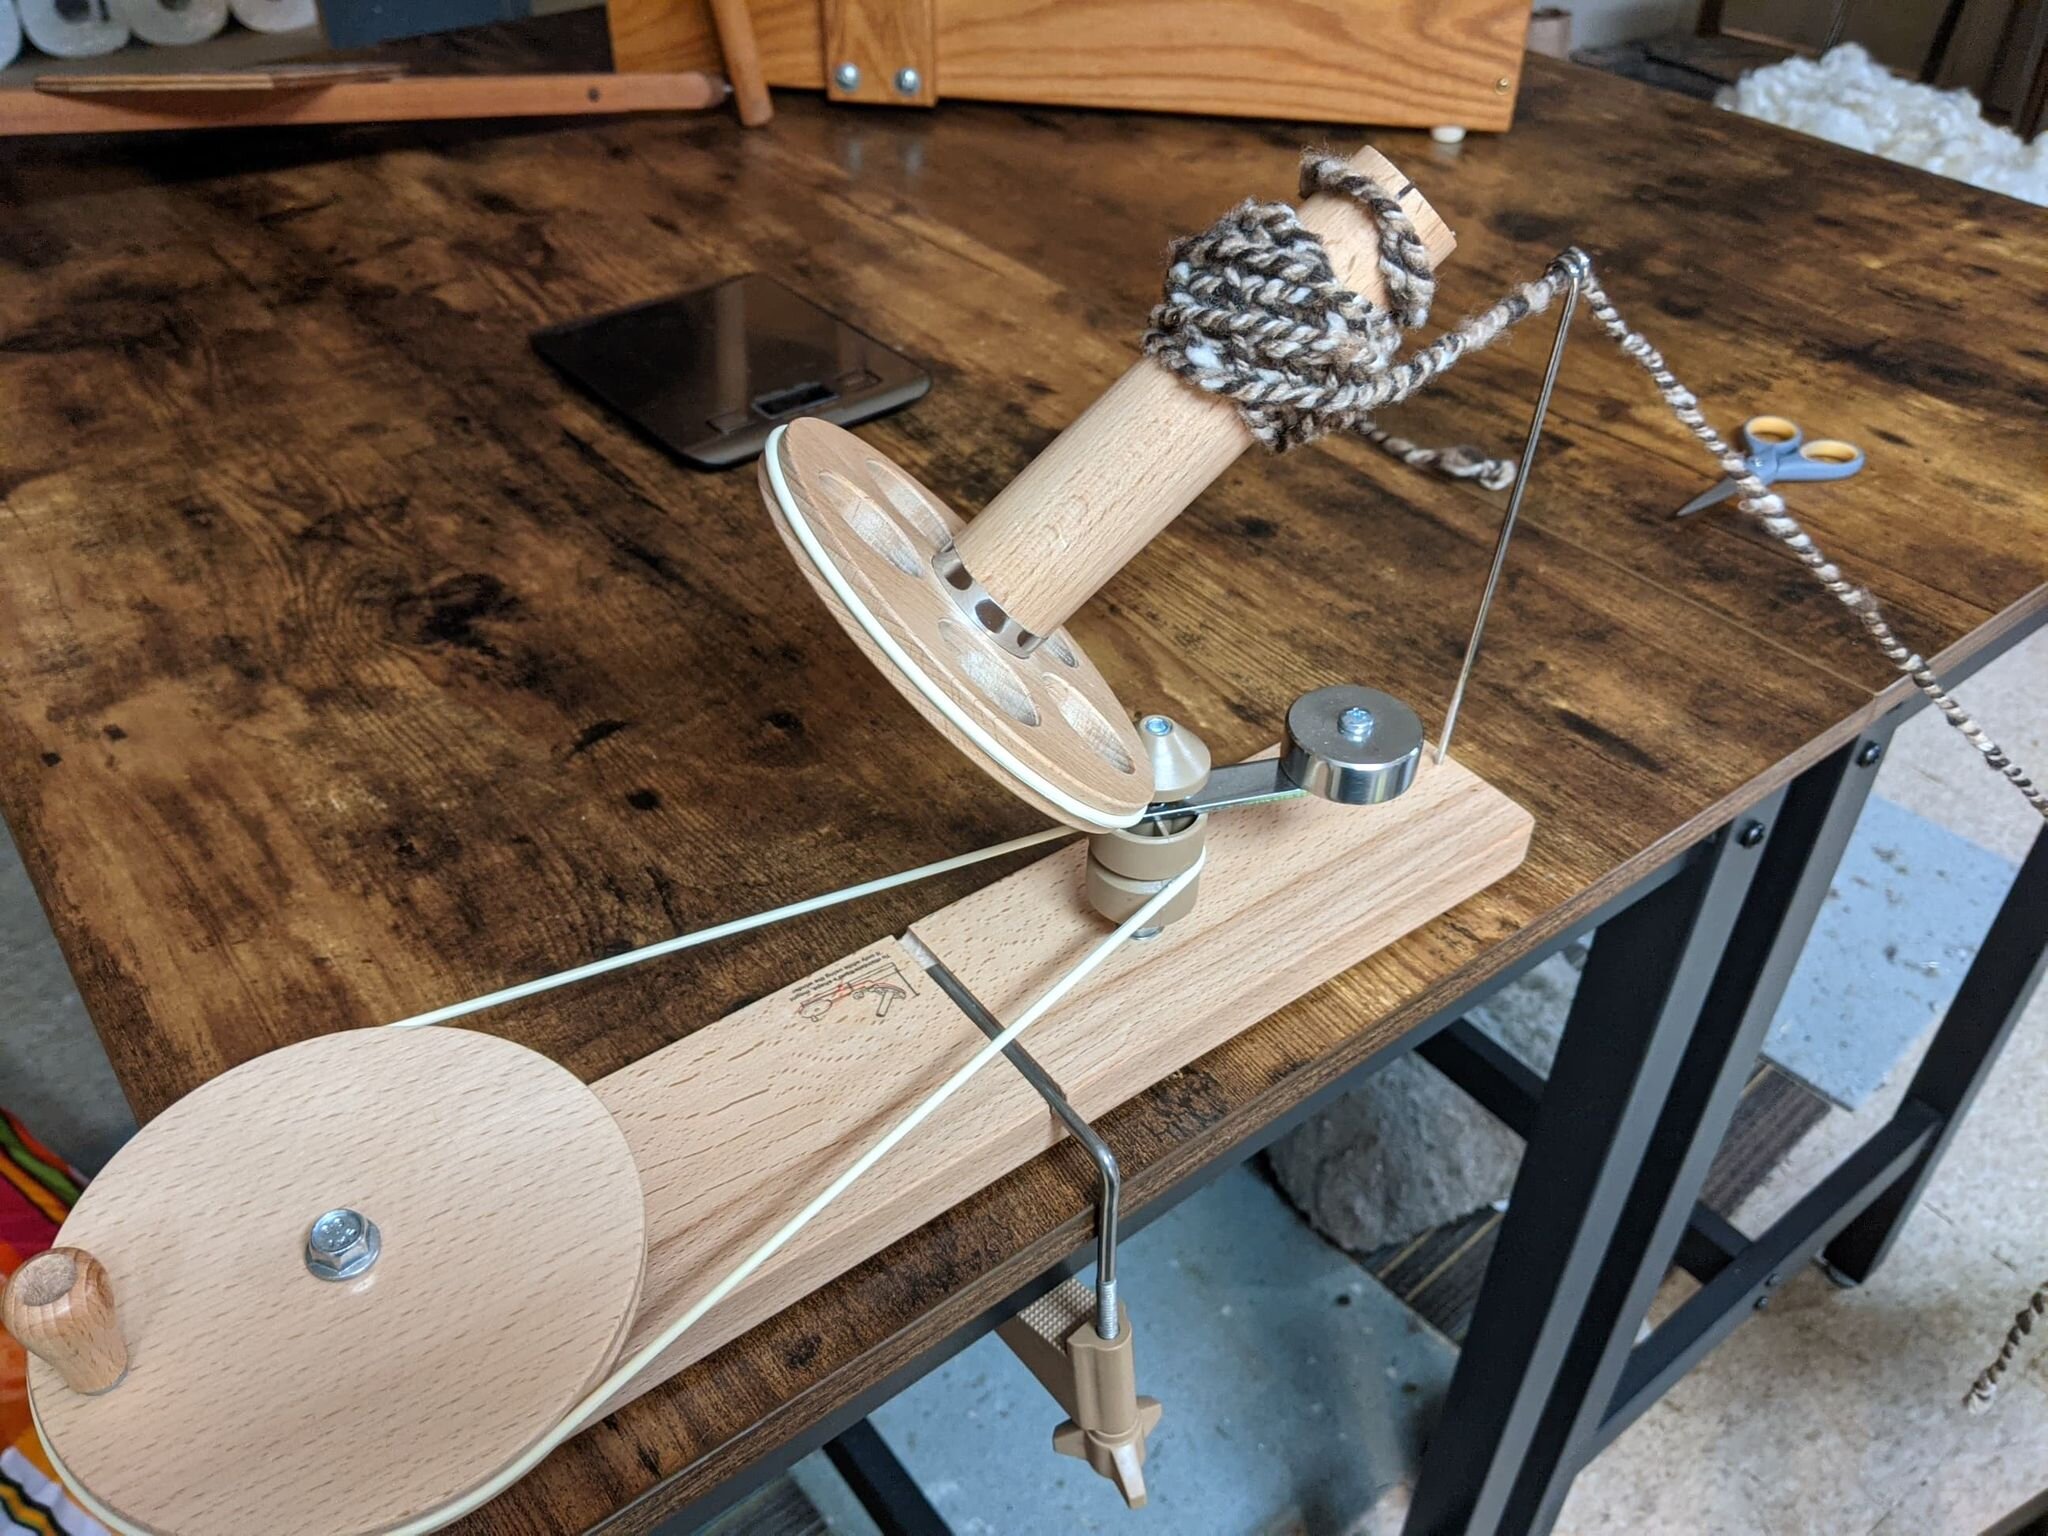
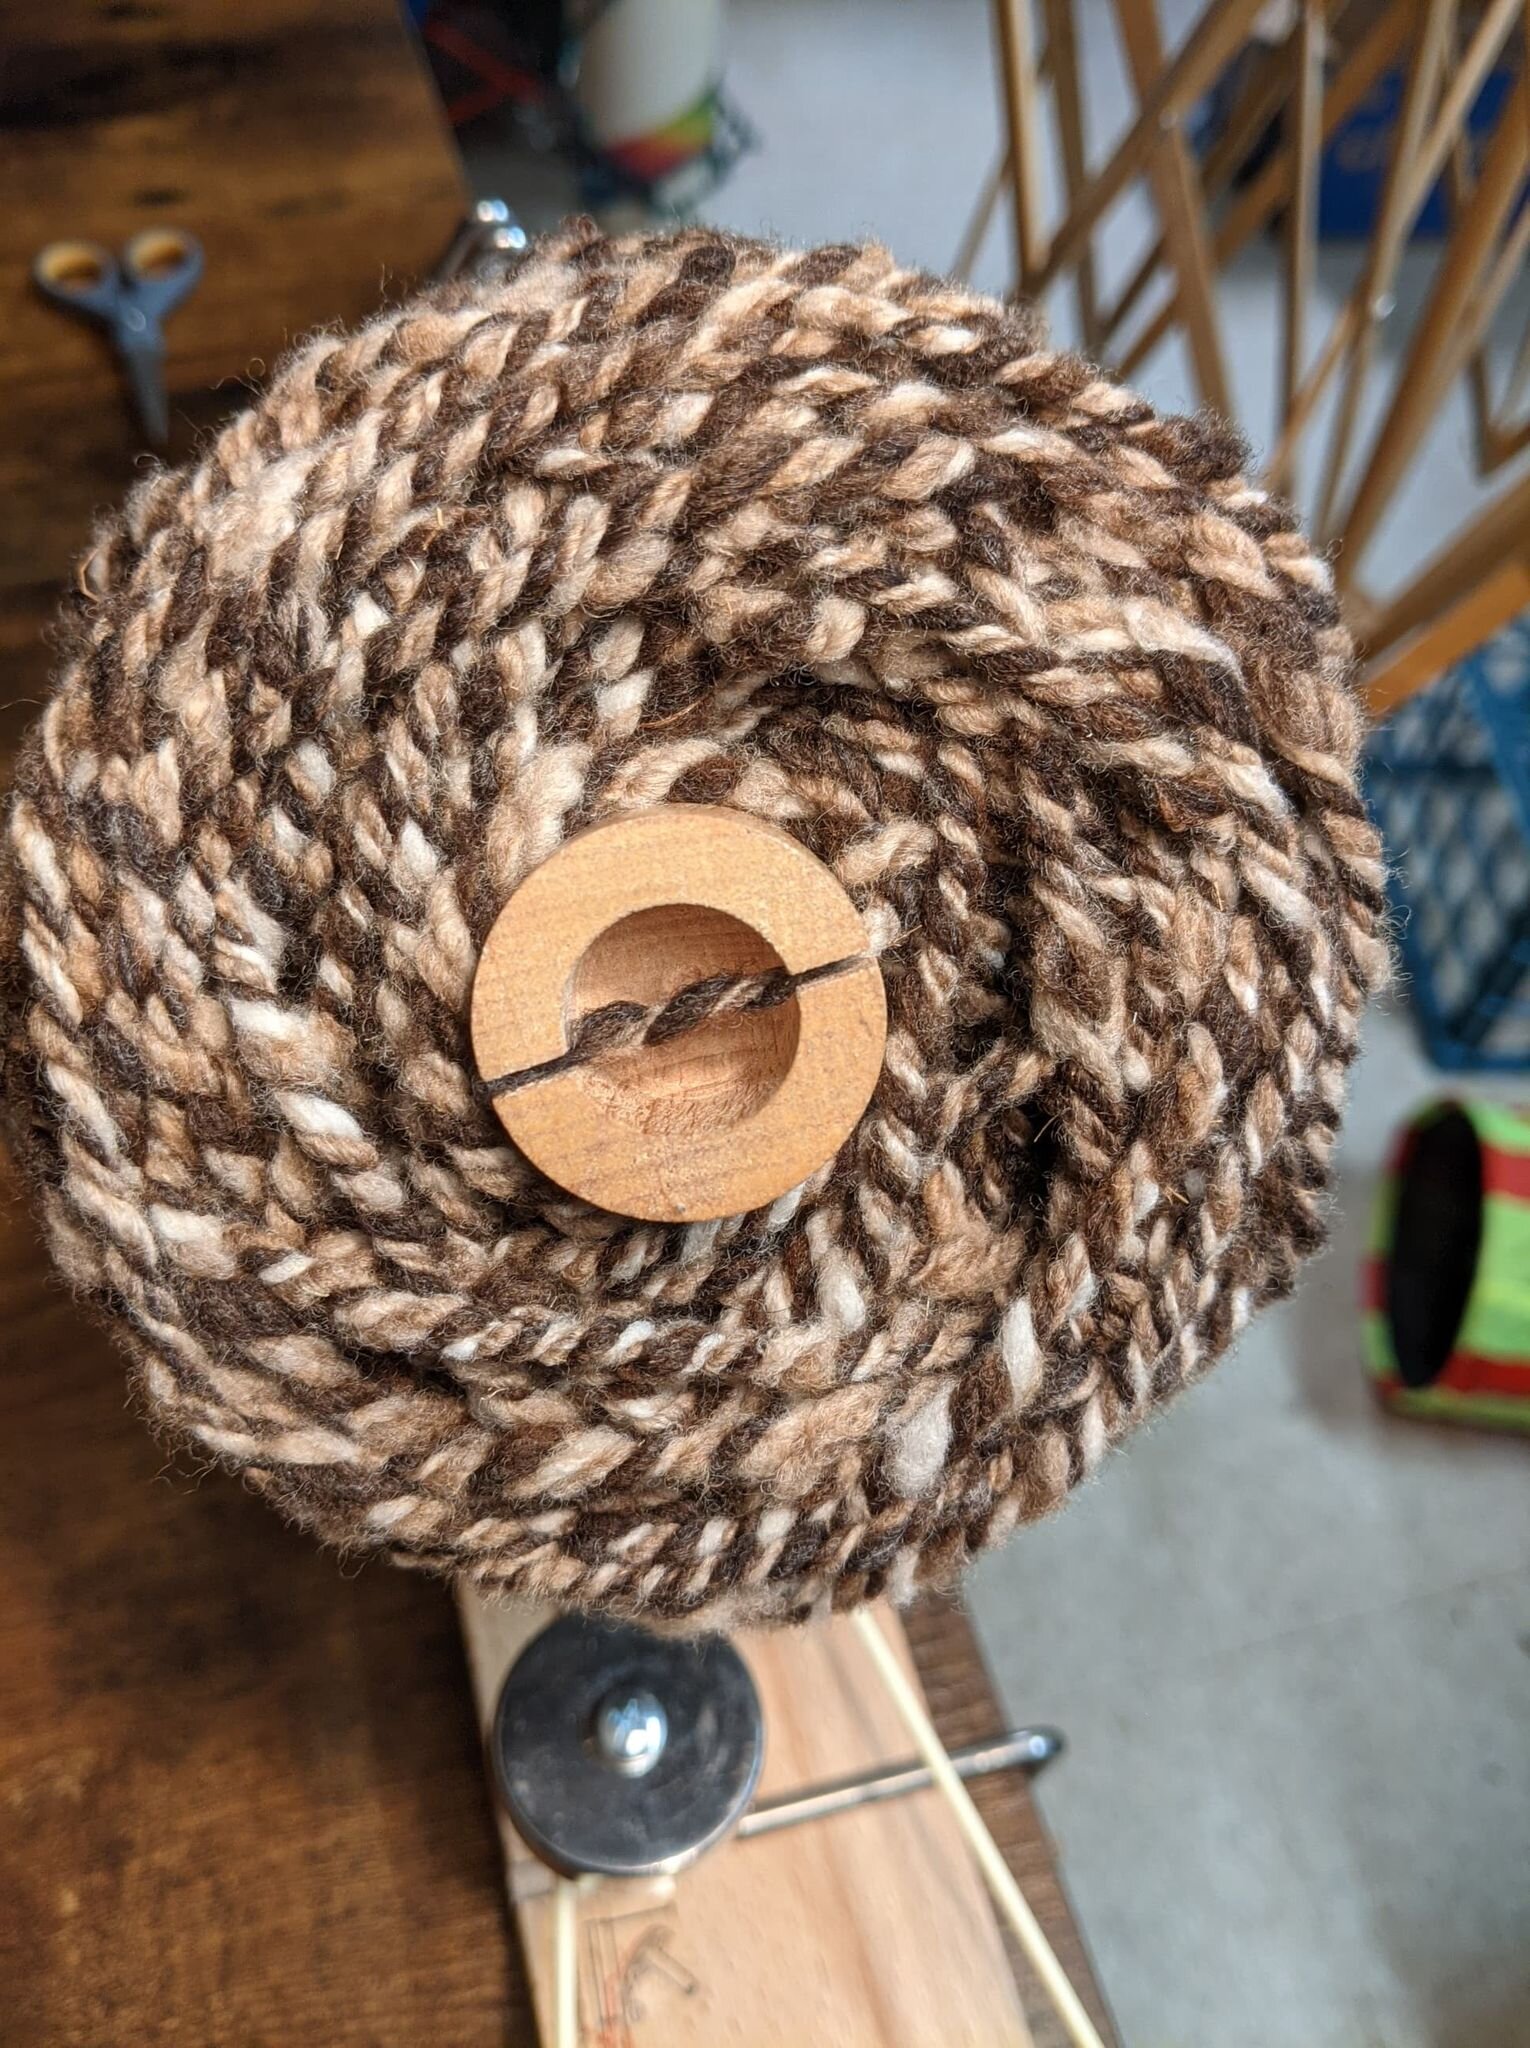
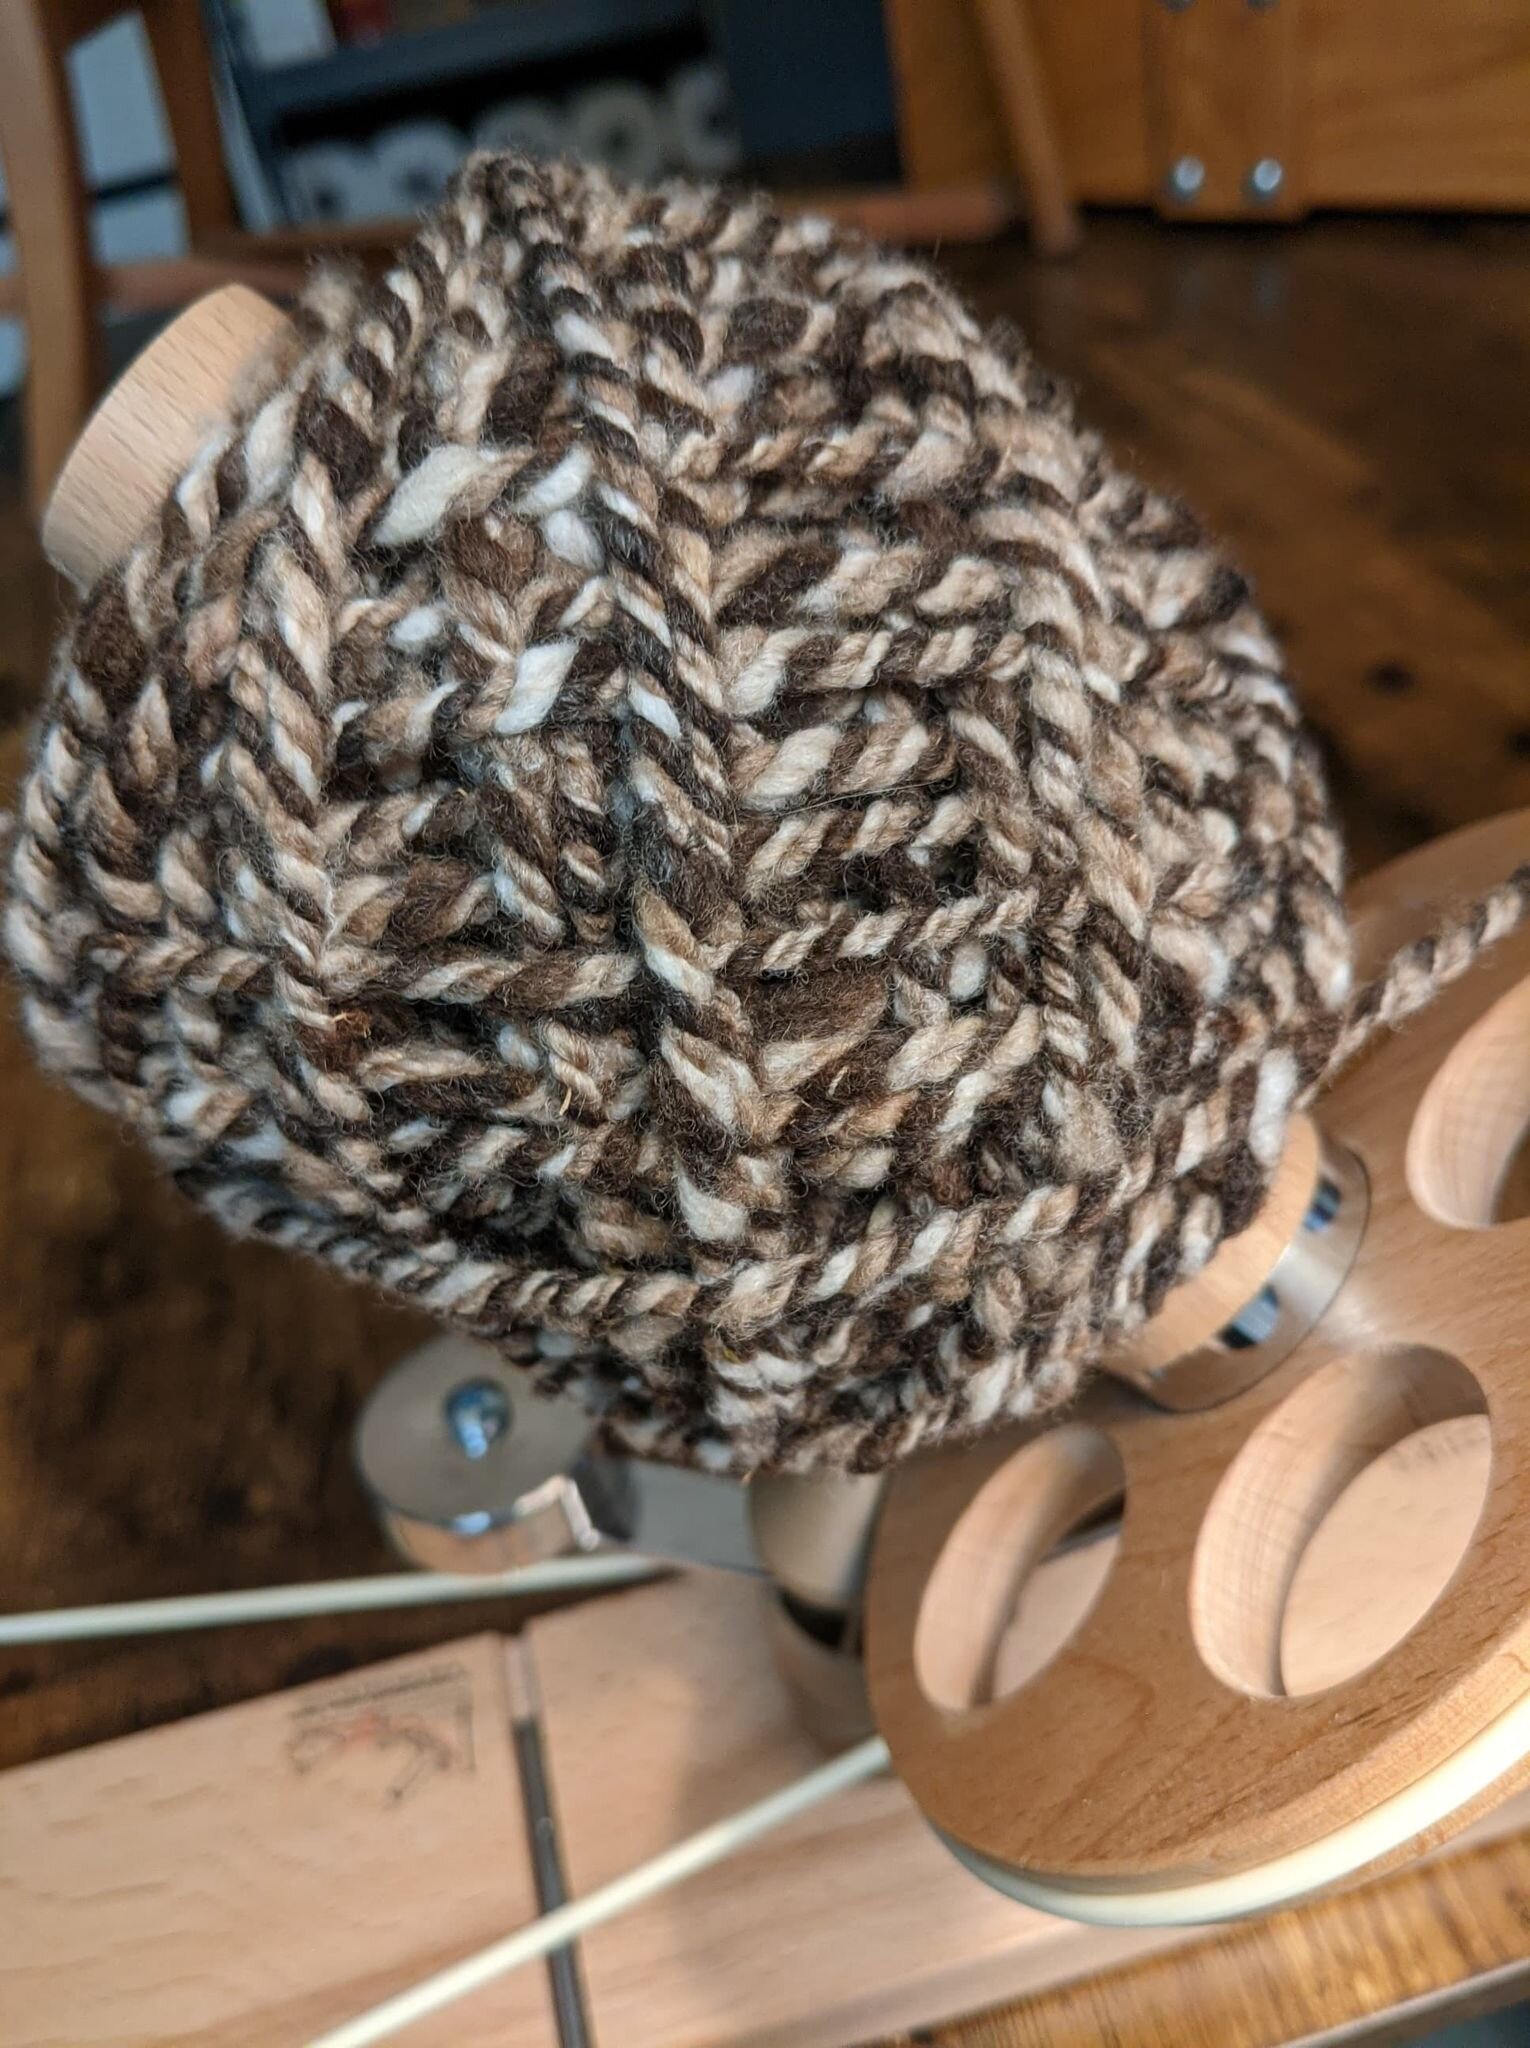
I wind my yarn clockwise, spinning my yarn swift with my right hand while winding with my left. It’s one of the most exciting parts of yarn making because it means everything is almost done!
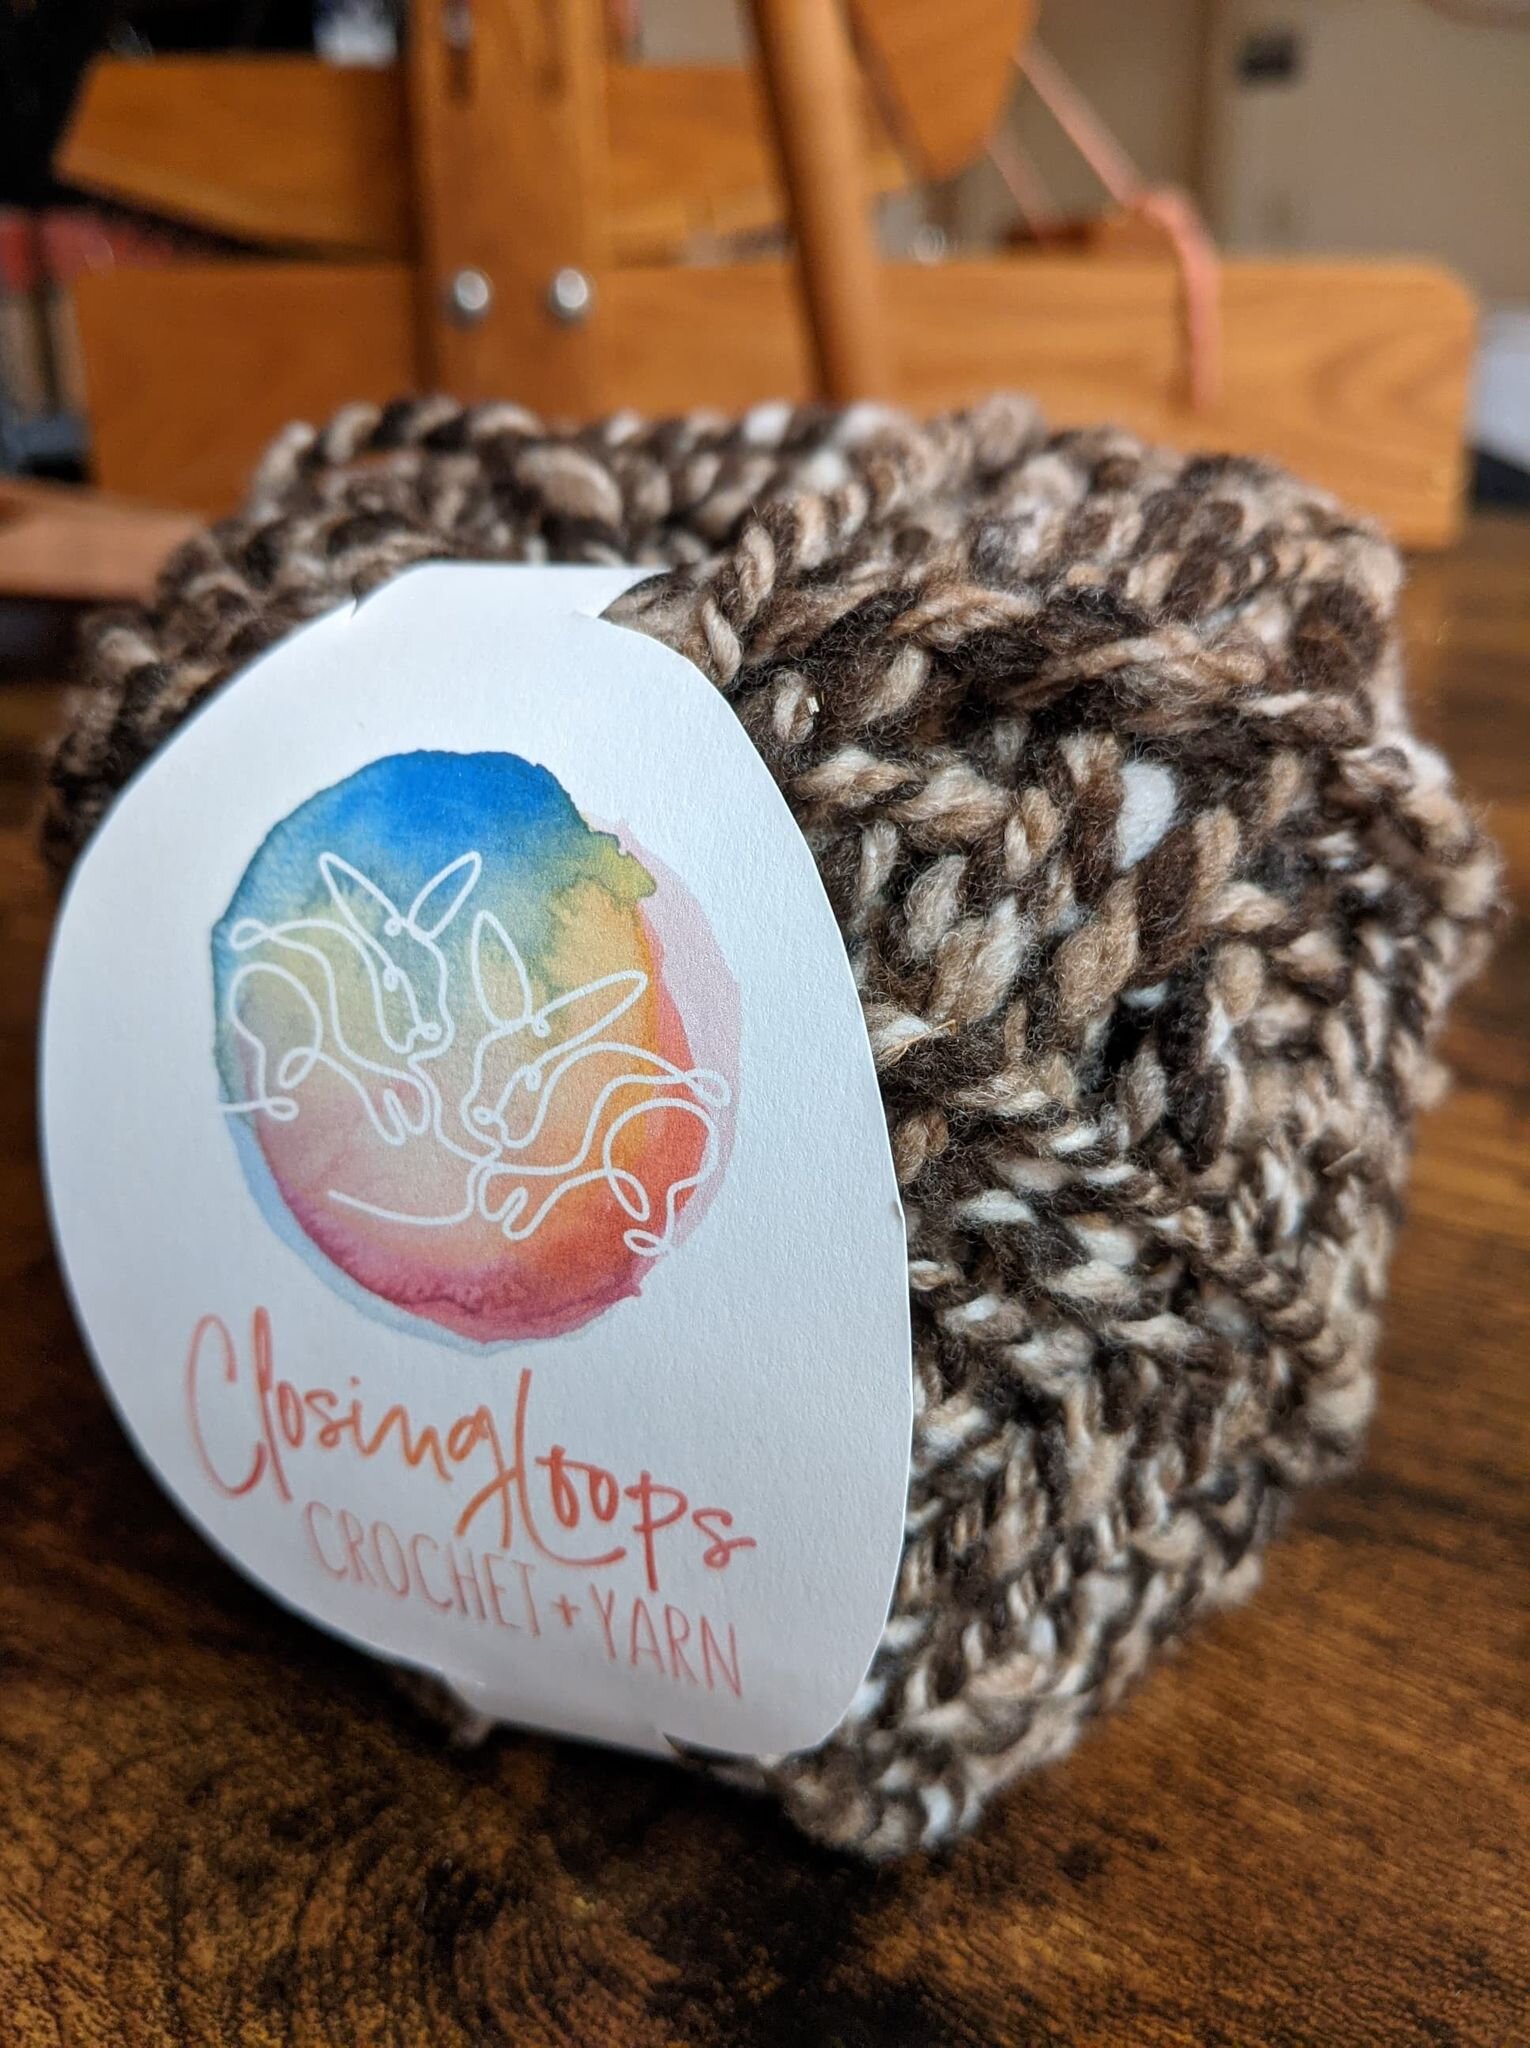
How many yards did I make, you ask? Seventy-seven. This made 77 yards of jumbo yarn. I’m hoping it’s enough to make a super soft and squishy hat.
The Finished Product
For my first time processing raw fleece, I think I did relatively well. Sure, there was still a little grease in the wool after washing, but I feel confident that I know how to avoid that next time. In fact, I have already washed two more pounds of raw fleece, and they came out exceptionally clean after I turned my water heater all the way up and ran them through the washing machine (no bags, just some biodegradable dish soap, making sure not to let the washing machine agitate).
The finished yarn weighed in at 6.91 ounces, which means I had a 66 percent yield, but I also had extra left thread left on two of the three bobbins. And, keep in mind this that is already stuff most mills won’t accept. Not too shabby.
I definitely have a lot of appreciation for what the commercial machines can do. Processing a few ounces of fiber at a time is difficult and exceedingly time consuming. All that work for a single skein of yarn, after all!
But, I loved doing it, and I get to feel awesome about having reclaimed and tamed perfectly usable wool. I will wear it with pride.
Stats:
Starting weight: 10.81 ounces
Yarn weight: 6.91 ounces
Yield: 66.4%
Time taken: 25 hours
Yardage: 77 yards
Yarn weight (size): weight 5 (jumbo)